Using the Applied Epic API to Create Clients (with Javascript examples)
Introduction to Applied Epic API
Applied Epic is a comprehensive insurance management platform that offers a suite of tools for agencies to manage their operations efficiently. It provides capabilities for policy management, customer relationship management, and financial accounting, making it a popular choice for insurance agencies looking to streamline their processes.
Integrating with the Applied Epic API allows developers to automate and enhance client management tasks. For example, you can use the API to create new client profiles directly from your custom application, ensuring seamless data synchronization and reducing manual entry errors.
This article will guide you through using JavaScript to interact with the Applied Epic API, specifically focusing on creating clients. By following this tutorial, you'll learn how to efficiently manage client data within the Applied Epic platform.
Setting Up Your Applied Epic Test Account
Before you can start integrating with the Applied Epic API, you'll need to set up a test or sandbox account. This environment allows you to safely experiment with API calls without affecting live data.
Creating an Applied Epic Developer Account
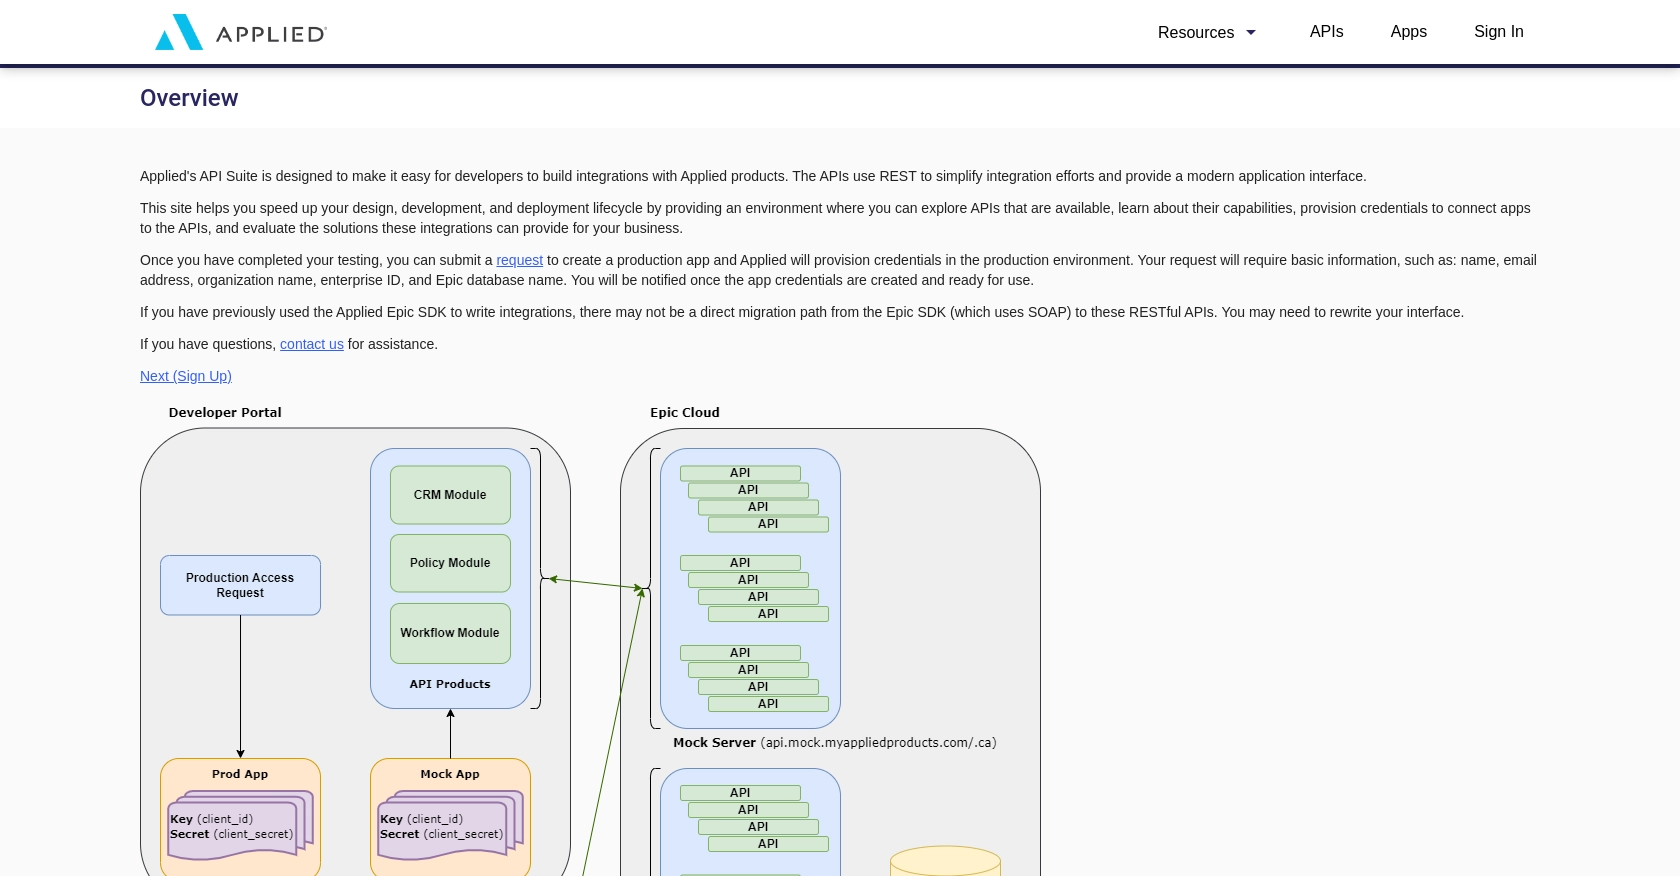
To begin, you'll need to sign up for a developer account on the Applied Epic platform. Follow these steps:
- Visit the Applied Epic Developer Portal.
- Complete the registration form with your details and submit it.
- Once registered, log in to your developer account to access the sandbox environment.
Generating API Credentials for Applied Epic
Applied Epic uses custom authentication for API access. Follow these steps to generate the necessary credentials:
- Navigate to the API credentials section in your developer account dashboard.
- Create a new application to obtain your client ID and client secret.
- Ensure you save these credentials securely, as they will be used to authenticate your API requests.
Configuring OAuth for Applied Epic API Access
To interact with the Applied Epic API, you'll need to configure OAuth authentication:
- In your application settings, set up OAuth scopes to include
epic/clients:writeandepic/clients:all. - Follow the OAuth flow to obtain an access token using your client ID and client secret.
- Store the access token securely, as it will be required for making API calls.
With your test account and API credentials set up, you're ready to start integrating with the Applied Epic API to create clients using JavaScript.
sbb-itb-96038d7
Making API Calls to Create Clients in Applied Epic Using JavaScript
To interact with the Applied Epic API and create clients, you'll need to make HTTP requests using JavaScript. This section will guide you through the process of setting up your environment, writing the code, and handling responses effectively.
Setting Up Your JavaScript Environment for Applied Epic API Integration
Before making API calls, ensure you have the following prerequisites:
- Node.js installed on your machine.
- A code editor like Visual Studio Code.
- Knowledge of JavaScript and asynchronous programming.
You'll also need to install the axios library to handle HTTP requests. Run the following command in your terminal:
npm install axiosWriting JavaScript Code to Create Clients in Applied Epic
Now, let's write the JavaScript code to create a client using the Applied Epic API. Create a new file named createClient.js and add the following code:
const axios = require('axios');

// Set the API endpoint and headers
const endpoint = 'https://api.myappliedproducts.com/crm/v1/clients';
const headers = {
    'Content-Type': 'application/json',
    'Authorization': 'Bearer YOUR_ACCESS_TOKEN'
};

// Define the client data
const clientData = {
    individualOrBusiness: 'INDIVIDUAL',
    businessTypes: ['PERSONAL'],
    name: 'Alice Smith',
    lookupCode: 'SMITALI-01',
    type: 'INSURED',
    accountSource: {
        id: '65536',
        description: 'Cold Call'
    },
    address: {
        streets: ['123 Main St.'],
        city: 'Schenectady',
        zipOrPostalCode: '12345',
        stateOrProvince: 'NY',
        countryCode: 'USA'
    },
    phoneNumber: {
        number: '+15555555555',
        extension: '25',
        callPermission: 'OBTAINED'
    },
    contact: {
        prefix: 'Ms.',
        firstName: 'Alice',
        lastName: 'Smith',
        email: [{
            emailAddress: 'AliceSmith@wahoo.com',
            isPrimary: true
        }]
    }
};

// Function to create a client
async function createClient() {
    try {
        const response = await axios.post(endpoint, clientData, { headers });
        console.log('Client Created Successfully:', response.data);
    } catch (error) {
        console.error('Error Creating Client:', error.response ? error.response.data : error.message);
    }
}

// Execute the function
createClient();
Replace YOUR_ACCESS_TOKEN with the access token obtained during the OAuth authentication process.
Verifying API Call Success and Handling Errors
After running the script, you should see a success message with the client details if the API call is successful. To verify, check your Applied Epic sandbox account to ensure the client appears in the system.
In case of errors, the script will log the error message. Common error codes include:
- 400 Bad Request: Check the request body for missing or incorrect fields.
- 401 Unauthorized: Ensure your access token is valid and has the correct scopes.
- 403 Forbidden: Verify that your account has the necessary permissions.
For more detailed error handling, refer to the Applied Epic API documentation.
Conclusion: Best Practices for Applied Epic API Integration
Integrating with the Applied Epic API to create clients using JavaScript can significantly enhance your agency's efficiency by automating client management tasks. To ensure a seamless integration experience, consider the following best practices:
Securely Storing User Credentials
Always store your API credentials, such as client ID, client secret, and access tokens, securely. Use environment variables or secure vaults to prevent unauthorized access and ensure that sensitive information is not exposed in your codebase.
Handling Rate Limiting and API Quotas
Be mindful of any rate limits imposed by the Applied Epic API. Implement retry logic with exponential backoff to handle rate limit errors gracefully. This approach helps maintain a smooth user experience without overwhelming the API.
Standardizing and Transforming Data Fields
Ensure that the data you send to the API is properly formatted and validated. Standardize data fields to match the API's requirements, and perform necessary transformations to maintain data integrity and consistency across systems.
Utilizing Endgrate for Streamlined Integrations
If managing multiple integrations becomes challenging, consider using Endgrate to simplify the process. Endgrate provides a unified API endpoint that connects to various platforms, including Applied Epic, allowing you to focus on your core product while outsourcing integration complexities.
By following these best practices, you can optimize your integration with the Applied Epic API, ensuring reliable and efficient client management for your agency.
Read More

Ready to get started?
