Using the FreeAgent API to Create or Update Contacts in Javascript
Introduction to FreeAgent API Integration
FreeAgent is a comprehensive accounting software platform designed to simplify financial management for small businesses and freelancers. It offers a wide range of features, including invoicing, expense tracking, and project management, all within an intuitive interface.
Integrating with FreeAgent's API allows developers to automate and streamline various accounting tasks. For example, you can use the FreeAgent API to create or update contact information directly from your application, ensuring that your client data is always up-to-date and synchronized across platforms.
This article will guide you through the process of using JavaScript to interact with the FreeAgent API, focusing on creating and updating contacts. By following these steps, you can enhance your application's functionality and improve your workflow efficiency.
Setting Up Your FreeAgent Sandbox Account for API Integration
Before you can start integrating with the FreeAgent API, you'll need to set up a sandbox account. This allows you to test your API interactions without affecting live data. Follow these steps to create a FreeAgent sandbox account and configure OAuth authentication.
Create a FreeAgent Sandbox Account
- Visit the FreeAgent Sandbox page.
- Sign up for a free temporary FreeAgent user account.
- Log in to your sandbox account and complete the setup stages to avoid unexpected errors.
Register an App in the FreeAgent Developer Dashboard
- Navigate to the FreeAgent Developer Dashboard.
- Create a new app and take note of the OAuth Client ID and Client Secret.
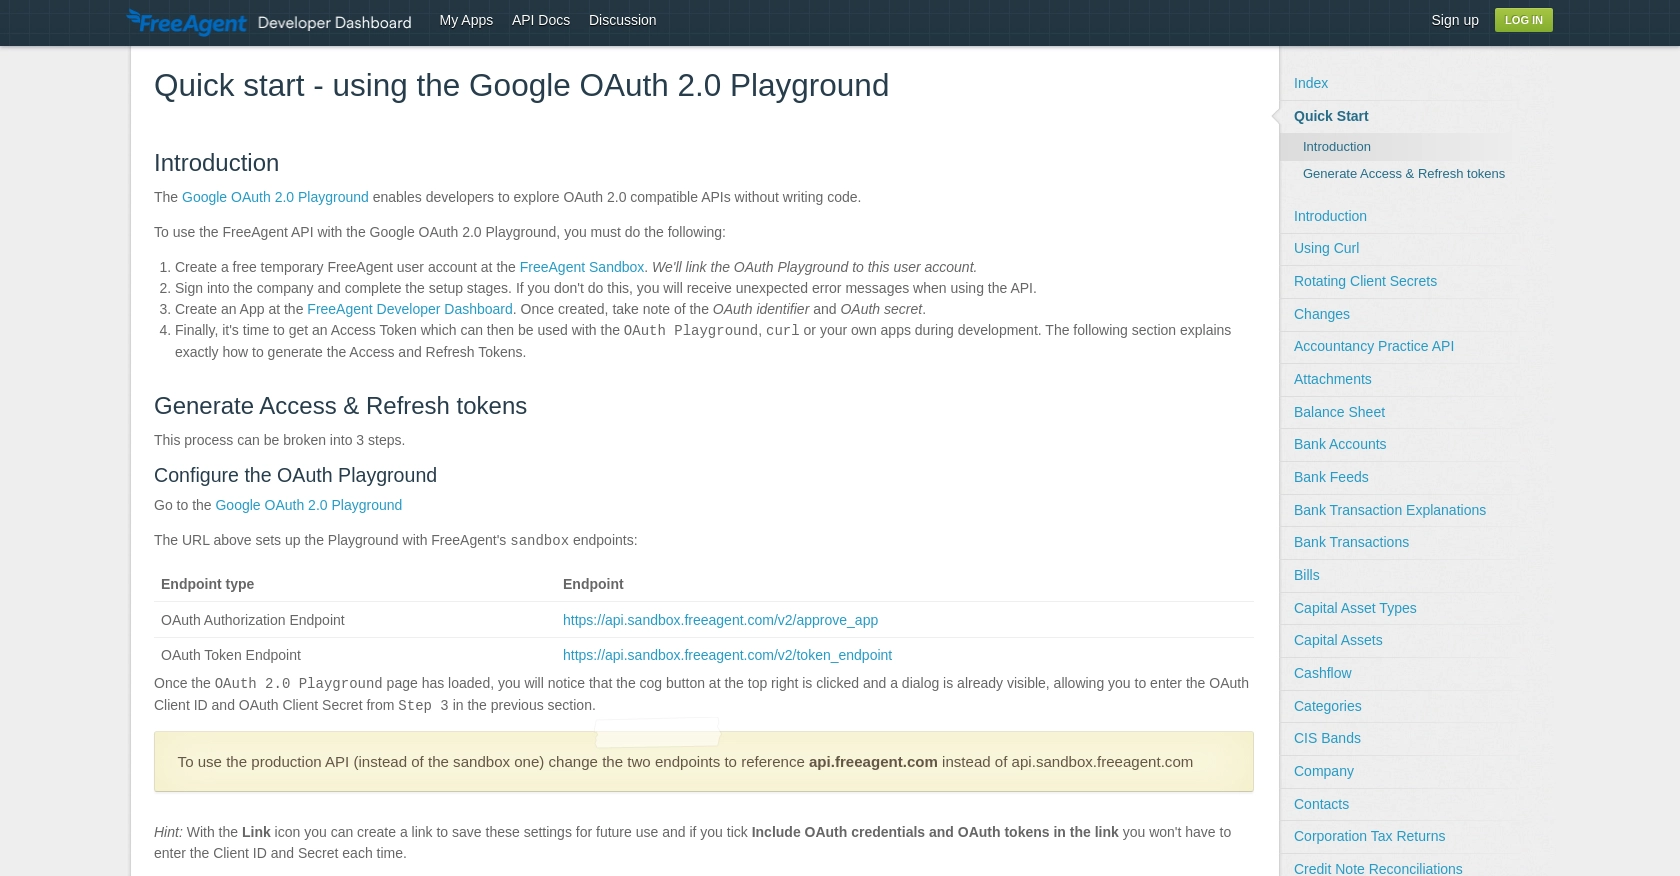
Configure OAuth Authentication with Google OAuth 2.0 Playground
- Go to the Google OAuth 2.0 Playground.
- Enter the following endpoints:
- OAuth Authorization Endpoint:
https://api.sandbox.freeagent.com/v2/approve_app - OAuth Token Endpoint:
https://api.sandbox.freeagent.com/v2/token_endpoint
- OAuth Authorization Endpoint:
- Input your OAuth Client ID and Client Secret from the FreeAgent Developer Dashboard.
- Specify a scope name and click on the "Authorize APIs" button.
- Log in to your FreeAgent sandbox account and approve the app.
- Click "Exchange Authorization Code for Tokens" to generate access and refresh tokens.
With these tokens, you can now access the FreeAgent API using JavaScript to create or update contacts. Ensure you store these tokens securely and refresh them as needed to maintain access.
sbb-itb-96038d7
Making API Calls to FreeAgent for Creating or Updating Contacts Using JavaScript
To interact with the FreeAgent API using JavaScript, you'll need to set up your development environment and write code to create or update contacts. This section will guide you through the necessary steps, including setting up your JavaScript environment, writing the API call code, and handling responses and errors.
Setting Up Your JavaScript Environment
Before making API calls, ensure you have the following prerequisites installed:
- Node.js and npm (Node Package Manager)
To install the required dependencies, open your terminal and run:
npm install axiosWe'll use Axios, a promise-based HTTP client, to make requests to the FreeAgent API.
Writing JavaScript Code to Create or Update Contacts in FreeAgent
Create a new JavaScript file named freeagent_contacts.js and add the following code:
const axios = require('axios');
// Set the API endpoint and headers
const endpoint = 'https://api.sandbox.freeagent.com/v2/contacts';
const headers = {
'Authorization': 'Bearer Your_Access_Token',
'Content-Type': 'application/json'
};
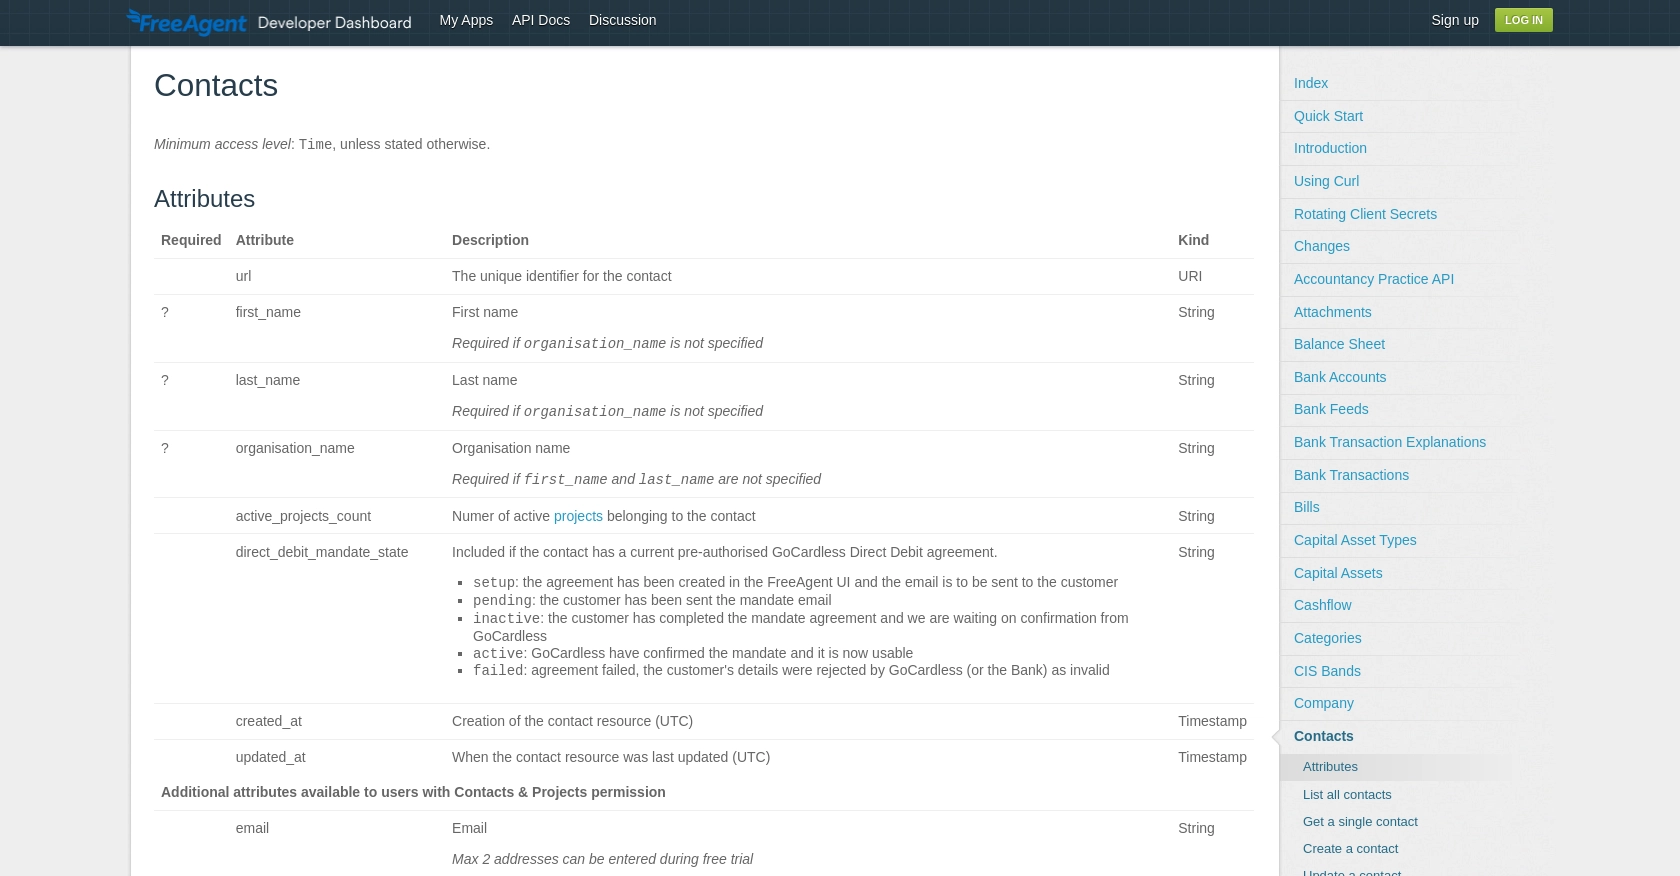
// Define the contact data
const contactData = {
contact: {
first_name: 'John',
last_name: 'Doe',
email: 'john.doe@example.com',
organisation_name: 'Doe Enterprises',
phone_number: '1234567890'
}
};
// Function to create or update a contact
async function createOrUpdateContact() {
try {
const response = await axios.post(endpoint, contactData, { headers });
console.log('Contact Created or Updated Successfully:', response.data);
} catch (error) {
if (error.response) {
console.error('Error:', error.response.status, error.response.data);
} else {
console.error('Error:', error.message);
}
}
}
// Execute the function
createOrUpdateContact();
Replace Your_Access_Token with the access token obtained during the OAuth setup. This code sends a POST request to the FreeAgent API to create or update a contact with the specified data.
Handling API Responses and Errors
After executing the code, you should see a success message in the console if the contact is created or updated successfully. If there's an error, the code will log the status code and error message, helping you diagnose the issue.
Common error codes include:
- 400 Bad Request: The request was invalid. Check the data format.
- 401 Unauthorized: The access token is missing or invalid.
- 429 Too Many Requests: Rate limit exceeded. Refer to the FreeAgent API documentation for rate limits.
For more detailed error handling, consider implementing retry logic with exponential backoff for rate-limiting errors.
Verifying API Call Success in FreeAgent Sandbox
To verify that the contact was created or updated, log in to your FreeAgent sandbox account and navigate to the contacts section. You should see the new or updated contact information reflected there.
Conclusion and Best Practices for FreeAgent API Integration
Integrating with the FreeAgent API using JavaScript provides a powerful way to automate and enhance your accounting workflows. By following the steps outlined in this article, you can efficiently create or update contact information, ensuring your data remains synchronized and up-to-date.
Best Practices for Secure and Efficient FreeAgent API Usage
- Securely Store Credentials: Always store your OAuth tokens securely and refresh them periodically to maintain access. Avoid hardcoding sensitive information in your codebase.
- Handle Rate Limits: Be mindful of FreeAgent's rate limits, which allow 120 user requests per minute and 3600 per hour. Implement retry logic with exponential backoff to handle 429 status codes effectively. For more details, refer to the FreeAgent API documentation.
- Data Standardization: Ensure consistent data formatting when interacting with the API, especially for contact details, to avoid errors and maintain data integrity.
Enhancing Your Integration Strategy with Endgrate
While integrating with FreeAgent's API can significantly improve your application's functionality, managing multiple integrations can be complex and time-consuming. Endgrate offers a streamlined solution by providing a unified API endpoint that connects to various platforms, including FreeAgent.
By leveraging Endgrate, you can save time and resources, allowing you to focus on your core product development. Build once for each use case and enjoy a seamless integration experience for your customers. Explore how Endgrate can simplify your integration strategy by visiting Endgrate.
Read More

Ready to get started?
