How to Create or Update Prospects with the Outreach API in Python
Introduction to Outreach API for Prospect Management
Outreach is a powerful sales engagement platform that helps businesses streamline their sales processes and enhance productivity. With its robust set of tools, Outreach enables sales teams to manage customer interactions, automate workflows, and gain valuable insights into their sales activities.
Integrating with the Outreach API allows developers to efficiently manage prospects, a crucial aspect of sales operations. By leveraging the API, developers can automate the creation and updating of prospect records, ensuring that sales teams have access to the most current and accurate information. For example, a developer might use the Outreach API to automatically update prospect details from a CRM system, ensuring seamless data synchronization and reducing manual data entry.
Setting Up Your Outreach Test or Sandbox Account
Before you can start integrating with the Outreach API, you'll need to set up a test or sandbox account. This allows you to safely develop and test your application without affecting live data. Outreach provides a development environment where you can create and manage your app credentials.
Creating an Outreach Developer Account
If you don't already have an Outreach account, you can sign up for a free trial or developer account on the Outreach website. Follow the instructions to complete the registration process.
Creating an Outreach App for API Access
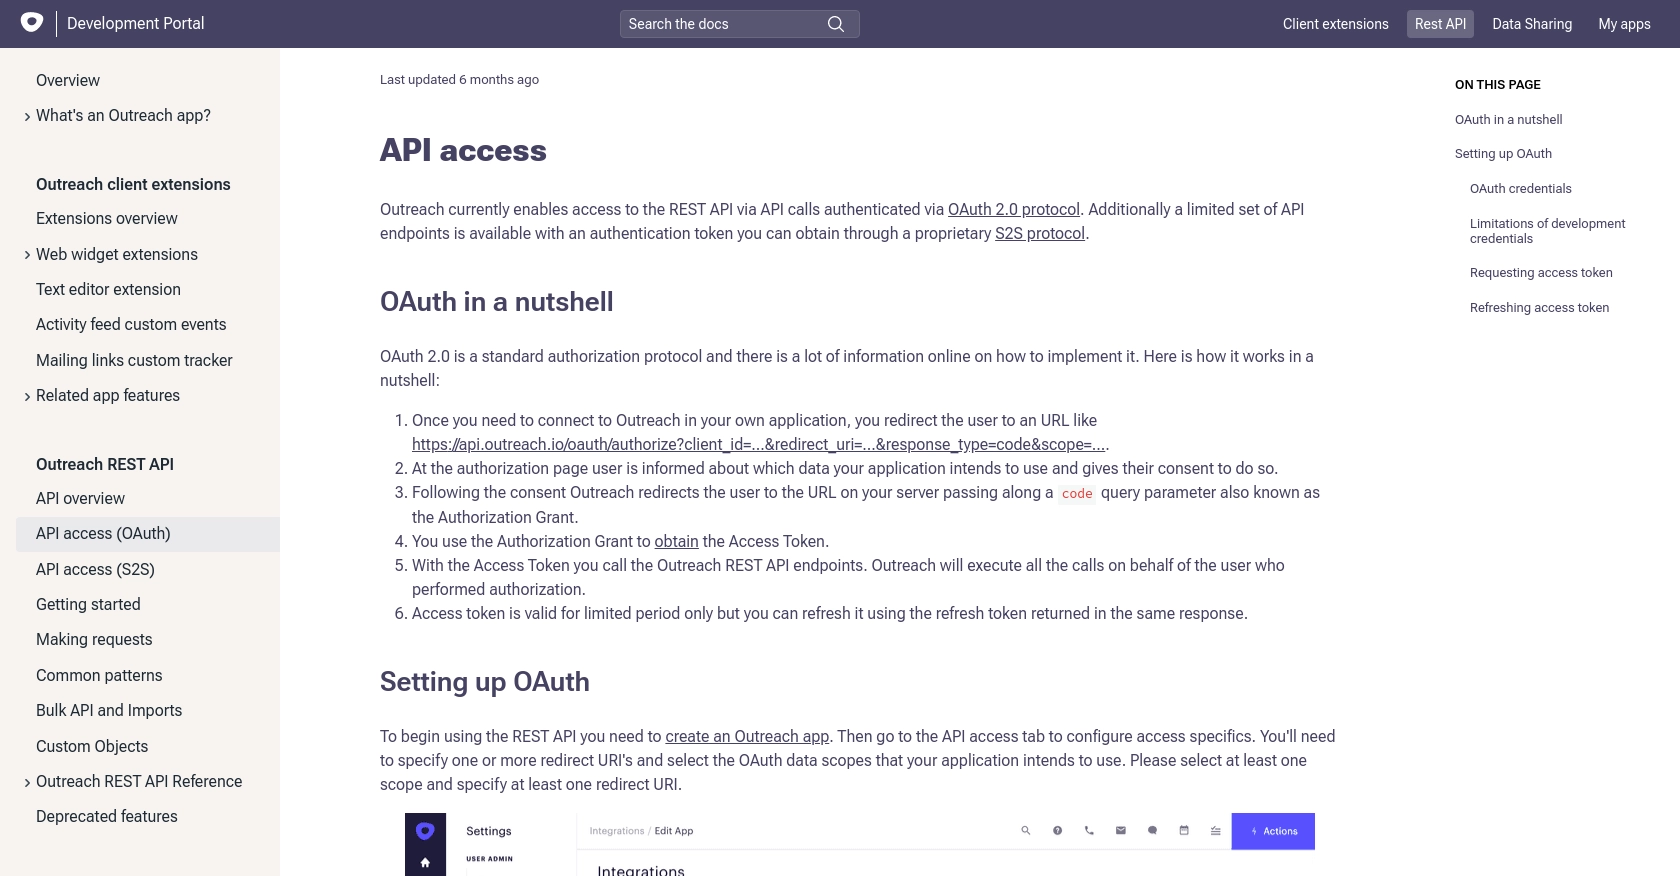
Once your account is set up, you'll need to create an Outreach app to obtain the necessary credentials for API access. Follow these steps:
- Log in to your Outreach account and navigate to the Developer Portal.
- Go to the "My Apps" section and click on "Create New App."
- Fill in the required details for your app, such as the app name and description.
- Specify the redirect URI(s) that your application will use during the OAuth flow.
- Select the necessary OAuth scopes that your application requires. Ensure you include scopes related to prospects, such as
prospects.readandprospects.write. - Click "Save" to create your app.
Obtaining OAuth Credentials
After creating your app, you'll receive OAuth credentials, including a client ID and client secret. These are essential for authenticating API requests.
Note: The client secret will only be displayed once, so make sure to store it securely. If you lose it, you'll need to regenerate a new one.
Authorizing Your Application
To authorize your application and obtain an access token, follow these steps:
- Redirect users to the Outreach authorization URL with the following parameters:
client_id,redirect_uri,response_type=code, andscope. - Once the user authorizes the app, they will be redirected to your specified redirect URI with an authorization code.
- Exchange the authorization code for an access token by making a POST request to
https://api.outreach.io/oauth/tokenwith the required parameters:client_id,client_secret,redirect_uri,grant_type=authorization_code, andcode.
For detailed instructions, refer to the Outreach OAuth documentation: Outreach OAuth Documentation.
sbb-itb-96038d7
Making API Calls to Create or Update Prospects with the Outreach API in Python
To interact with the Outreach API for creating or updating prospects, you'll need to use Python. This section will guide you through the necessary steps, including setting up your environment, writing the code, and handling responses.
Setting Up Your Python Environment for Outreach API Integration
Before making API calls, ensure you have Python 3.11.1 installed on your machine. Additionally, you'll need the requests library to handle HTTP requests. Install it using pip:
pip install requestsCreating a New Prospect with the Outreach API
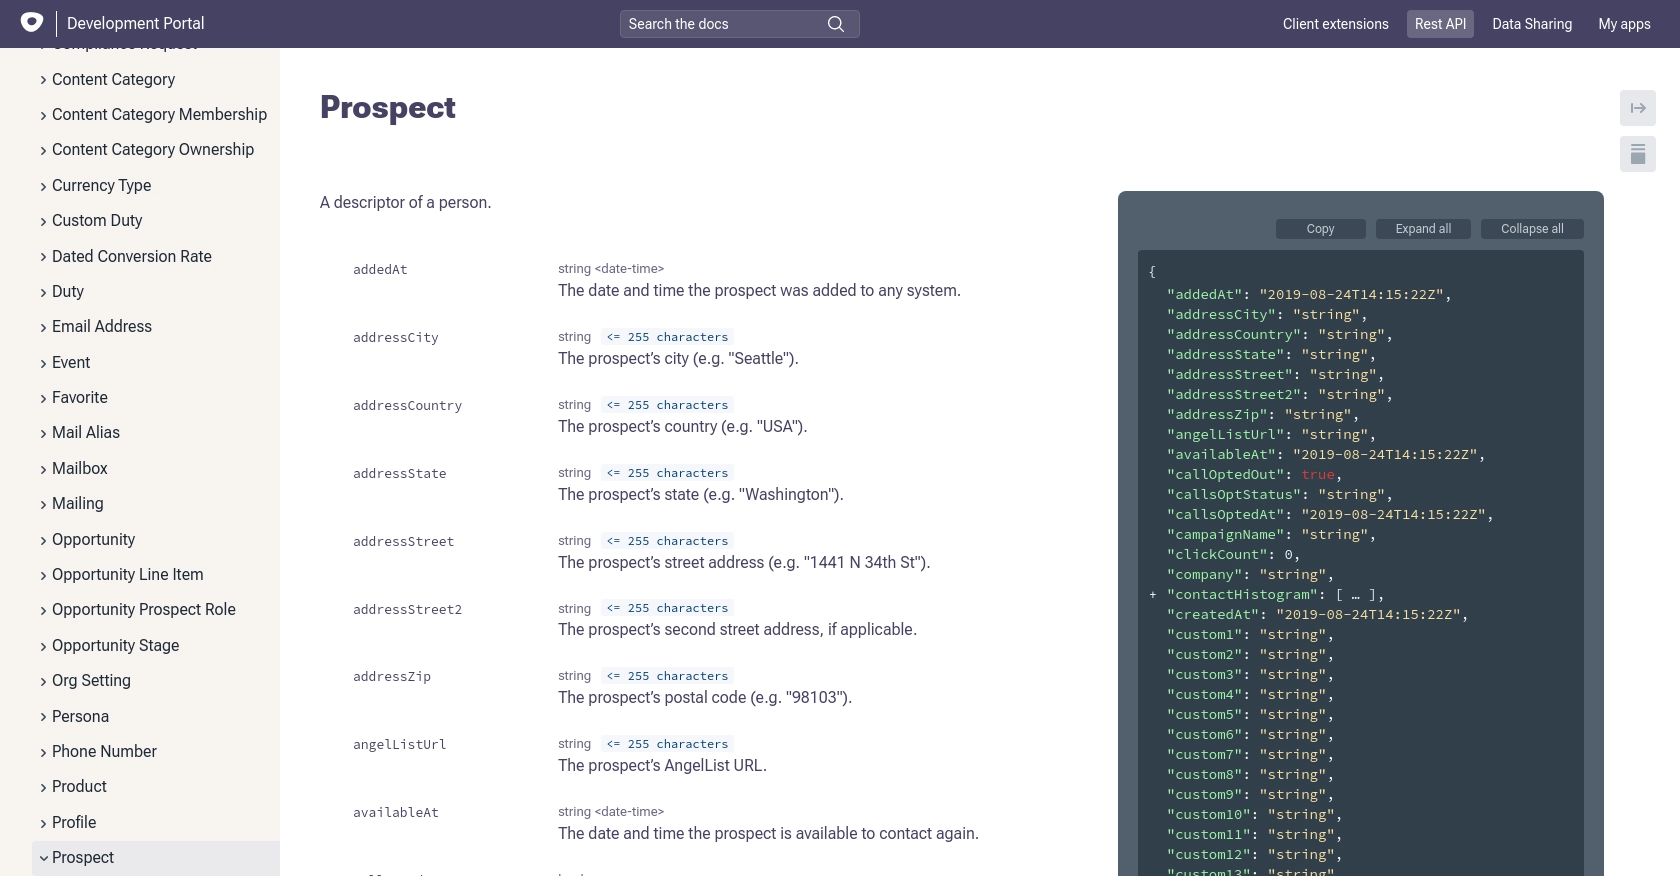
To create a new prospect, you'll make a POST request to the Outreach API. Here's a sample code snippet to help you get started:
import requests

# Set the API endpoint and headers
url = "https://api.outreach.io/api/v2/prospects"
headers = {
    "Authorization": "Bearer Your_Access_Token",
    "Content-Type": "application/vnd.api+json"
}

# Define the prospect data
prospect_data = {
    "data": {
        "attributes": {
            "firstName": "John",
            "lastName": "Doe",
            "email": "john.doe@example.com"
        },
        "type": "prospect"
    }
}

# Make the POST request
response = requests.post(url, json=prospect_data, headers=headers)

# Check the response status
if response.status_code == 201:
    print("Prospect created successfully.")
else:
    print("Failed to create prospect:", response.json())
Replace Your_Access_Token with the access token obtained during the OAuth process. The response should indicate success with a status code of 201.
Updating an Existing Prospect with the Outreach API
To update an existing prospect, use the PATCH method. Here's how you can do it:
import requests

# Set the API endpoint and headers
prospect_id = "12345"  # Replace with the actual prospect ID
url = f"https://api.outreach.io/api/v2/prospects/{prospect_id}"
headers = {
    "Authorization": "Bearer Your_Access_Token",
    "Content-Type": "application/vnd.api+json"
}

# Define the updated prospect data
update_data = {
    "data": {
        "attributes": {
            "firstName": "Jane",
            "lastName": "Smith"
        },
        "type": "prospect"
    }
}

# Make the PATCH request
response = requests.patch(url, json=update_data, headers=headers)

# Check the response status
if response.status_code == 200:
    print("Prospect updated successfully.")
else:
    print("Failed to update prospect:", response.json())
Ensure you replace prospect_id with the actual ID of the prospect you wish to update. A successful update will return a status code of 200.
Handling Errors and Verifying API Requests
When making API calls, it's crucial to handle potential errors. The Outreach API may return various error codes, such as 422 for validation errors or 403 for unauthorized access. Always check the response and handle errors gracefully:
if response.status_code == 422:
    print("Validation error:", response.json())
elif response.status_code == 403:
    print("Unauthorized access:", response.json())
Verify the success of your requests by checking the Outreach dashboard or using GET requests to confirm the changes.
For more detailed information on error codes, refer to the Outreach API documentation: Outreach API Reference.
Conclusion: Best Practices for Using the Outreach API in Python
Integrating with the Outreach API to manage prospects can significantly enhance your sales operations by automating data synchronization and reducing manual tasks. To ensure a seamless integration experience, consider the following best practices:
Securely Store OAuth Credentials
Always store your OAuth credentials, such as client ID, client secret, and access tokens, securely. Avoid hardcoding them in your source code. Instead, use environment variables or secure vaults to manage sensitive information.
Handle Rate Limiting and Error Responses
The Outreach API enforces a rate limit of 10,000 requests per hour. Monitor the X-RateLimit-Remaining header in API responses to avoid hitting this limit. If you receive a 429 error, respect the Retry-After header before retrying.
Additionally, handle error responses gracefully by checking status codes and providing meaningful feedback to users. Refer to the Outreach API documentation for detailed error code descriptions.
Optimize Data Transformation and Standardization
When integrating with multiple systems, ensure data consistency by transforming and standardizing data fields. This practice helps maintain data integrity across platforms and improves the overall efficiency of your integration.
Leverage Endgrate for Streamlined Integrations
Consider using Endgrate to simplify your integration processes. With Endgrate, you can build once for each use case and connect to multiple platforms through a single API endpoint. This approach saves time and resources, allowing you to focus on your core product development.
For more information on how Endgrate can enhance your integration experience, visit Endgrate.
Read More

Ready to get started?
