How to Get Accounts with the Younium API in Javascript

Introduction to Younium API Integration
Younium is a comprehensive subscription management platform designed to streamline billing, invoicing, and revenue recognition for B2B SaaS companies. Its robust API allows developers to integrate seamlessly with Younium's services, enabling automated management of accounts, subscriptions, and financial operations.
Integrating with the Younium API can significantly enhance a developer's ability to manage customer accounts programmatically. For example, a developer might use the Younium API to retrieve detailed account information, facilitating real-time updates and synchronization with other business systems. This capability is crucial for businesses looking to maintain accurate financial records and provide exceptional customer service.
Setting Up a Younium Test/Sandbox Account for API Integration
Before you can start interacting with the Younium API, you'll need to set up a test or sandbox account. This environment allows you to safely experiment with API calls without affecting live data. Follow these steps to get started:
Creating a Younium Sandbox Account
To begin, you'll need to create a sandbox account on Younium. This can typically be done by signing up for a free trial or requesting access through Younium's developer portal. Visit the Younium Developer Portal for detailed instructions on setting up your account.
Generating API Tokens and Client Credentials
Once your sandbox account is ready, you'll need to generate the necessary API tokens and client credentials to authenticate your API requests:
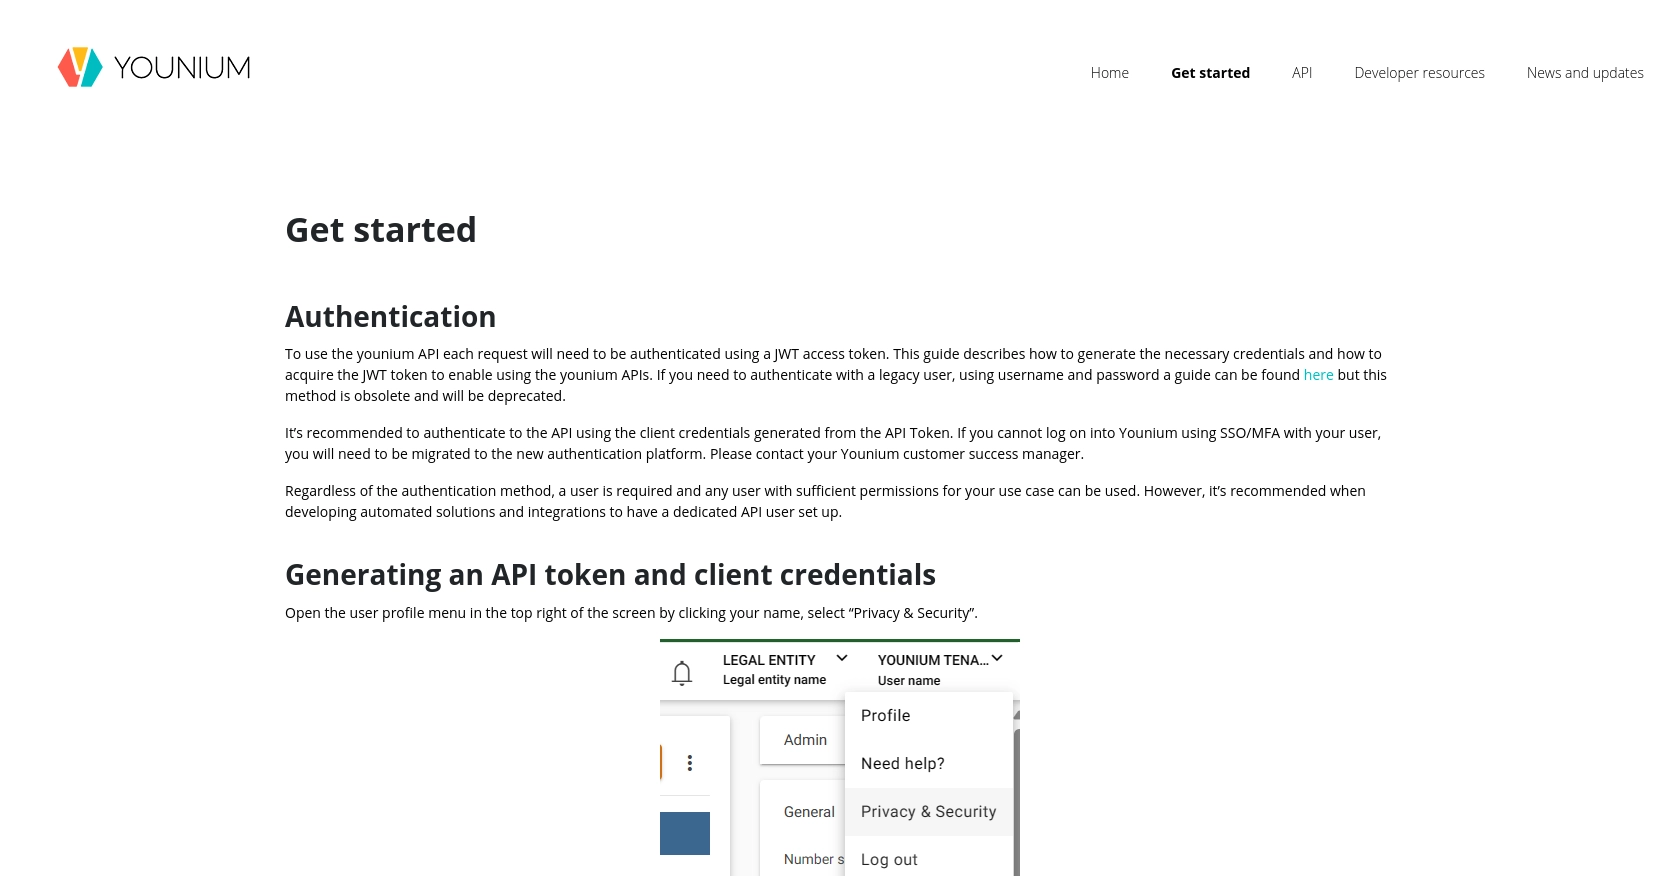
- Log in to your Younium account and navigate to your user profile by clicking your name in the top right corner.
- Select "Privacy & Security" from the dropdown menu.
- In the left panel, click on "Personal Tokens" and then "Generate Token".
- Provide a relevant description for the token and click "Create".
- Copy the generated Client ID and Secret Key. These credentials will be used to generate a JWT access token. Note that these values will not be visible again, so store them securely.
Acquiring a JWT Access Token
With your client credentials in hand, you can now generate a JWT access token, which is required for making authenticated API calls:
// Example POST request to acquire JWT token
const axios = require('axios');

const getToken = async () => {
    try {
        const response = await axios.post('https://api.sandbox.younium.com/auth/token', {
            clientId: 'Your_Client_ID',
            secret: 'Your_Secret_Key'
        }, {
            headers: {
                'Content-Type': 'application/json'
            }
        });
        console.log('Access Token:', response.data.accessToken);
    } catch (error) {
        console.error('Error acquiring token:', error.response.data);
    }
};

getToken();
Replace Your_Client_ID and Your_Secret_Key with the credentials you generated earlier. This script will output the access token, which is valid for 24 hours.
Handling Authentication Errors
If you encounter errors during authentication, refer to the following common issues:
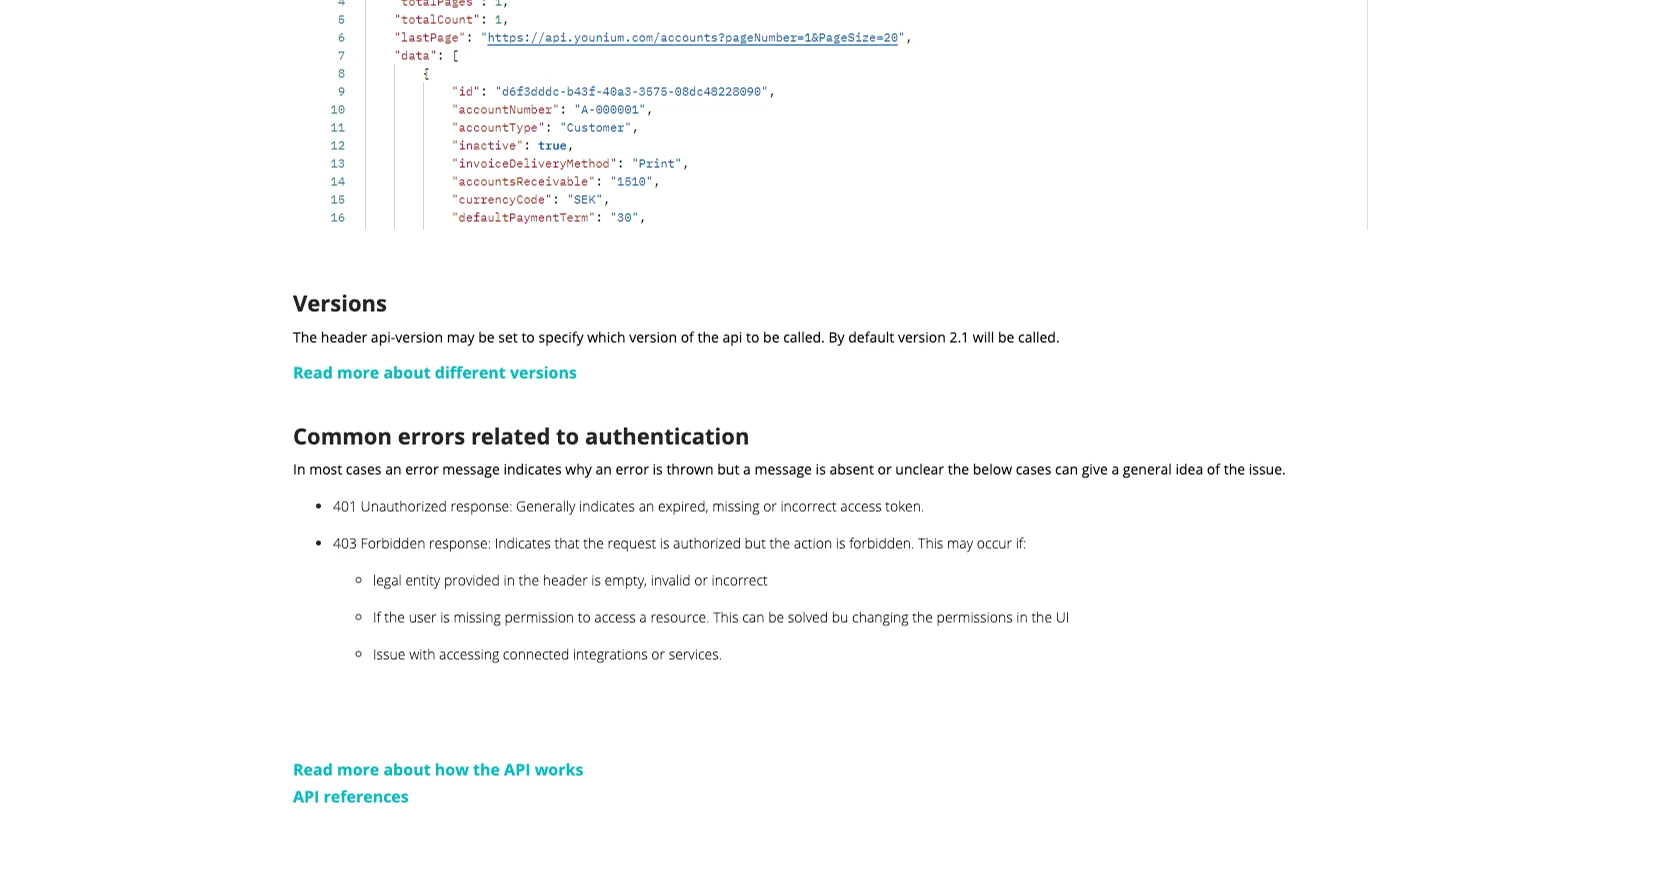
- 401 Unauthorized: This typically indicates an expired, missing, or incorrect access token.
- 403 Forbidden: This may occur if the legal entity specified in the request is invalid or if the user lacks necessary permissions.
For more details on handling authentication errors, visit the Younium Authentication Documentation.
sbb-itb-96038d7
Making API Calls to Retrieve Accounts with Younium API in JavaScript
To interact with the Younium API and retrieve account information, you'll need to make authenticated API calls using JavaScript. This section will guide you through the process of setting up your environment, writing the necessary code, and handling potential errors.
Setting Up Your JavaScript Environment for Younium API Integration
Before making API calls, ensure you have the following prerequisites installed on your machine:
- Node.js (version 14 or higher)
- NPM (Node Package Manager)
Once you have Node.js and NPM installed, you can install the Axios library, which simplifies making HTTP requests:
npm install axiosWriting JavaScript Code to Retrieve Accounts from Younium API
With your environment set up, you can now write the JavaScript code to retrieve account information from the Younium API. Create a file named getYouniumAccounts.js and add the following code:
const axios = require('axios');

const getAccounts = async () => {
    try {
        const tokenResponse = await axios.post('https://api.sandbox.younium.com/auth/token', {
            clientId: 'Your_Client_ID',
            secret: 'Your_Secret_Key'
        }, {
            headers: {
                'Content-Type': 'application/json'
            }
        });

        const accessToken = tokenResponse.data.accessToken;

        const accountsResponse = await axios.get('https://api.sandbox.younium.com/accounts', {
            headers: {
                'Authorization': `Bearer ${accessToken}`,
                'Content-Type': 'application/json',
                'api-version': '2.1'
            }
        });

        console.log('Accounts:', accountsResponse.data);
    } catch (error) {
        console.error('Error retrieving accounts:', error.response ? error.response.data : error.message);
    }
};

getAccounts();
Replace Your_Client_ID and Your_Secret_Key with your actual client credentials. This script first acquires a JWT access token and then uses it to make a GET request to the Younium API to retrieve account data.
Verifying Successful API Requests and Handling Errors
After running the script, you should see the account data printed in the console. To verify the request's success, check your Younium sandbox account to ensure the data matches the output.
If you encounter errors, consider the following common issues:
- 401 Unauthorized: Check if the access token is expired or incorrect.
- 403 Forbidden: Ensure the legal entity is correctly specified and the user has the necessary permissions.
For more detailed error handling, refer to the Younium API Documentation.
Best Practices for Younium API Integration and Error Handling
When working with the Younium API, it's essential to follow best practices to ensure smooth and efficient integration. Here are some recommendations:
- Securely Store Credentials: Always store your client credentials and JWT tokens securely. Consider using environment variables or a secure vault to manage sensitive information.
- Handle Rate Limiting: Be mindful of the API's rate limits to avoid throttling. Implement retry logic with exponential backoff to handle rate limit errors gracefully.
- Data Standardization: Ensure that data retrieved from Younium is standardized and transformed as needed to fit your application's requirements. This will help maintain data consistency across systems.
- Regularly Refresh Tokens: Since JWT tokens are valid for 24 hours, implement a mechanism to refresh tokens automatically to maintain uninterrupted access to the API.
Streamlining Integrations with Endgrate
Building and maintaining multiple integrations can be time-consuming and complex. Endgrate simplifies this process by providing a unified API endpoint that connects to various platforms, including Younium. By leveraging Endgrate, you can:
- Save Time and Resources: Focus on your core product development while outsourcing integration complexities to Endgrate.
- Build Once, Deploy Everywhere: Create a single integration for each use case and deploy it across multiple platforms effortlessly.
- Enhance Customer Experience: Offer your customers a seamless and intuitive integration experience with minimal effort.
Explore how Endgrate can transform your integration strategy by visiting Endgrate's website and discover the benefits of a streamlined integration process.
Read More

Ready to get started?
