How to Get People with the Salesloft API in Javascript
Introduction to Salesloft API Integration
Salesloft is a powerful sales engagement platform designed to enhance the efficiency and effectiveness of sales teams. By providing tools for communication, analytics, and automation, Salesloft helps sales professionals connect with prospects more effectively and close deals faster.
Integrating with the Salesloft API allows developers to access and manage sales data programmatically. For example, you might want to retrieve a list of people from Salesloft to analyze their engagement levels or to synchronize this data with another CRM system. This can streamline workflows and provide deeper insights into sales activities.
Setting Up Your Salesloft Test Account for API Integration
Before you can start interacting with the Salesloft API, you'll need to set up a test account. This will allow you to safely experiment with API calls without affecting live data. Follow these steps to create a sandbox environment and obtain the necessary credentials for OAuth authentication.
Create a Salesloft Account
If you don't already have a Salesloft account, you can sign up for a free trial on the Salesloft website. This will give you access to the platform's features and allow you to create an OAuth application for API access.
- Visit the Salesloft website and click on the "Sign Up" button.
- Fill in the required information and follow the instructions to complete the registration process.
- Once your account is created, log in to access the Salesloft dashboard.
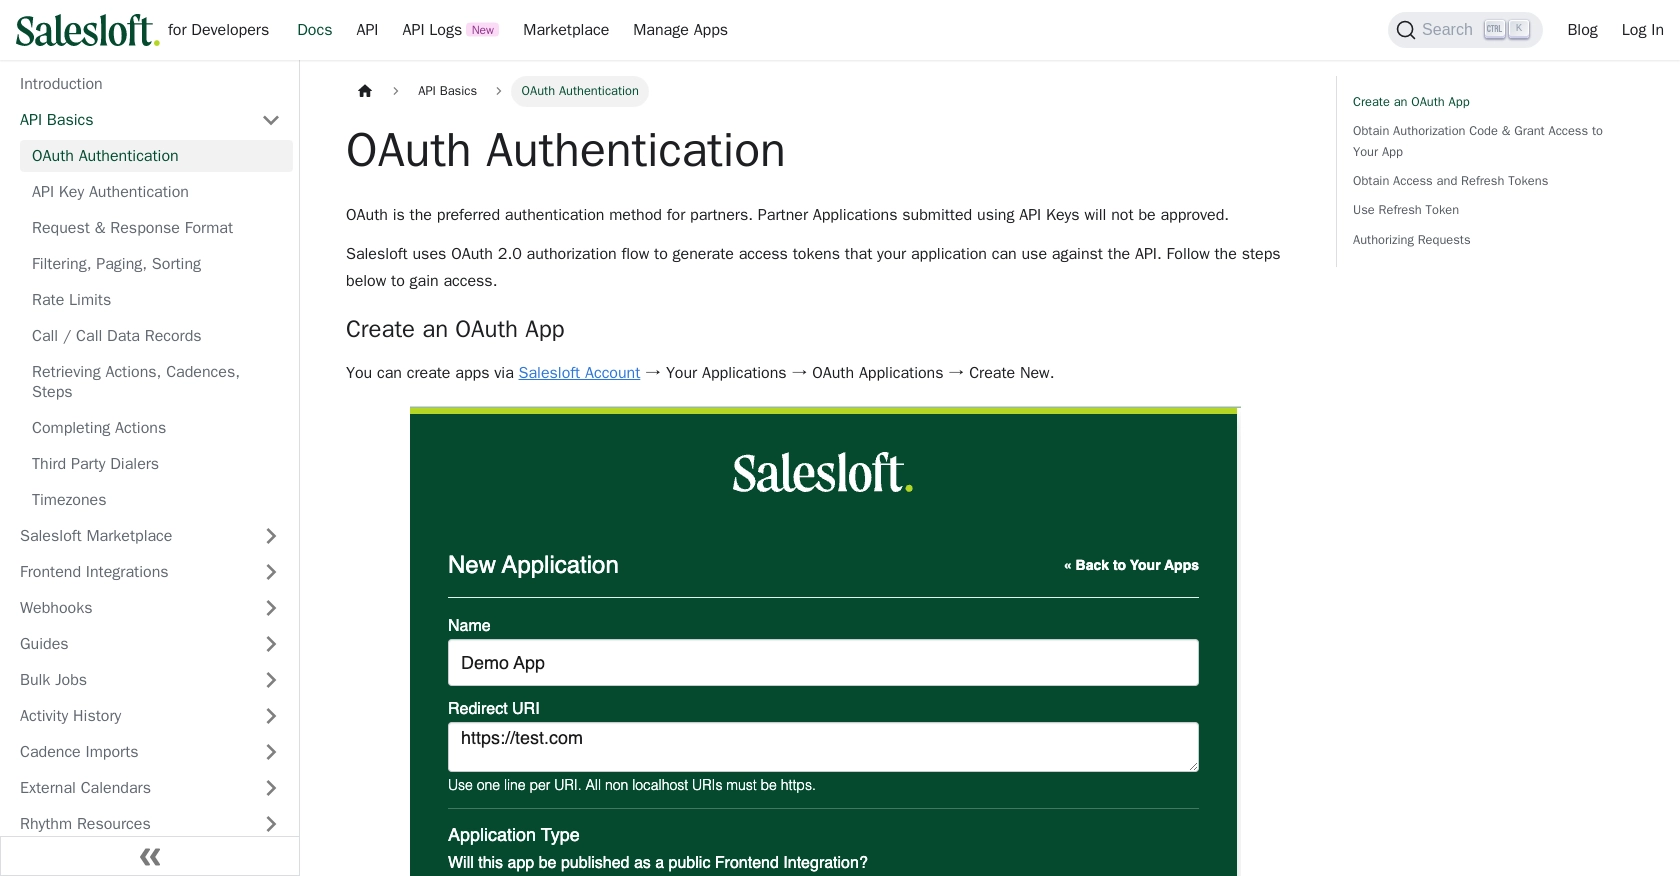
Create an OAuth Application in Salesloft
To interact with the Salesloft API, you'll need to create an OAuth application. This will provide you with the client ID and client secret required for authentication.
- Navigate to Your Applications in the Salesloft dashboard.
- Select OAuth Applications and click on Create New.
- Fill out the necessary fields, such as application name and redirect URI, then click Save.
- After saving, you'll receive your Application ID (Client ID) and Secret (Client Secret). Keep these credentials secure as they are essential for the authorization process.
Obtain Authorization Code and Access Tokens
With your OAuth application set up, you can now obtain an authorization code and access tokens to authenticate API requests.
- Generate a request to the authorization endpoint using your client ID and redirect URI:
- Authorize the application when prompted. Upon approval, you'll receive an authorization code.
- Exchange the authorization code for an access token by making a POST request:
- Store the access token securely, as it will be used to authenticate your API requests.
https://accounts.salesloft.com/oauth/authorize?client_id=YOUR_CLIENT_ID&redirect_uri=YOUR_REDIRECT_URI&response_type=codePOST https://accounts.salesloft.com/oauth/token
{
"client_id": "YOUR_CLIENT_ID",
"client_secret": "YOUR_CLIENT_SECRET",
"code": "AUTHORIZATION_CODE",
"grant_type": "authorization_code",
"redirect_uri": "YOUR_REDIRECT_URI"
}For more detailed information on OAuth authentication, refer to the Salesloft OAuth documentation.
sbb-itb-96038d7
Making API Calls to Retrieve People Data from Salesloft Using JavaScript
To interact with the Salesloft API and retrieve people data, you'll need to set up your JavaScript environment and make HTTP requests using the access token obtained during the OAuth authentication process. This section will guide you through the necessary steps to achieve this.
Setting Up Your JavaScript Environment
Before making API calls, ensure you have Node.js installed on your machine. Node.js provides a runtime environment to execute JavaScript code outside the browser. You can download it from the official Node.js website.
Once Node.js is installed, create a new project directory and initialize it:
mkdir salesloft-api-integration
cd salesloft-api-integration
npm init -y
Next, install the Axios library to simplify HTTP requests:
npm install axiosWriting JavaScript Code to Fetch People Data from Salesloft
Create a new file named get_people.js and add the following code to fetch people data from Salesloft:
const axios = require('axios');
// Replace 'YOUR_ACCESS_TOKEN' with the access token obtained from OAuth
const accessToken = 'YOUR_ACCESS_TOKEN';
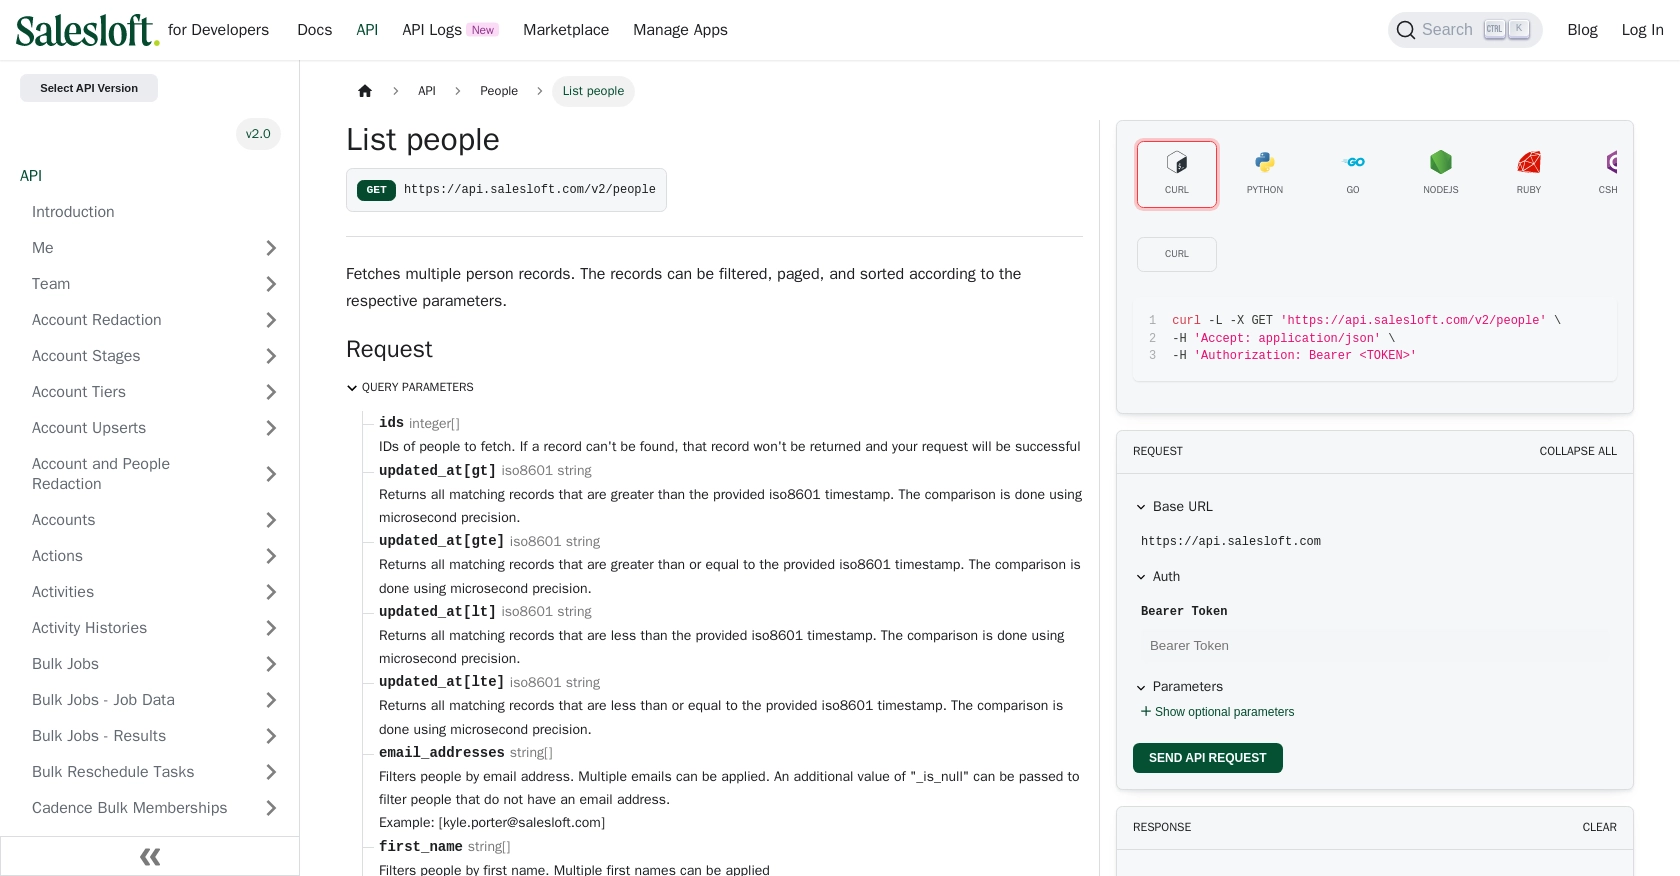
// Define the API endpoint
const endpoint = 'https://api.salesloft.com/v2/people';
// Set up the request headers
const headers = {
'Authorization': `Bearer ${accessToken}`,
'Accept': 'application/json'
};
// Make a GET request to the Salesloft API
axios.get(endpoint, { headers })
.then(response => {
// Handle successful response
const people = response.data.data;
people.forEach(person => {
console.log(`Name: ${person.first_name} ${person.last_name}, Email: ${person.email_address}`);
});
})
.catch(error => {
// Handle errors
if (error.response) {
console.error('Error:', error.response.status, error.response.data);
} else {
console.error('Error:', error.message);
}
});In this code, we use Axios to send a GET request to the Salesloft API endpoint for people data. The access token is included in the request headers for authentication. Upon a successful response, the code logs each person's name and email address to the console.
Running the JavaScript Code and Verifying Results
To execute the code, run the following command in your terminal:
node get_people.jsIf the request is successful, you should see a list of people with their names and email addresses printed in the console. If there are any errors, they will be logged with the corresponding status code and message.
Handling Errors and Understanding Salesloft API Responses
Salesloft API responses include metadata and error information. Common HTTP status codes you might encounter include:
- 200 OK: The request was successful.
- 403 Forbidden: The request was valid, but the server is refusing action. Check your access token and permissions.
- 404 Not Found: The requested resource could not be found.
- 422 Unprocessable Entity: The request was well-formed but was unable to be followed due to semantic errors.
For more details on handling errors, refer to the Salesloft API Request & Response Format documentation.
Conclusion and Best Practices for Integrating with Salesloft API Using JavaScript
Integrating with the Salesloft API using JavaScript provides a powerful way to access and manage sales data programmatically. By following the steps outlined in this guide, you can efficiently retrieve people data and enhance your sales processes.
Best Practices for Secure and Efficient API Integration
- Securely Store Credentials: Always store your OAuth credentials, such as client ID, client secret, and access tokens, securely. Avoid hardcoding them in your source code.
- Handle Rate Limiting: Be mindful of Salesloft's rate limits, which are set at 600 cost per minute. Implement logic to handle rate limit responses and retry requests if necessary. For more details, refer to the Salesloft Rate Limits documentation.
- Manage Access Tokens: Regularly refresh your access tokens using the refresh token to maintain uninterrupted access to the API.
- Data Transformation: Consider transforming and standardizing data fields to match your application's requirements, ensuring consistency across different systems.
Enhance Your Integration Strategy with Endgrate
While integrating with Salesloft API can be straightforward, managing multiple integrations can become complex. Endgrate simplifies this process by providing a unified API endpoint that connects to various platforms, including Salesloft. This allows you to build once for each use case, saving time and resources.
Explore how Endgrate can streamline your integration efforts and provide an intuitive experience for your customers by visiting Endgrate's website.
Read More
- https://endgrate.com/provider/salesloft
- https://developers.salesloft.com/docs/platform/api-basics/oauth-authentication/
- https://developers.salesloft.com/docs/platform/api-basics/request-response-format/
- https://developers.salesloft.com/docs/platform/api-basics/filtering-paging-sorting/
- https://developers.salesloft.com/docs/platform/api-basics/rate-limits/
- https://developers.salesloft.com/docs/api/people-index/

Ready to get started?
