How to Get Vendors with the Sage Accounting API in Javascript
Introduction to Sage Accounting API
Sage Accounting is a robust cloud-based accounting solution tailored for small to medium-sized businesses. It offers a comprehensive suite of tools to manage finances, track expenses, and streamline accounting processes. With its user-friendly interface and powerful features, Sage Accounting is a preferred choice for businesses looking to enhance their financial management capabilities.
Integrating with the Sage Accounting API allows developers to automate and manage various accounting tasks programmatically. For example, developers can use the API to retrieve vendor information, enabling seamless integration of vendor data into custom applications or systems. This can be particularly useful for businesses that need to synchronize vendor data across multiple platforms, ensuring accuracy and efficiency in financial operations.
Setting Up Your Sage Accounting Test/Sandbox Account
Before you can start interacting with the Sage Accounting API, you need to set up a test or sandbox account. This allows you to safely experiment with API calls without affecting any live data. Follow these steps to create your sandbox environment and obtain the necessary credentials for OAuth authentication.
Create a Sage Developer Account
To begin, you need a Sage Developer Account. This account will enable you to register and manage your applications, as well as obtain client credentials for API access.
- Visit the Sage Developer Portal.
- Sign up using your GitHub account or an email address.
- Follow the guide on signing up to complete your registration.
Register a Trial Business for Development
Next, set up a trial business account to use as your sandbox environment. This will allow you to test API interactions without impacting real data.
- Navigate to the trial business setup page.
- Select your region and the appropriate subscription tier (e.g., Accounting Start, Accounting Standard, or Accounting Plus).
- Complete the sign-up process to create your trial business account.
Create a Sage Accounting App for OAuth Authentication
With your trial business account ready, the next step is to create an app within the Sage Developer Portal. This app will provide the client ID and client secret needed for OAuth authentication.
- Log in to your Sage Developer Account.
- Click on "Create App" and provide a name and callback URL for your app. The callback URL is essential for OAuth flow.
- Save your app to generate the client ID and client secret.
For more detailed instructions, refer to the Create an App guide.
Upgrade to a Developer Account
To fully utilize the Sage Accounting API, upgrade your trial account to a developer account. This will grant you extended access for testing purposes.
- Submit an upgrade request through the upgrade form.
- Provide your name, email, app name, client ID, and region.
- Wait for confirmation from the Sage team, which typically takes 3-5 working days.
Once you have completed these steps, you will be ready to start making API calls to the Sage Accounting platform using your sandbox account.

sbb-itb-96038d7
Making API Calls to Retrieve Vendors Using Sage Accounting API in JavaScript
To interact with the Sage Accounting API and retrieve vendor information, you'll need to use JavaScript to make HTTP requests. This section will guide you through the process of setting up your environment, writing the code, and handling responses effectively.
Setting Up Your JavaScript Environment for Sage Accounting API
Before making API calls, ensure you have Node.js installed on your machine. Node.js allows you to run JavaScript code outside of a browser, making it ideal for server-side applications.
- Download and install Node.js from the official website.
- Verify the installation by running
node -vandnpm -vin your terminal.
You'll also need the axios library to handle HTTP requests. Install it using npm:
npm install axiosWriting JavaScript Code to Retrieve Vendors from Sage Accounting
With your environment ready, you can now write the JavaScript code to make API calls to Sage Accounting. The following example demonstrates how to retrieve vendor information using the Sage Accounting API.
const axios = require('axios');

// Set the API endpoint and headers
const endpoint = 'https://api.accounting.sage.com/v3.1/contacts';
const headers = {
    'Authorization': 'Bearer YOUR_ACCESS_TOKEN',
    'Content-Type': 'application/json'
};

// Function to get vendors
async function getVendors() {
    try {
        const response = await axios.get(endpoint, { headers });
        const vendors = response.data;
        console.log('Vendors:', vendors);
    } catch (error) {
        console.error('Error fetching vendors:', error.response ? error.response.data : error.message);
    }
}

// Call the function
getVendors();
Replace YOUR_ACCESS_TOKEN with the access token obtained during the OAuth authentication process. This token is necessary to authorize your requests to the Sage Accounting API.
Understanding the Response and Handling Errors
Upon executing the code, the API will return a list of vendors. You can verify the success of your request by checking the response data. If the request is successful, the vendor information will be logged to the console.
In case of errors, the code is designed to catch exceptions and log the error message. Common errors include invalid tokens or incorrect API endpoints. Refer to the Sage Accounting API documentation for detailed error codes and troubleshooting tips.
Verifying API Call Success in Sage Accounting Sandbox
To ensure the API call was successful, log in to your Sage Accounting sandbox account and verify the vendor data. The retrieved data should match the vendors listed in your sandbox environment.
By following these steps, you can efficiently retrieve vendor information using the Sage Accounting API in JavaScript, enabling seamless integration and data synchronization across your applications.
Best Practices for Using Sage Accounting API with JavaScript
When working with the Sage Accounting API, it's essential to follow best practices to ensure secure and efficient integration. Here are some recommendations:
- Securely Store Credentials: Always store your client ID, client secret, and access tokens securely. Avoid hardcoding them in your source code. Use environment variables or secure vaults to manage sensitive information.
- Handle Rate Limiting: Be aware of the API's rate limits to avoid throttling. Implement retry logic with exponential backoff to handle rate limit errors gracefully.
- Data Standardization: Ensure that data retrieved from the API is standardized and transformed as needed to fit your application's requirements. This will help maintain consistency across different systems.
- Error Handling: Implement robust error handling to manage API errors effectively. Log errors for troubleshooting and provide meaningful feedback to users when issues occur.
Leveraging Endgrate for Seamless Sage Accounting Integrations
While integrating with Sage Accounting API directly can be beneficial, using a tool like Endgrate can further streamline the process. Endgrate offers a unified API endpoint that connects to multiple platforms, including Sage Accounting, allowing you to manage integrations more efficiently.
With Endgrate, you can:
- Save time and resources by outsourcing complex integrations and focusing on your core product development.
- Build once for each use case instead of creating multiple integrations for different platforms.
- Provide an intuitive integration experience for your customers, enhancing user satisfaction and engagement.
Explore how Endgrate can simplify your integration needs by visiting Endgrate's website.
Conclusion on Integrating Sage Accounting API with JavaScript
Integrating with the Sage Accounting API using JavaScript provides a powerful way to automate and manage vendor data within your applications. By following the steps outlined in this guide, you can efficiently retrieve and synchronize vendor information, enhancing your financial management processes.
Remember to adhere to best practices for security, error handling, and data management to ensure a robust integration. Consider leveraging Endgrate for a more streamlined and scalable integration solution, allowing you to focus on delivering value to your users.
Read More
- https://endgrate.com/provider/sage
- https://developer.sage.com/accounting/quick-start/set-up-the-basics/
- https://developer.sage.com/accounting/quick-start/create-an-app/
- https://developer.sage.com/accounting/quick-start/upgrade-your-account/
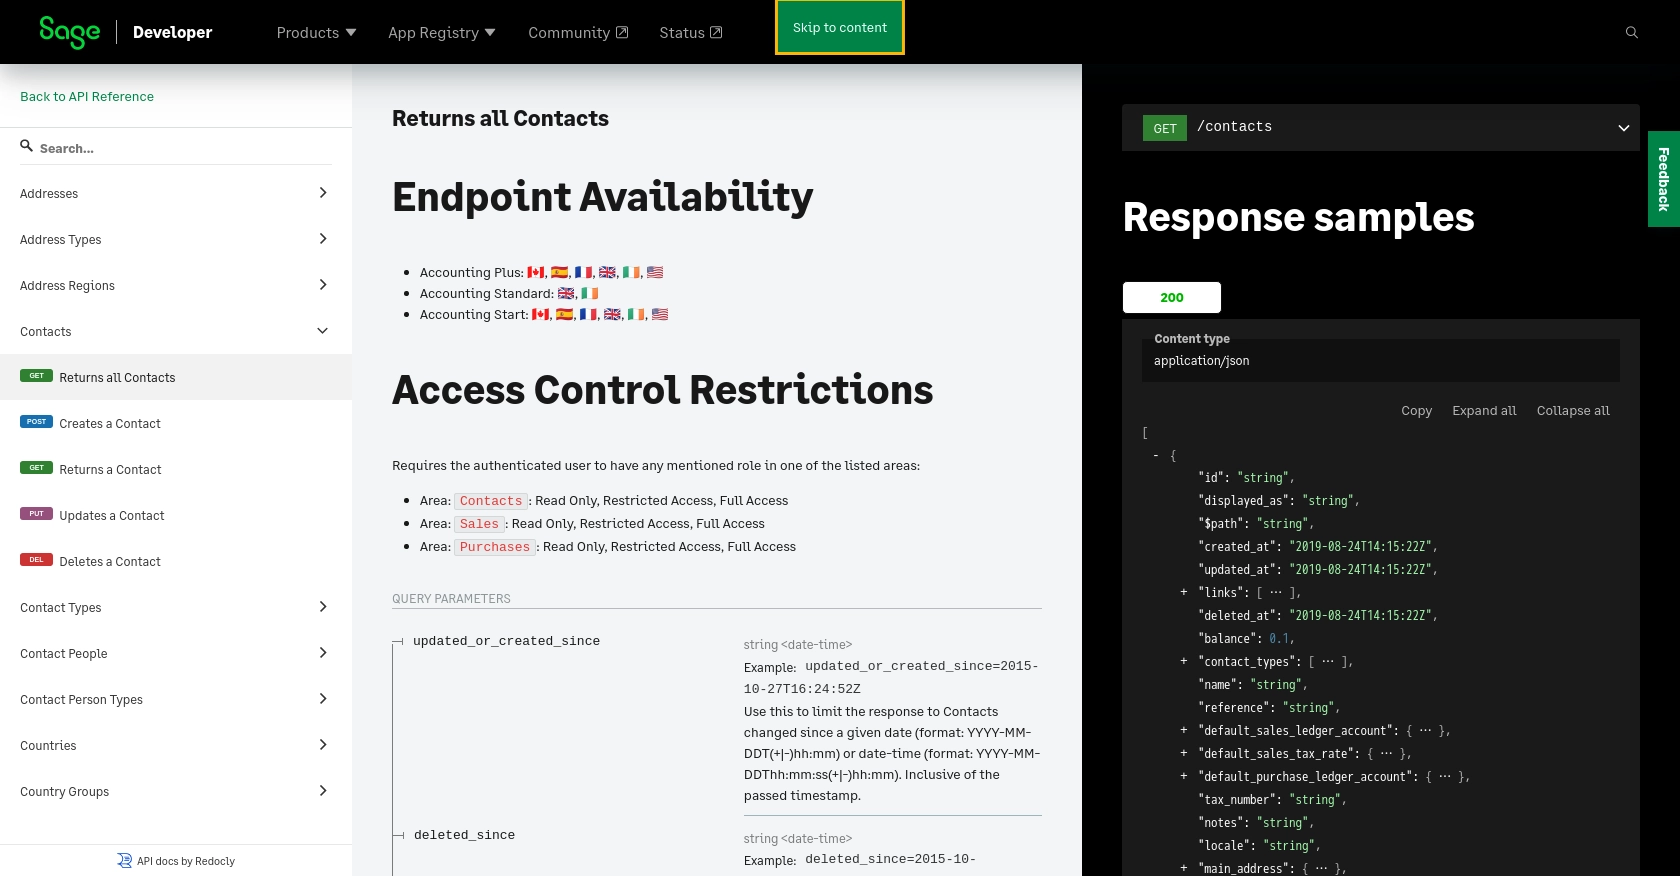
- https://developer.sage.com/accounting/reference/contacts/#tag/Contacts/operation/getContacts

Ready to get started?
