Using the FreeAgent API to Create or Update Contacts in PHP
Introduction to FreeAgent API for Contact Management
FreeAgent is a powerful accounting software designed to simplify financial management for small businesses and freelancers. It offers a comprehensive suite of tools for invoicing, expense tracking, and financial reporting, making it an essential platform for managing business finances efficiently.
Integrating with the FreeAgent API allows developers to automate and streamline contact management processes. For example, you can use the API to create or update contact information directly from your application, ensuring that your client database is always up-to-date and accurate.
In this article, we'll explore how to interact with the FreeAgent API using PHP to manage contacts effectively. This integration can help developers automate workflows, reduce manual data entry, and enhance the overall efficiency of their business operations.
Setting Up Your FreeAgent Sandbox Account for API Integration
Before diving into the FreeAgent API integration, it's essential to set up a sandbox account. This allows you to test and develop your application without affecting live data. FreeAgent provides a sandbox environment specifically for developers to experiment and build integrations safely.
Creating a FreeAgent Sandbox Account
- Visit the FreeAgent Sandbox page.
- Sign up for a free temporary FreeAgent user account. This account will be linked to your OAuth Playground for testing purposes.
- Log in to your sandbox account and complete the initial setup stages. This step is crucial to avoid unexpected errors when using the API.
Registering Your App on the FreeAgent Developer Dashboard
- Navigate to the FreeAgent Developer Dashboard.
- Create a new app and take note of the OAuth Client ID and Client Secret. These credentials are necessary for authenticating API requests.
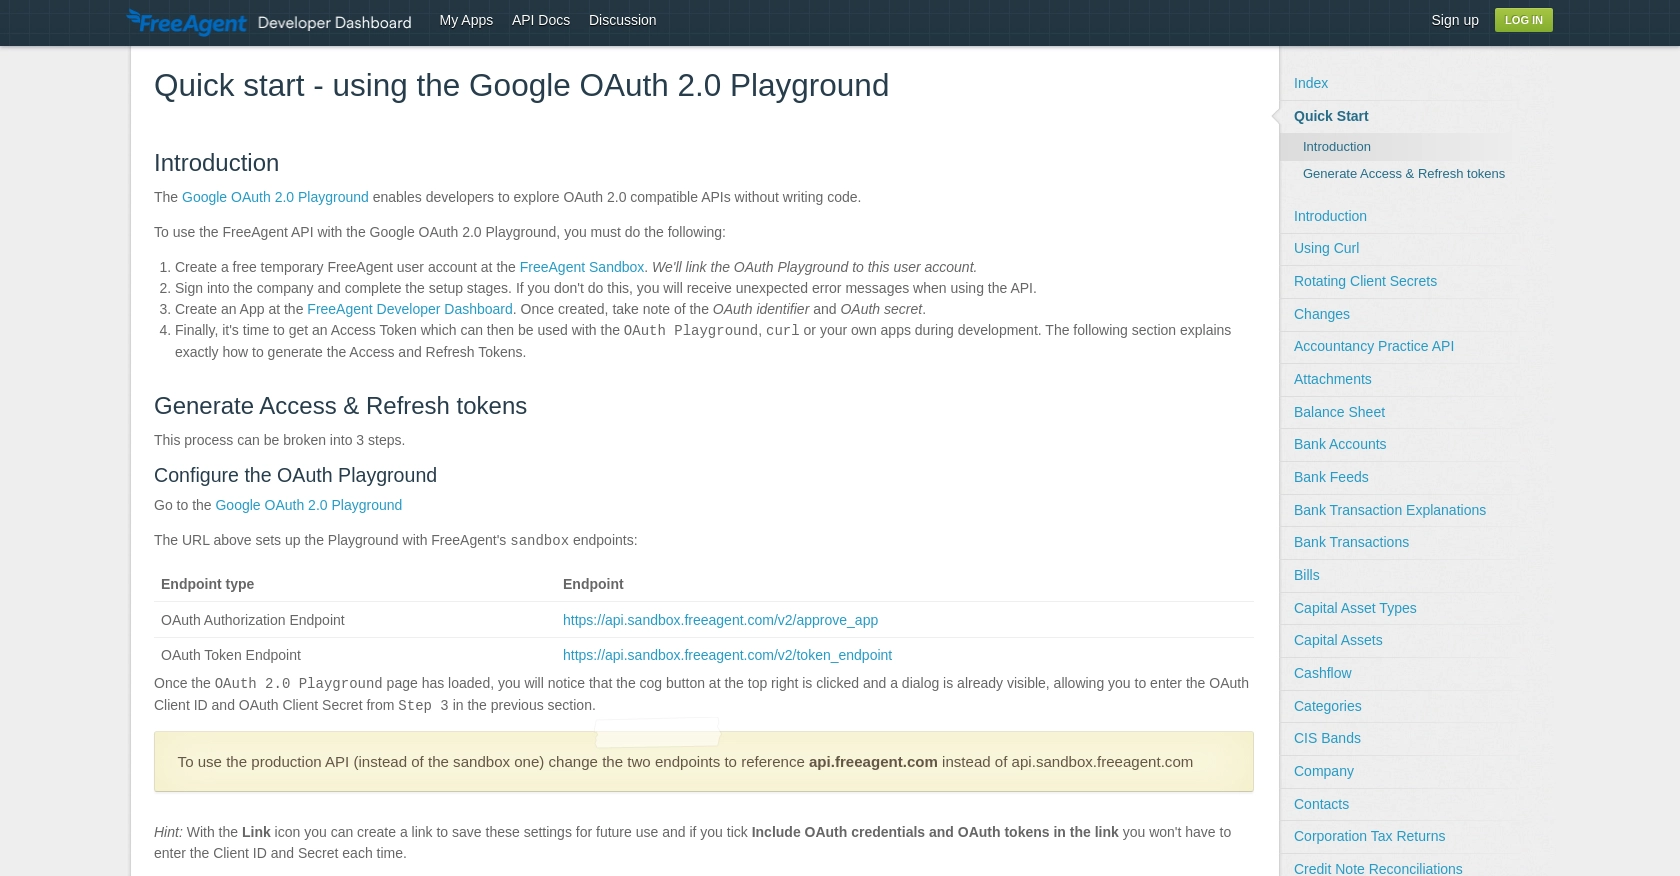
Generating Access and Refresh Tokens Using Google OAuth 2.0 Playground
- Go to the Google OAuth 2.0 Playground.
- Configure the playground with FreeAgent's sandbox endpoints:
- Enter your OAuth Client ID and Client Secret from the FreeAgent Developer Dashboard.
- Specify a scope name and authorize API usage. You will be redirected to log in to your FreeAgent Sandbox account and approve the app.
- Click "Exchange Authorization Code for Tokens" to generate access and refresh tokens. These tokens will be used to access the FreeAgent API.
OAuth Authorization Endpoint: https://api.sandbox.freeagent.com/v2/approve_app
OAuth Token Endpoint: https://api.sandbox.freeagent.com/v2/token_endpoint
With your sandbox account and tokens ready, you can now proceed to interact with the FreeAgent API using PHP to create or update contacts.
sbb-itb-96038d7
Making API Calls to FreeAgent for Contact Management Using PHP
To interact with the FreeAgent API for creating or updating contacts, you'll need to use PHP to make HTTP requests. This section will guide you through the process of setting up your PHP environment, writing the necessary code, and handling responses from the FreeAgent API.
Setting Up Your PHP Environment
Before you begin, ensure that you have PHP installed on your machine. You will also need the cURL extension enabled to make HTTP requests. You can check your PHP installation by running the following command:
php -v
To enable the cURL extension, locate your php.ini file and ensure the following line is uncommented:
extension=curl
Installing Dependencies for FreeAgent API Integration
To simplify HTTP requests, you can use the Guzzle library. Install it using Composer with the following command:
composer require guzzlehttp/guzzle
Creating a Contact with FreeAgent API Using PHP
Now that your environment is set up, you can create a new contact in FreeAgent using the API. Here's a step-by-step guide:
require 'vendor/autoload.php';
use GuzzleHttp\Client;
$client = new Client();
$accessToken = 'Your_Access_Token';
$response = $client->post('https://api.sandbox.freeagent.com/v2/contacts', [
'headers' => [
'Authorization' => 'Bearer ' . $accessToken,
'Content-Type' => 'application/json',
'Accept' => 'application/json',
],
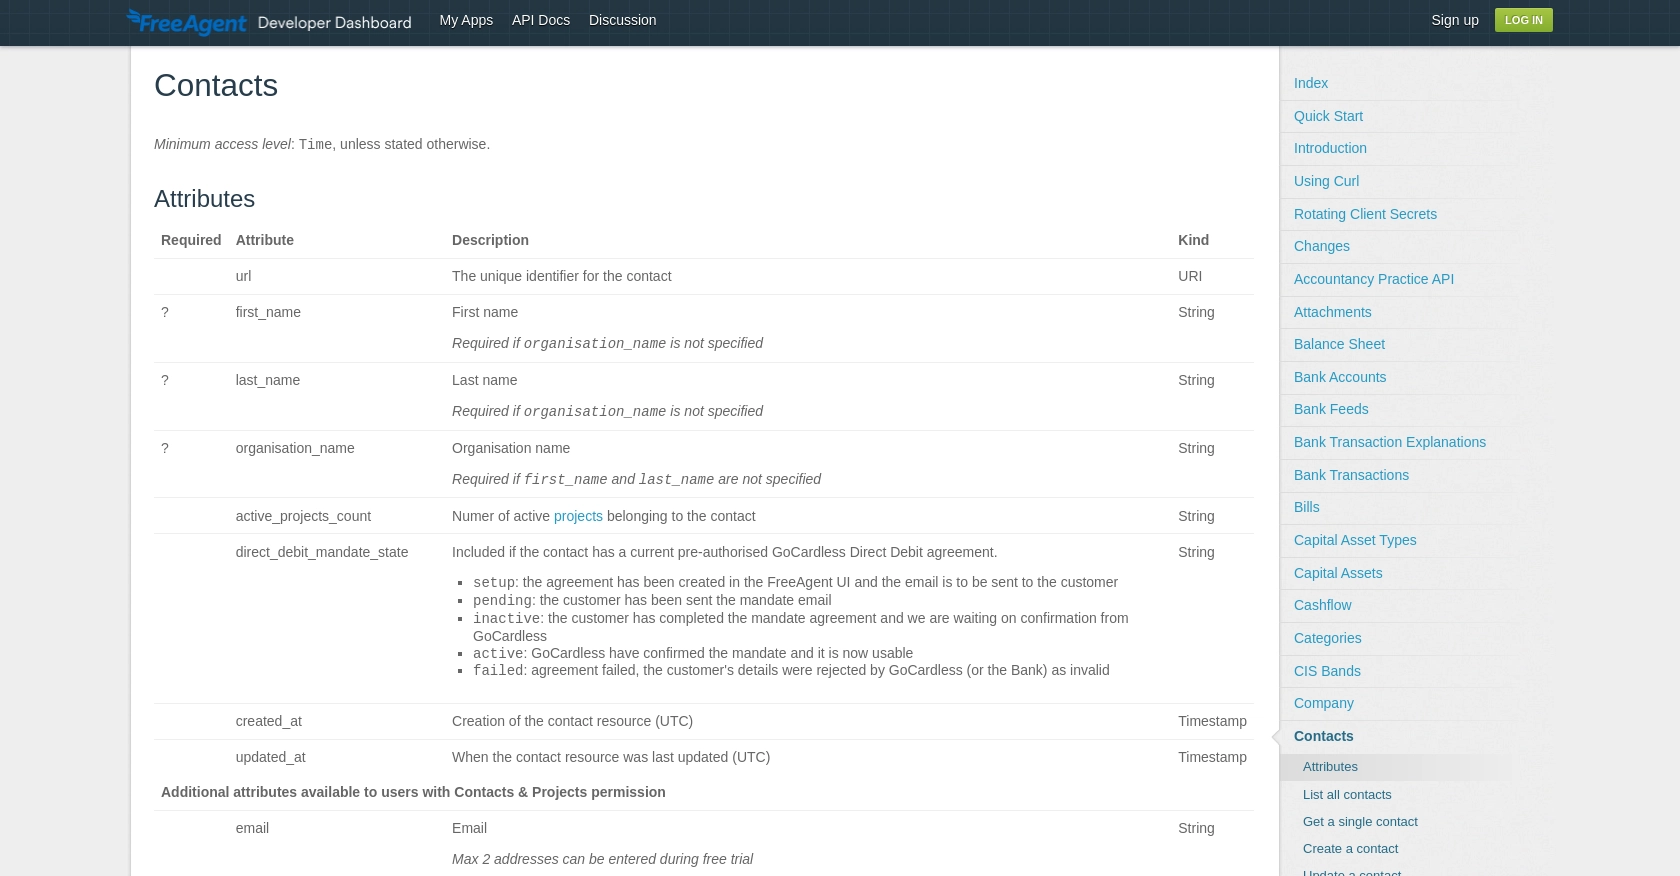
'json' => [
'contact' => [
'first_name' => 'John',
'last_name' => 'Doe',
'email' => 'john.doe@example.com',
'organisation_name' => 'Example Corp',
'phone_number' => '1234567890',
'address1' => '123 Main St',
'town' => 'Anytown',
'region' => 'Anystate',
'postcode' => '12345',
'country' => 'United Kingdom',
],
],
]);
if ($response->getStatusCode() == 201) {
echo "Contact created successfully.";
} else {
echo "Failed to create contact.";
}
Replace Your_Access_Token with the access token you obtained from the OAuth Playground. This script sends a POST request to the FreeAgent API to create a new contact. If successful, it will return a 201 status code.
Updating a Contact with FreeAgent API Using PHP
To update an existing contact, you'll need the contact's ID. Here's how you can update a contact's information:
$contactId = 'Contact_ID';

$response = $client->put("https://api.sandbox.freeagent.com/v2/contacts/{$contactId}", [
    'headers' => [
        'Authorization' => 'Bearer ' . $accessToken,
        'Content-Type' => 'application/json',
        'Accept' => 'application/json',
    ],
    'json' => [
        'contact' => [
            'email' => 'new.email@example.com',
            'phone_number' => '0987654321',
        ],
    ],
]);

if ($response->getStatusCode() == 200) {
    echo "Contact updated successfully.";
} else {
    echo "Failed to update contact.";
}
Replace Contact_ID with the actual ID of the contact you wish to update. This script sends a PUT request to update the contact's email and phone number.
Handling API Responses and Errors
When making API calls, it's crucial to handle responses and potential errors effectively. Check the status code of the response to determine if the request was successful. If you encounter a 429 status code, it means you've hit the rate limit, and you should implement a back-off strategy.
For more information on handling errors and rate limits, refer to the FreeAgent API documentation.
Best Practices for Using FreeAgent API in PHP
When integrating with the FreeAgent API, it's essential to follow best practices to ensure secure and efficient interactions. Here are some recommendations:
- Securely Store Credentials: Always store your OAuth credentials, such as Client ID and Client Secret, securely. Avoid hardcoding them in your source code. Use environment variables or secure vaults to manage sensitive information.
- Handle Rate Limits: FreeAgent enforces rate limits of 120 requests per minute and 3600 per hour. Implement a back-off strategy if you receive a 429 status code. This involves pausing requests and retrying after the specified time.
- Data Standardization: Ensure that the data you send to FreeAgent is standardized and validated. This helps maintain consistency and prevents errors during API calls.
- Use Pagination: When retrieving large datasets, utilize pagination to manage the data efficiently. FreeAgent's API supports pagination, allowing you to fetch data in manageable chunks.
Enhancing Your Integration with Endgrate
While integrating with FreeAgent's API can streamline your contact management processes, managing multiple integrations can be complex. This is where Endgrate can be a valuable asset.
Endgrate offers a unified API endpoint that connects to various platforms, including FreeAgent. By using Endgrate, you can:
- Save Time and Resources: Focus on your core product development while Endgrate handles the integration complexities.
- Build Once, Use Everywhere: Develop a single integration for multiple platforms, reducing redundancy and maintenance efforts.
- Provide a Seamless Experience: Offer your customers an intuitive and efficient integration experience with minimal effort.
Explore how Endgrate can simplify your integration needs by visiting Endgrate's website and discover the benefits of a streamlined integration process.
Read More

Ready to get started?
