Using the Shopify API to Create or Update Products (with Python examples)

Introduction to Shopify API Integration
Shopify is a leading e-commerce platform that empowers businesses to create and manage online stores with ease. It offers a robust set of tools and features for product management, order processing, and customer engagement, making it a popular choice for businesses of all sizes.
Integrating with Shopify's API allows developers to automate and enhance various aspects of store management. For example, using the Shopify API, developers can create or update products programmatically, streamlining inventory management and ensuring product information is always up-to-date.
This article will guide you through using Python to interact with the Shopify API, specifically focusing on creating and updating products. By the end of this tutorial, you'll be equipped to efficiently manage product data within a Shopify store using Python code.
Setting Up Your Shopify Test or Sandbox Account for API Integration
Before you can start integrating with the Shopify API, you'll need to set up a test or sandbox account. This allows you to safely experiment with API calls without affecting a live store. Shopify provides a development store option, which is ideal for testing and development purposes.
Creating a Shopify Development Store
To create a development store, follow these steps:
- Sign up for a Shopify Partner account if you haven't already. This is necessary to create development stores.
- Once logged in, navigate to the Stores section in your Shopify Partner dashboard.
- Click on Add store and select Development store.
- Fill in the required details, such as store name and password, and click Create store.
Your development store is now ready, and you can use it to test API integrations.
Setting Up OAuth Authentication for Shopify API
Shopify uses OAuth 2.0 for authentication, which requires you to create an app to obtain the necessary credentials. Follow these steps to set up OAuth authentication:
- In your Shopify Partner dashboard, go to the Apps section and click on Create app.
- Provide a name for your app and select the development store you created earlier.
- Under the App setup tab, note down the API key and API secret key.
- Set the Redirect URL to a valid URL where Shopify will redirect after authentication.
- Under Scopes, select the necessary permissions for your app, such as
write_productsandread_products. - Save your changes.
With these credentials, you can now authenticate API requests using OAuth.
Generating Access Tokens for API Calls
To interact with the Shopify API, you'll need to exchange your API key and secret for an access token. Here's how you can do it:
- Direct the user to the Shopify authorization URL, including your API key and requested scopes.
- After the user authorizes your app, Shopify will redirect them to your specified redirect URL with a temporary code.
- Use this code to request an access token from Shopify by making a POST request to the token endpoint.
import requests

# Replace with your app's credentials
API_KEY = 'your_api_key'
API_SECRET = 'your_api_secret'
REDIRECT_URI = 'your_redirect_uri'
SHOP_NAME = 'your_shop_name'

# Step 1: Direct user to authorization URL
auth_url = f"https://{SHOP_NAME}.myshopify.com/admin/oauth/authorize?client_id={API_KEY}&scope=write_products,read_products&redirect_uri={REDIRECT_URI}"

# Step 2: Exchange temporary code for access token
def get_access_token(code):
    token_url = f"https://{SHOP_NAME}.myshopify.com/admin/oauth/access_token"
    payload = {
        'client_id': API_KEY,
        'client_secret': API_SECRET,
        'code': code
    }
    response = requests.post(token_url, data=payload)
    return response.json().get('access_token')
Once you have the access token, you can use it to authenticate your API requests by including it in the X-Shopify-Access-Token header.
For more details on setting up OAuth, refe

sbb-itb-96038d7
Making API Calls to Shopify for Product Management Using Python
To interact with Shopify's API for creating or updating products, you'll need to use Python. This section will guide you through the necessary steps, including setting up your environment, writing the code, and handling responses.
Setting Up Your Python Environment for Shopify API Integration
Before making API calls, ensure you have Python installed on your machine. This tutorial uses Python 3.11.1. Additionally, you'll need the requests library to handle HTTP requests. Install it using pip:
pip install requestsCreating a New Product in Shopify Using Python
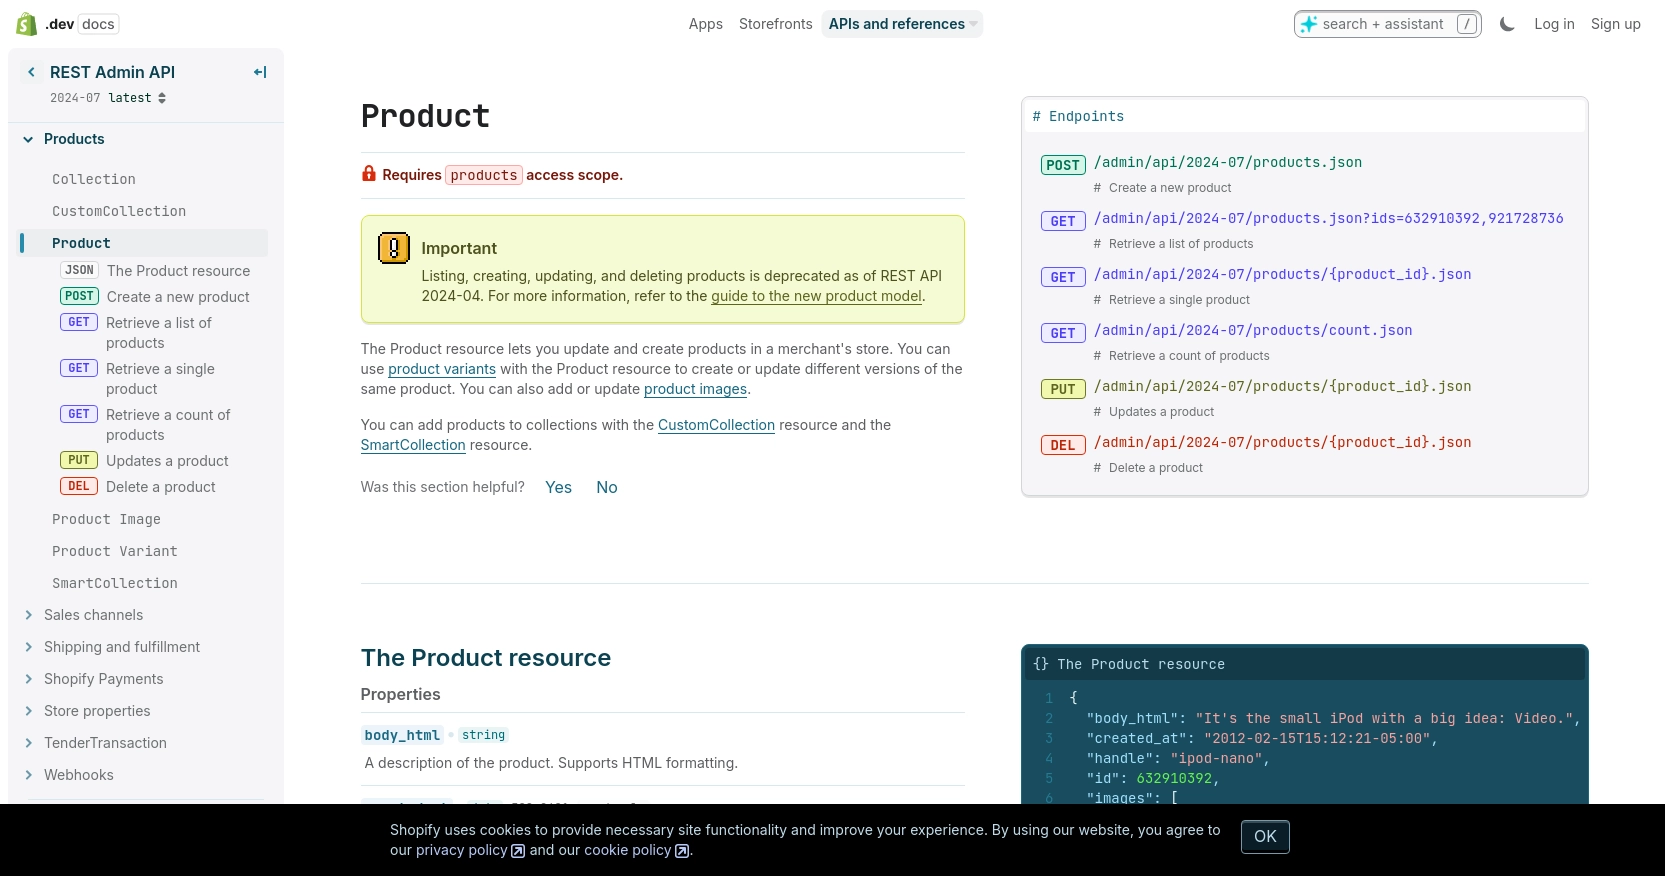
To create a new product in Shopify, you'll need to make a POST request to the Shopify API endpoint. Here's a step-by-step guide:
- Define the API endpoint URL for creating products.
- Set up the request headers, including the
X-Shopify-Access-Token. - Prepare the product data in JSON format.
- Send the POST request and handle the response.
import requests

# Define the API endpoint
url = "https://your-shop-name.myshopify.com/admin/api/2024-07/products.json"

# Set the request headers
headers = {
    "Content-Type": "application/json",
    "X-Shopify-Access-Token": "your_access_token"
}

# Define the product data
product_data = {
    "product": {
        "title": "New Product",
        "body_html": "Great product!",
        "vendor": "Your Vendor",
        "product_type": "Category",
        "status": "active"
    }
}

# Send the POST request
response = requests.post(url, json=product_data, headers=headers)

# Check the response status
if response.status_code == 201:
    print("Product created successfully:", response.json())
else:
    print("Failed to create product:", response.status_code, response.json())
Replace your-shop-name and your_access_token with your actual Shopify store name and access token. If successful, the response will include the details of the newly created product.
Updating an Existing Product in Shopify Using Python
To update an existing product, you'll need to make a PUT request. Follow these steps:
- Identify the product ID you wish to update.
- Define the API endpoint URL for updating the product.
- Set up the request headers and prepare the updated product data.
- Send the PUT request and handle the response.
import requests

# Define the product ID and API endpoint
product_id = "632910392"
url = f"https://your-shop-name.myshopify.com/admin/api/2024-07/products/{product_id}.json"

# Set the request headers
headers = {
    "Content-Type": "application/json",
    "X-Shopify-Access-Token": "your_access_token"
}

# Define the updated product data
updated_data = {
    "product": {
        "id": product_id,
        "title": "Updated Product Title"
    }
}

# Send the PUT request
response = requests.put(url, json=updated_data, headers=headers)

# Check the response status
if response.status_code == 200:
    print("Product updated successfully:", response.json())
else:
    print("Failed to update product:", response.status_code, response.json())
Ensure you replace your-shop-name, your_access_token, and product_id with the appropriate values. A successful response will confirm the product update.
Handling Shopify API Responses and Errors
When making API calls, it's crucial to handle responses and potential errors effectively. Shopify's API returns various status codes:
- 201 Created: The product was successfully created.
- 200 OK: The product was successfully updated.
- 401 Unauthorized: Invalid authentication credentials.
- 429 Too Many Requests: Rate limit exceeded. Retry after the specified time.
For more details on error handling, refer to the Shopify API authentication documentation and Shopify API product documentation.

Conclusion and Best Practices for Shopify API Integration
Integrating with the Shopify API using Python provides a powerful way to automate and manage product data within your Shopify store. By following the steps outlined in this guide, you can efficiently create and update products, ensuring your store's inventory is always current and accurate.
Best Practices for Secure and Efficient Shopify API Usage
- Securely Store Credentials: Always store your API keys and access tokens securely. Avoid hardcoding them in your source code. Consider using environment variables or secure vaults.
- Handle Rate Limits: Shopify imposes a rate limit of 40 requests per app per store per minute. Monitor the
X-Shopify-Shop-Api-Call-Limitheader in responses to manage your request rate and avoid hitting the limit. Implement exponential backoff strategies for retries. - Data Standardization: Ensure consistent data formatting when creating or updating products. This includes standardizing fields like product titles, descriptions, and tags to maintain data integrity across your store.
- Error Handling: Implement robust error handling to manage API response codes effectively. This includes handling 401 Unauthorized errors by checking your authentication credentials and 429 Too Many Requests errors by respecting rate limits.
Streamlining Shopify Integrations with Endgrate
While building custom integrations with the Shopify API can be rewarding, it can also be time-consuming and complex. Endgrate offers a solution by providing a unified API endpoint that simplifies integration processes across multiple platforms, including Shopify.
By leveraging Endgrate, you can save time and resources, allowing you to focus on your core product development. Endgrate's intuitive integration experience ensures a seamless connection for your customers, enabling you to build once for each use case rather than multiple times for different integrations.
Explore how Endgrate can enhance your integration strategy by visiting Endgrate today.
Read More
Ready to get started?
