Using the Shopify API to Get Orders (with PHP examples)

Introduction to Shopify API for Order Management
Shopify is a leading e-commerce platform that empowers businesses to create and manage online stores with ease. It offers a robust suite of tools for managing products, processing payments, and handling orders, making it a popular choice for businesses of all sizes.
Integrating with the Shopify API allows developers to automate and streamline various aspects of order management. For example, you can use the Shopify API to retrieve order details, helping businesses to efficiently process and fulfill customer orders. This integration can be particularly beneficial for automating inventory updates, generating sales reports, and enhancing customer service by providing real-time order tracking.
Setting Up a Shopify Test or Sandbox Account for API Integration
Before you can start interacting with the Shopify API to manage orders, you'll need to set up a test or sandbox account. This allows you to safely experiment with API calls without affecting live data. Shopify provides a development store option that acts as a sandbox environment for developers.
Creating a Shopify Development Store
To create a development store, follow these steps:
- Sign up for a Shopify Partner account if you haven't already. This account gives you access to create development stores.
- Once logged in, navigate to the Stores section in your Partner Dashboard.
- Click on Add store and select Development store as the store type.
- Fill in the required details, such as store name and password, and click Create store.
Your development store is now ready, and you can use it to test API integrations.
Setting Up OAuth for Shopify API Authentication
Shopify uses OAuth for authenticating API requests. To set this up, you'll need to create a private app within your development store:
- Log in to your development store's admin panel.
- Navigate to Apps and click on Develop apps for your store.
- Click on Create an app and provide a name for your app.
- Under API credentials, click on Configure Admin API scopes and select the necessary permissions, such as read_orders and write_orders.
- Click Save to generate your API credentials, including the API key and secret.
These credentials will be used to authenticate your API requests.
Generating Access Tokens for API Requests
Once your app is set up, you can generate access tokens to authenticate your API requests:
- Use the API key and secret to request an access token via the OAuth flow. This involves redirecting users to Shopify's authorization page and handling the callback to receive the token.
- Include the access token in your API requests as a header:
X-Shopify-Access-Token: {access_token}.
For more details on authentication, refer to the Shopify authentication documentation.
sbb-itb-96038d7
Making API Calls to Retrieve Shopify Orders Using PHP
To interact with the Shopify API and retrieve order data, you'll need to use PHP to make HTTP requests. This section will guide you through the process of setting up your PHP environment, making API calls, and handling responses effectively.
Setting Up PHP Environment for Shopify API Integration
Before making API calls, ensure your PHP environment is properly configured. You'll need PHP 7.4 or later and the cURL extension enabled. You can verify your PHP version and extensions by running:
php -v
php -m | grep curl
If cURL is not enabled, you can enable it by modifying your php.ini file and restarting your web server.
Installing Required PHP Dependencies
To simplify HTTP requests, you can use the Guzzle library. Install it via Composer:
composer require guzzlehttp/guzzle
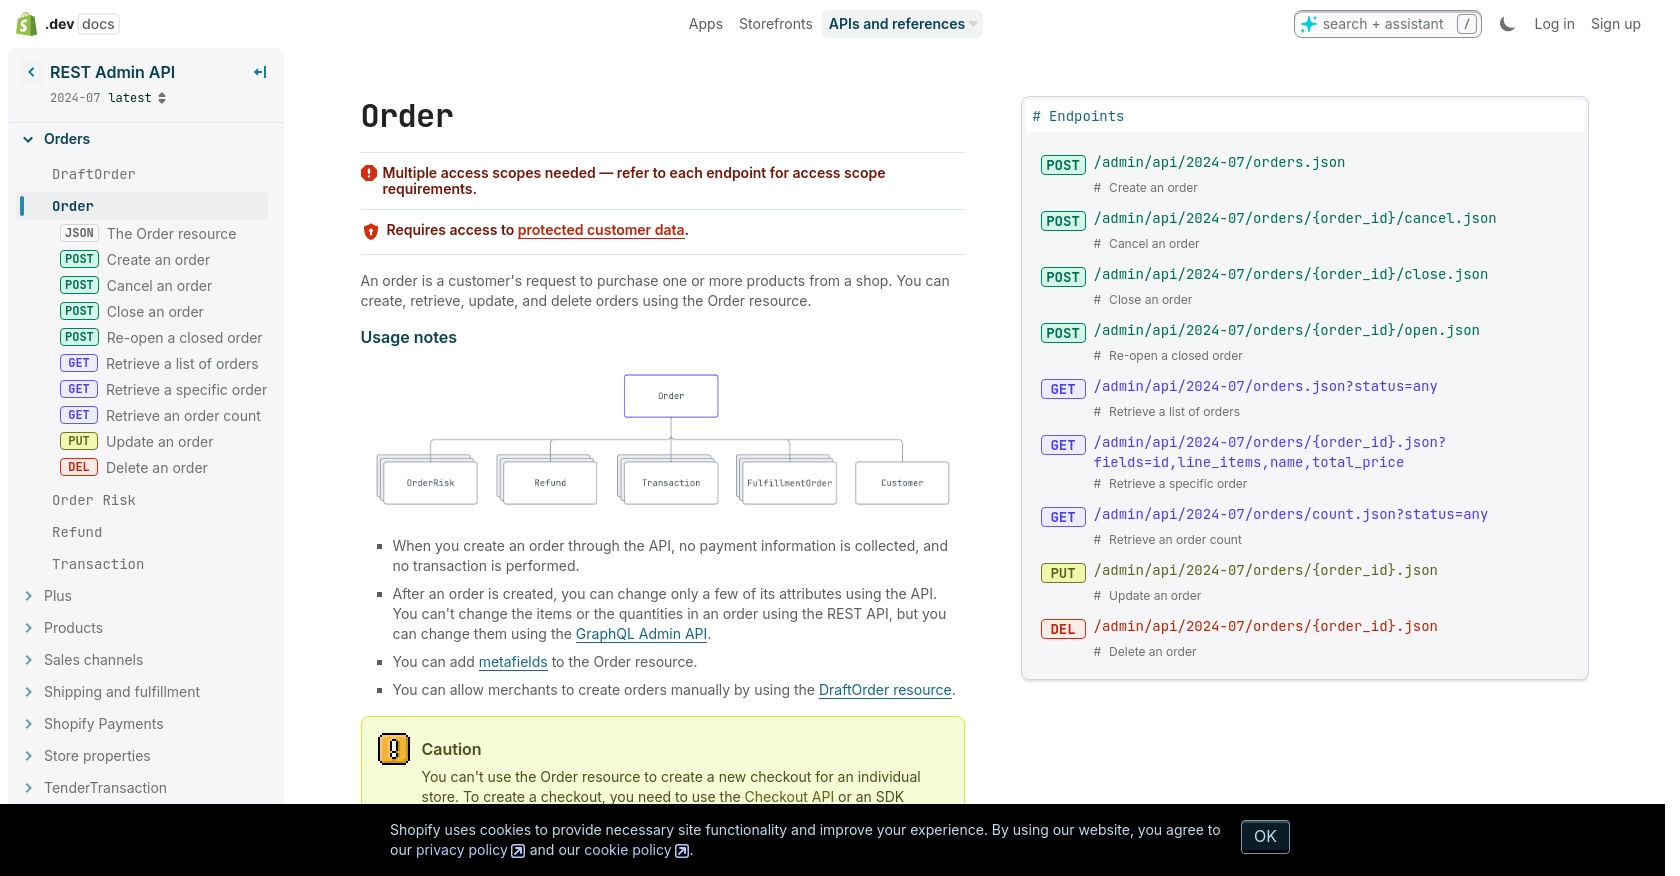
Example Code to Retrieve Shopify Orders
Below is a PHP example demonstrating how to retrieve a list of orders from Shopify:
require 'vendor/autoload.php';

use GuzzleHttp\Client;

$client = new Client();
$storeName = 'your-development-store';
$accessToken = 'your_access_token';

$response = $client->request('GET', "https://{$storeName}.myshopify.com/admin/api/2024-07/orders.json", [
    'headers' => [
        'X-Shopify-Access-Token' => $accessToken,
        'Content-Type' => 'application/json',
    ],
]);

if ($response->getStatusCode() === 200) {
    $orders = json_decode($response->getBody(), true);
    foreach ($orders['orders'] as $order) {
        echo 'Order ID: ' . $order['id'] . ' - Total Price: ' . $order['total_price'] . "\n";
    }
} else {
    echo 'Failed to retrieve orders. Status Code: ' . $response->getStatusCode();
}
Replace your-development-store and your_access_token with your actual store name and access token. This script uses Guzzle to send a GET request to the Shopify API, retrieves the orders, and prints their IDs and total prices.
Handling API Response and Errors
It's crucial to handle API responses and errors gracefully. Shopify API responses include status codes that indicate success or failure. Common error codes include:
- 401 Unauthorized: Invalid API key or access token.
- 403 Forbidden: Incorrect access scopes.
- 429 Too Many Requests: Rate limit exceeded.
For more details on error handling, refer to the Shopify API documentation.
Verifying API Call Success in Shopify Sandbox
After making API calls, verify the results in your Shopify development store. Check the Orders section to ensure the retrieved data matches the output from your PHP script.
Handling Shopify API Rate Limits
Shopify imposes a rate limit of 40 requests per app per store per minute. If you exceed this limit, you'll receive a 429 error. Implement logic to handle this by checking the Retry-After header and pausing requests accordingly.
Conclusion and Best Practices for Shopify API Integration
Integrating with the Shopify API to manage orders can significantly enhance your e-commerce operations by automating order processing, inventory management, and customer service. By following the steps outlined in this guide, you can efficiently retrieve and handle order data using PHP, ensuring a seamless experience for both your team and customers.
Best Practices for Secure and Efficient Shopify API Usage
- Secure Storage of Credentials: Always store your API credentials securely. Use environment variables or secure vaults to keep your access tokens and API keys safe from unauthorized access.
- Handle Rate Limits Gracefully: Shopify enforces a rate limit of 40 requests per app per store per minute. Implement logic to monitor the
Retry-Afterheader and pause requests when necessary to avoid hitting this limit. - Data Standardization: Ensure that data retrieved from Shopify is standardized and transformed as needed to fit your application's requirements. This will help maintain consistency and accuracy across your systems.
- Regularly Update API Versions: Shopify's API is versioned, with updates released quarterly. Stay informed about new versions and update your integration to leverage new features and improvements.
Streamlining Integrations with Endgrate
While building custom integrations with Shopify can be rewarding, it can also be time-consuming and complex. Endgrate offers a solution by providing a unified API endpoint that connects to multiple platforms, including Shopify. This allows you to focus on your core product while outsourcing the complexities of integration management.
With Endgrate, you can build once for each use case, rather than multiple times for different integrations, saving both time and resources. Explore how Endgrate can simplify your integration processes and enhance your e-commerce capabilities by visiting Endgrate.
Read More

Ready to get started?
