How to Create Annotations with the Mixpanel API in PHP
Introduction to Mixpanel API
Mixpanel is a powerful analytics platform that enables businesses to track user interactions and analyze data to drive better decision-making. With its robust set of tools, Mixpanel helps companies understand user behavior, optimize product experiences, and increase customer engagement.
Integrating with Mixpanel's API allows developers to automate data collection and analysis processes. For example, you can create annotations to mark significant events or changes in your data, providing context for your analytics. This can be particularly useful for tracking the impact of marketing campaigns or product updates.
Setting Up Your Mixpanel Test Account
Before you can start creating annotations with the Mixpanel API in PHP, you'll need to set up a Mixpanel account and configure a service account for authentication. This setup will allow you to interact with Mixpanel's API securely and efficiently.
Creating a Mixpanel Account
If you don't already have a Mixpanel account, you can sign up for a free account on the Mixpanel website. Follow the on-screen instructions to create your account and log in.
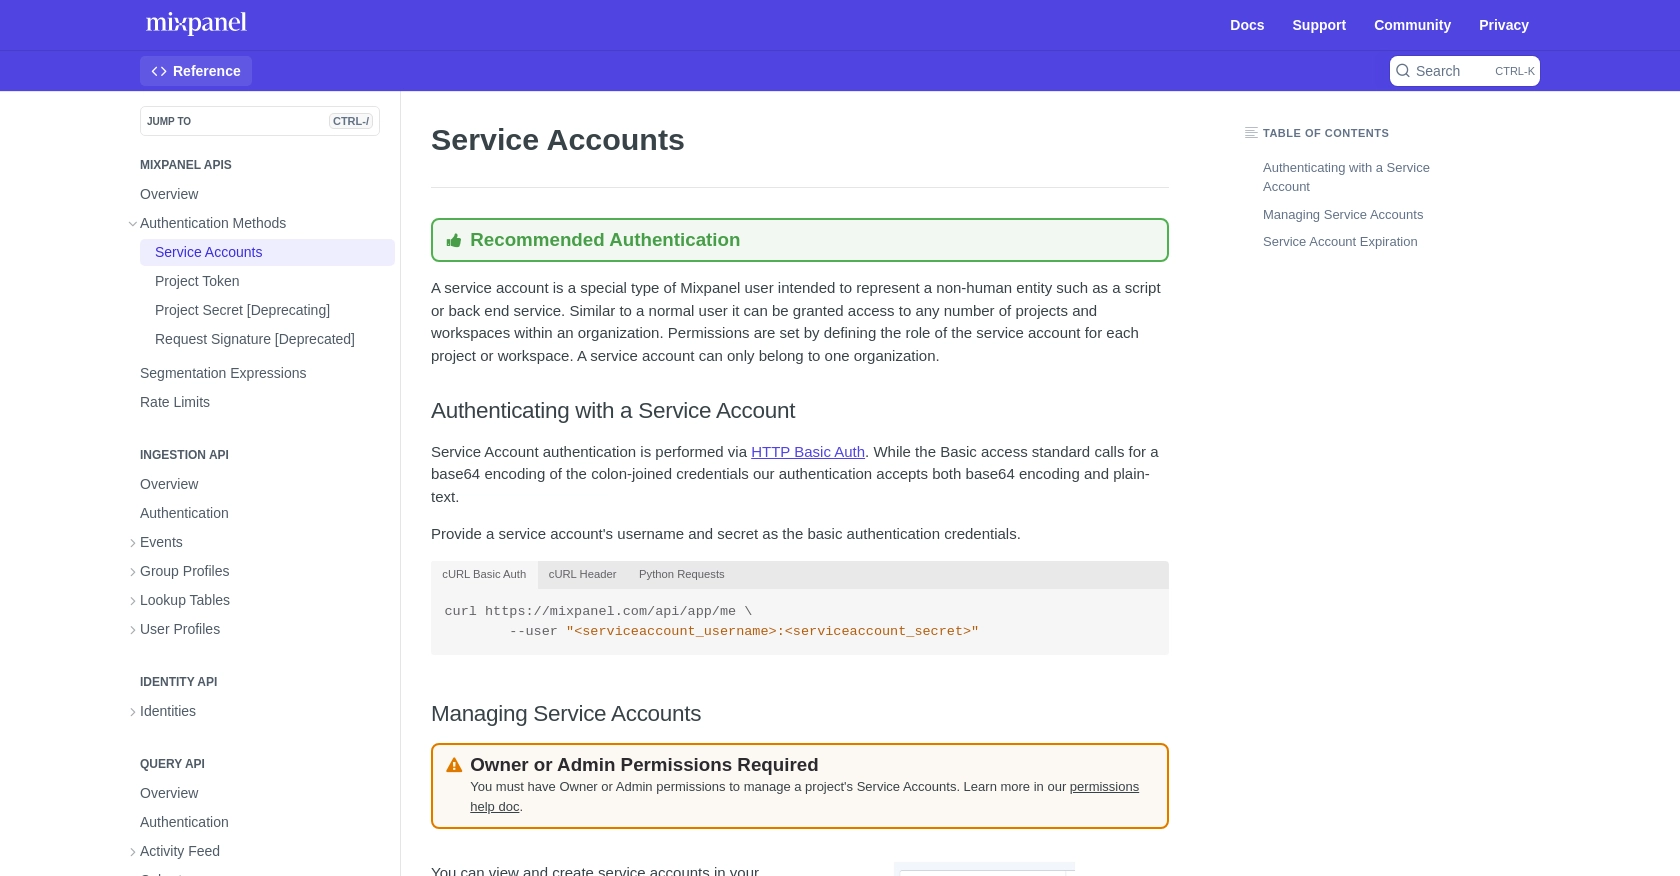
Configuring a Mixpanel Service Account
Mixpanel uses service accounts for API authentication. A service account is a special type of user account intended for non-human entities like scripts or backend services. Here's how to set one up:
- Navigate to your organization's settings in Mixpanel.
- Go to the Service Accounts tab.
- Click on Create Service Account.
- Select the appropriate role and projects for your service account.
- Save the service account's username and secret in a secure location, as you won't be able to access the secret again after creation.
For more details on managing service accounts, refer to the Mixpanel Service Accounts documentation.
Authenticating with Mixpanel API
Mixpanel's API uses HTTP Basic Auth for service account authentication. You can authenticate by providing the service account's username and secret. Here's an example of how to set this up in PHP:
$serviceAccountUsername = 'your_service_account_username';
$serviceAccountSecret = 'your_service_account_secret';

$auth = base64_encode("$serviceAccountUsername:$serviceAccountSecret");
$headers = [
    'Authorization: Basic ' . $auth,
    'Content-Type: application/json'
];
Ensure you replace your_service_account_username and your_service_account_secret with your actual credentials.
Understanding Mixpanel API Rate Limits
Mixpanel enforces rate limits to maintain system integrity. For example, the Query API allows a maximum of 5 concurrent queries and 60 queries per hour. For more information, visit the Mixpanel Rate Limits documentation.
To avoid hitting these limits, consider spreading your queries over time or consolidating multiple queries into a single request.
sbb-itb-96038d7
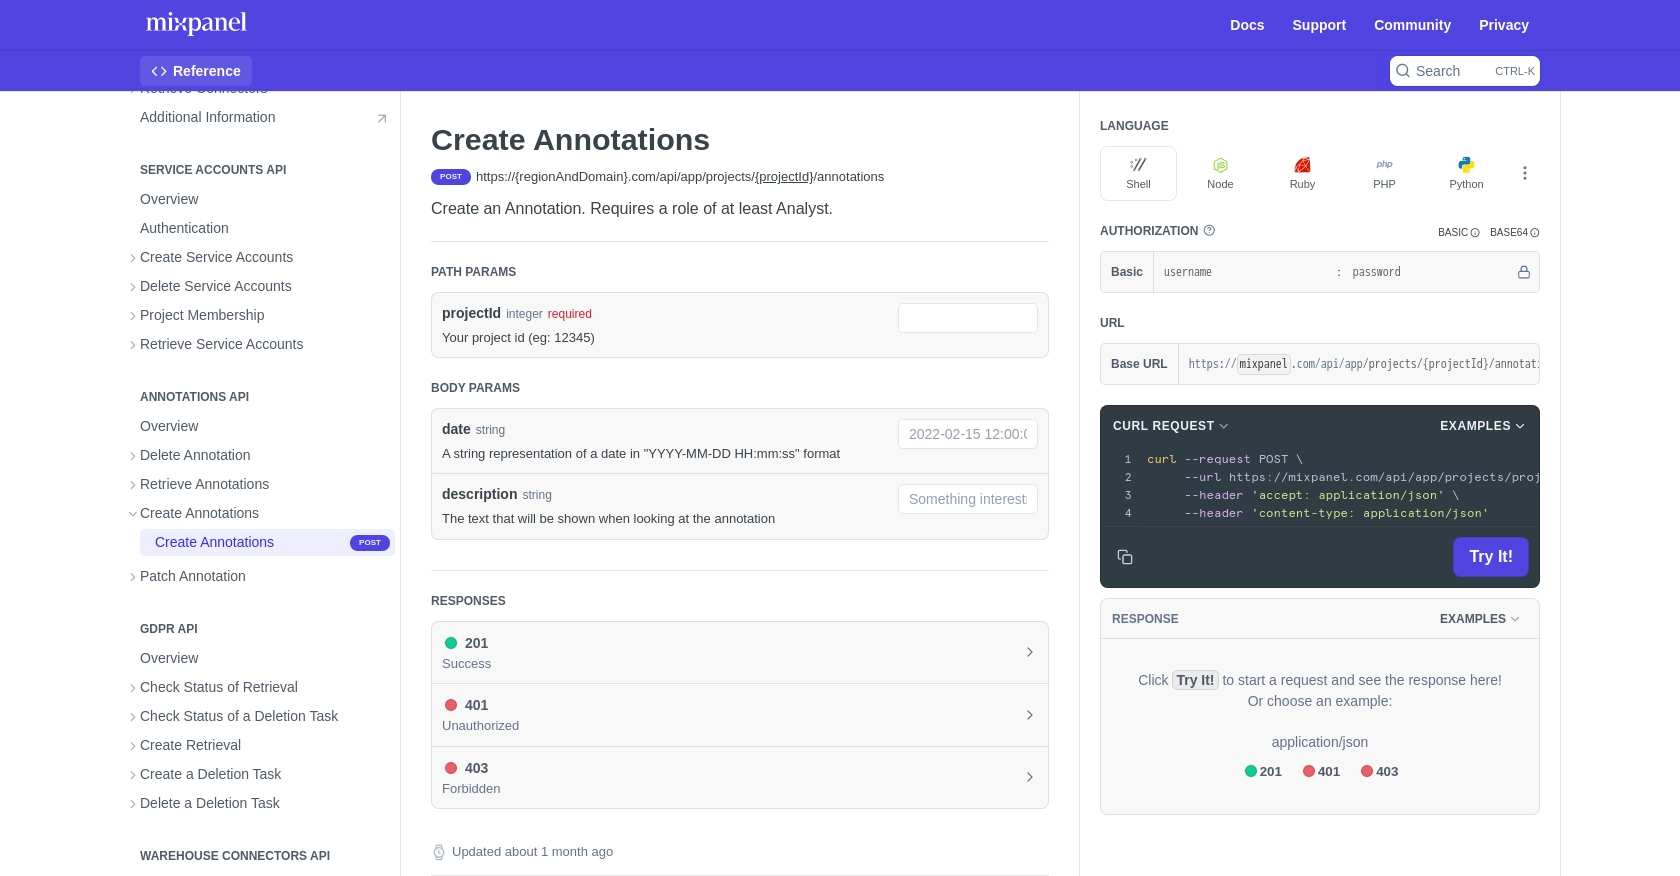
Making API Calls to Create Annotations with Mixpanel in PHP
To create annotations using the Mixpanel API in PHP, you'll need to make a POST request to the appropriate endpoint. This section will guide you through the process of setting up your PHP environment, writing the code to make the API call, and handling potential errors.
Setting Up Your PHP Environment for Mixpanel API Integration
Before you start coding, ensure you have PHP installed on your machine. You will also need the cURL extension enabled to make HTTP requests. You can check your PHP version and installed extensions using the following command:
php -v
php -m
If cURL is not listed, you can enable it by editing your php.ini file and uncommenting the line:
;extension=curlWriting PHP Code to Create Annotations with Mixpanel API
Now, let's write the PHP code to create an annotation in Mixpanel. You'll need to replace placeholders with your actual service account credentials and project ID.
$serviceAccountUsername = 'your_service_account_username';
$serviceAccountSecret = 'your_service_account_secret';
$projectId = 'your_project_id';

$auth = base64_encode("$serviceAccountUsername:$serviceAccountSecret");
$headers = [
    'Authorization: Basic ' . $auth,
    'Content-Type: application/json'
];

$url = "https://mixpanel.com/api/app/projects/$projectId/annotations";

$data = [
    'date' => '2023-10-01 12:00:00',
    'description' => 'Product launch event'
];

$ch = curl_init($url);
curl_setopt($ch, CURLOPT_POST, true);
curl_setopt($ch, CURLOPT_HTTPHEADER, $headers);
curl_setopt($ch, CURLOPT_POSTFIELDS, json_encode($data));
curl_setopt($ch, CURLOPT_RETURNTRANSFER, true);

$response = curl_exec($ch);
$httpCode = curl_getinfo($ch, CURLINFO_HTTP_CODE);

curl_close($ch);

if ($httpCode == 201) {
    echo "Annotation created successfully.";
} else {
    echo "Failed to create annotation. HTTP Status Code: " . $httpCode;
}
Replace your_service_account_username, your_service_account_secret, and your_project_id with your actual credentials and project ID. The $data array contains the date and description for the annotation you want to create.
Verifying Successful Annotation Creation in Mixpanel
After running the script, you should see a success message if the annotation was created successfully. To verify, log in to your Mixpanel account and check the annotations for your project. The new annotation should be listed with the specified date and description.
Handling Errors and Understanding Mixpanel API Response Codes
When making API calls, it's essential to handle potential errors. The Mixpanel API may return various HTTP status codes:
- 201 Created: The annotation was created successfully.
- 401 Unauthorized: Authentication failed. Check your service account credentials.
- 403 Forbidden: You do not have permission to create annotations. Verify your service account's role.
For more details on error handling, refer to the Mixpanel Create Annotations documentation.
Best Practices for Using Mixpanel API in PHP
When working with the Mixpanel API, it's crucial to follow best practices to ensure secure and efficient integration. Here are some recommendations:
- Securely Store Credentials: Always store your service account credentials in a secure location, such as environment variables or a secure vault, to prevent unauthorized access.
- Handle Rate Limits: Be mindful of Mixpanel's rate limits, such as the maximum of 5 concurrent queries and 60 queries per hour for the Query API. Spread your requests over time to avoid hitting these limits. For more details, refer to the Mixpanel Rate Limits documentation.
- Standardize Data Fields: Ensure that your data fields are consistent and standardized to facilitate easier analysis and reporting within Mixpanel.
Streamlining Integrations with Endgrate
Building and maintaining integrations with multiple platforms can be time-consuming and complex. Endgrate simplifies this process by providing a unified API endpoint that connects to various platforms, including Mixpanel. This allows you to focus on your core product while outsourcing integrations.
With Endgrate, you can build once for each use case instead of multiple times for different integrations, offering an intuitive integration experience for your customers. To learn more about how Endgrate can help streamline your integration processes, visit Endgrate.
Read More

Ready to get started?
