How to Create Clients with the Applied Epic API in PHP
Introduction to Applied Epic API
Applied Epic is a comprehensive agency management system designed to streamline operations for insurance agencies. It offers a unified platform that integrates various functionalities, including client management, policy administration, and financial accounting, making it a popular choice for insurance professionals seeking efficiency and scalability.
Developers may want to integrate with the Applied Epic API to automate client management processes, such as creating new client records. For example, a developer could use the API to automatically add new clients from an external CRM system into Applied Epic, ensuring that client data is consistently up-to-date and reducing manual data entry errors.
Setting Up Your Applied Epic Test Account
Before you can start integrating with the Applied Epic API, you'll need to set up a test or sandbox account. This will allow you to safely experiment with API calls without affecting live data. Follow these steps to get started:
Sign Up for an Applied Epic Developer Account
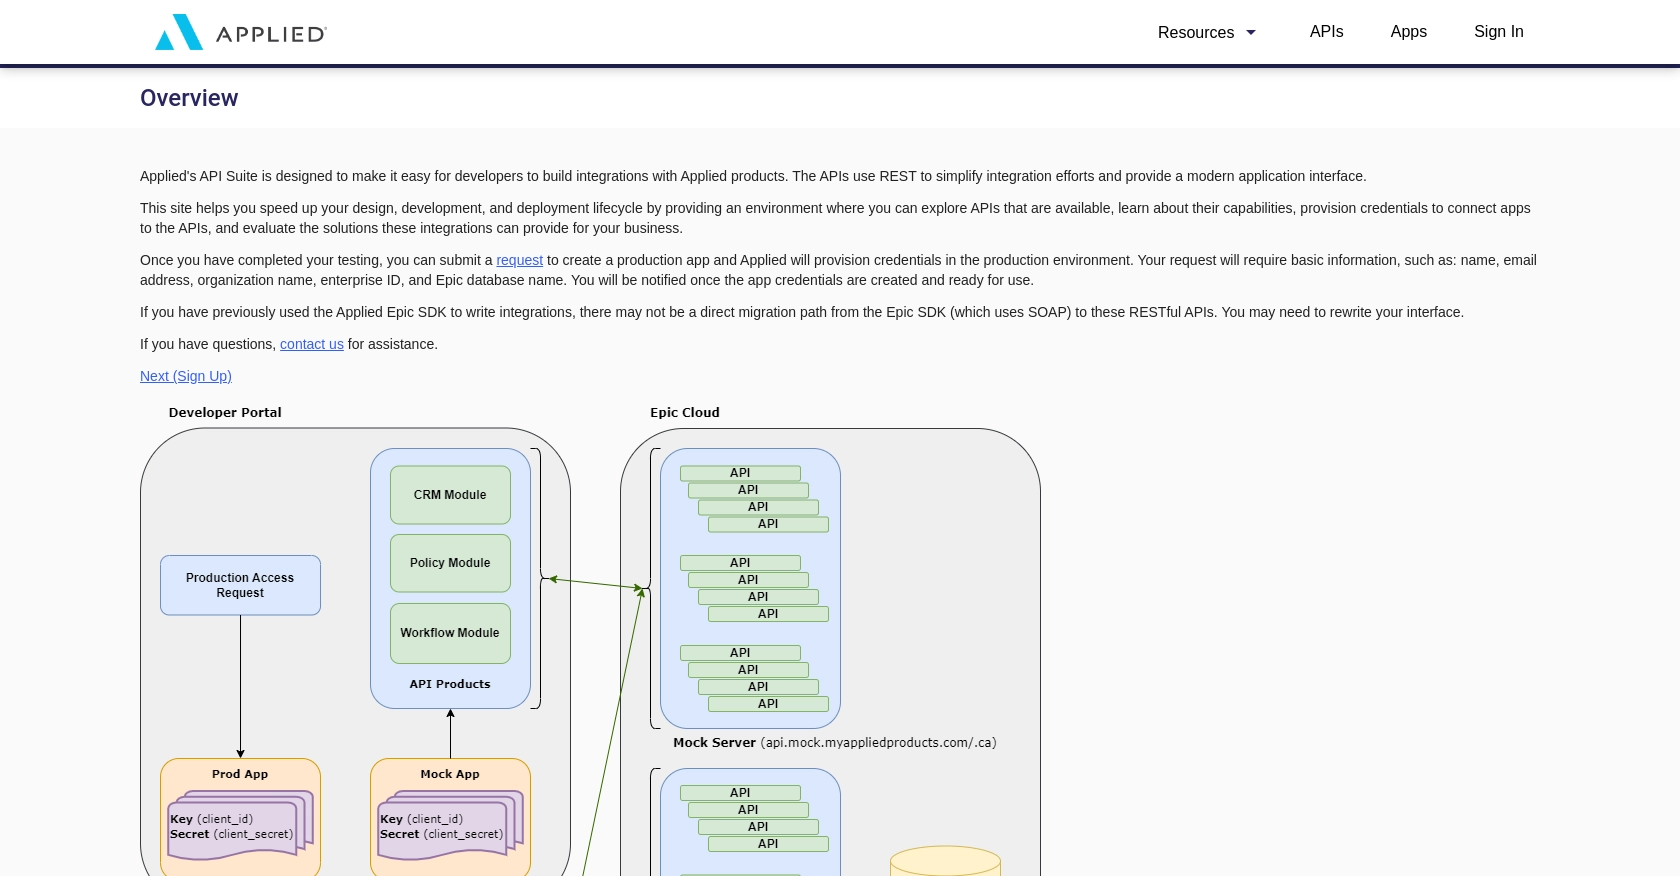
To access the Applied Epic API, you first need to sign up for a developer account. Visit the Applied Epic Developer Portal and complete the registration process. This will give you access to the necessary tools and resources for API integration.
Create an Application in the Applied Epic Sandbox
Once your developer account is set up, you need to create an application within the Applied Epic sandbox environment. This will provide you with the credentials required for API authentication.
- Log in to your Applied Epic developer account.
- Navigate to the "Applications" section and click on "Create New Application."
- Fill in the required details, such as the application name and description.
- Once created, note down the client ID and client secret, as these will be used for authentication.
Authenticate Using Custom Authentication
The Applied Epic API uses a custom authentication method. To authenticate your API requests, follow these steps:
- Use the client ID and client secret obtained from your application setup.
- Generate an access token by making a request to the authentication endpoint.
- Include the access token in the header of your API requests to authenticate.
For detailed instructions on authentication, refer to the Applied Epic API Documentation.
Testing Your Setup
With your sandbox account and application ready, you can now test API calls. Ensure that you are using the sandbox environment to avoid any impact on live data. Verify the success of your API requests by checking the sandbox account for the expected changes or data retrieval.
sbb-itb-96038d7
Making API Calls to Create Clients with Applied Epic API in PHP
To interact with the Applied Epic API for creating clients, you'll need to use PHP to send HTTP requests. This section will guide you through the process of setting up your PHP environment, crafting the API request, and handling the response.
Setting Up Your PHP Environment for Applied Epic API Integration
Before making API calls, ensure your PHP environment is properly configured. You'll need PHP version 7.4 or later and the cURL extension enabled to handle HTTP requests.
- Verify your PHP version by running
php -vin your terminal. - Ensure the cURL extension is enabled in your
php.inifile.
Installing Necessary PHP Dependencies
To simplify HTTP requests, you can use the Guzzle HTTP client. Install it using Composer:
composer require guzzlehttp/guzzleCreating a Client with the Applied Epic API
Now, let's write a PHP script to create a client using the Applied Epic API. Replace Your_Access_Token with the token obtained during authentication.
require 'vendor/autoload.php';

use GuzzleHttp\Client;

$client = new Client();

$response = $client->post('https://api.myappliedproducts.com/crm/v1/clients', [
    'headers' => [
        'Authorization' => 'Bearer Your_Access_Token',
        'Content-Type' => 'application/json'
    ],
    'json' => [
        'individualOrBusiness' => 'INDIVIDUAL',
        'businessTypes' => ['PERSONAL'],
        'name' => 'Alice Smith',
        'lookupCode' => 'SMITALI-01',
        'type' => 'INSURED',
        'accountSource' => [
            'id' => '65536',
            'description' => 'Cold Call'
        ],
        'address' => [
            'streets' => ['123 Main St.'],
            'city' => 'Schenectady',
            'zipOrPostalCode' => '12345',
            'stateOrProvince' => 'NY',
            'countryCode' => 'USA'
        ],
        'contact' => [
            'prefix' => 'Ms.',
            'firstName' => 'Alice',
            'lastName' => 'Smith',
            'email' => [
                ['emailAddress' => 'AliceSmith@wahoo.com', 'isPrimary' => true]
            ],
            'phoneNumber' => [
                ['number' => '+15555555555', 'type' => 'MOBILE']
            ]
        ]
    ]
]);

if ($response->getStatusCode() == 201) {
    echo "Client Created Successfully";
} else {
    echo "Failed to Create Client: " . $response->getBody();
}
Handling API Responses and Errors
After executing the script, you should see a success message if the client is created successfully. If there's an error, the response body will contain details about the issue. Common error codes include:
- 400 Bad Request: The request was invalid or cannot be served.
- 401 Unauthorized: Authentication failed or user does not have permissions.
- 403 Forbidden: The request is understood, but it has been refused.
Refer to the Applied Epic API Documentation for more details on error handling.
Conclusion and Best Practices for Applied Epic API Integration
Integrating with the Applied Epic API using PHP can significantly enhance your client management processes by automating tasks and ensuring data consistency across platforms. By following the steps outlined in this guide, you can efficiently create clients within the Applied Epic system, reducing manual data entry and minimizing errors.
Best Practices for Secure and Efficient API Integration
- Securely Store Credentials: Always store your API credentials, such as client ID, client secret, and access tokens, securely. Consider using environment variables or a secure vault to protect sensitive information.
- Handle Rate Limiting: Be mindful of any rate limits imposed by the API. Implement retry logic with exponential backoff to handle rate limit errors gracefully and ensure your application remains responsive.
- Standardize Data Fields: Ensure that data fields are consistently formatted across systems. This will help maintain data integrity and simplify data processing and analysis.
- Monitor API Usage: Regularly monitor your API usage to identify any unusual patterns or potential issues. This can help you optimize performance and prevent unexpected errors.
Streamline Your Integration Process with Endgrate
While integrating with the Applied Epic API can be highly beneficial, managing multiple integrations can be complex and time-consuming. Endgrate offers a solution by providing a unified API endpoint that connects to various platforms and services, including Applied Epic. By leveraging Endgrate, you can streamline your integration process, save time, and focus on your core product development.
Explore how Endgrate can simplify your integration needs by visiting Endgrate's website and discover how you can build once for each use case instead of multiple times for different integrations.
Read More

Ready to get started?
