How to Create or Update Invoices with the Younium API in PHP
Introduction to Younium API for Invoice Management
Younium is a comprehensive subscription management platform designed to streamline billing and invoicing processes for B2B SaaS companies. It offers a robust API that allows developers to automate and manage financial operations efficiently, ensuring seamless integration with existing systems.
Integrating with the Younium API can significantly enhance your invoicing capabilities. For example, developers can automate the creation and updating of invoices, reducing manual errors and improving financial accuracy. This is particularly useful for businesses that handle a large volume of transactions and need to maintain up-to-date financial records.
In this article, we will explore how to create or update invoices using the Younium API with PHP, providing a step-by-step guide to streamline your financial operations.
Setting Up Your Younium Sandbox Account for API Integration
Before diving into the integration process, it's essential to set up a Younium sandbox account. This environment allows you to test API interactions without affecting your production data, ensuring a smooth development experience.
Creating a Younium Sandbox Account
To begin, you'll need to create a sandbox account on Younium. Follow these steps:
- Visit the Younium Developer Portal.
- Sign up for a sandbox account by following the on-screen instructions. If you already have an account, simply log in.
- Once logged in, navigate to the sandbox environment to start setting up your API credentials.
Generating API Credentials for Younium
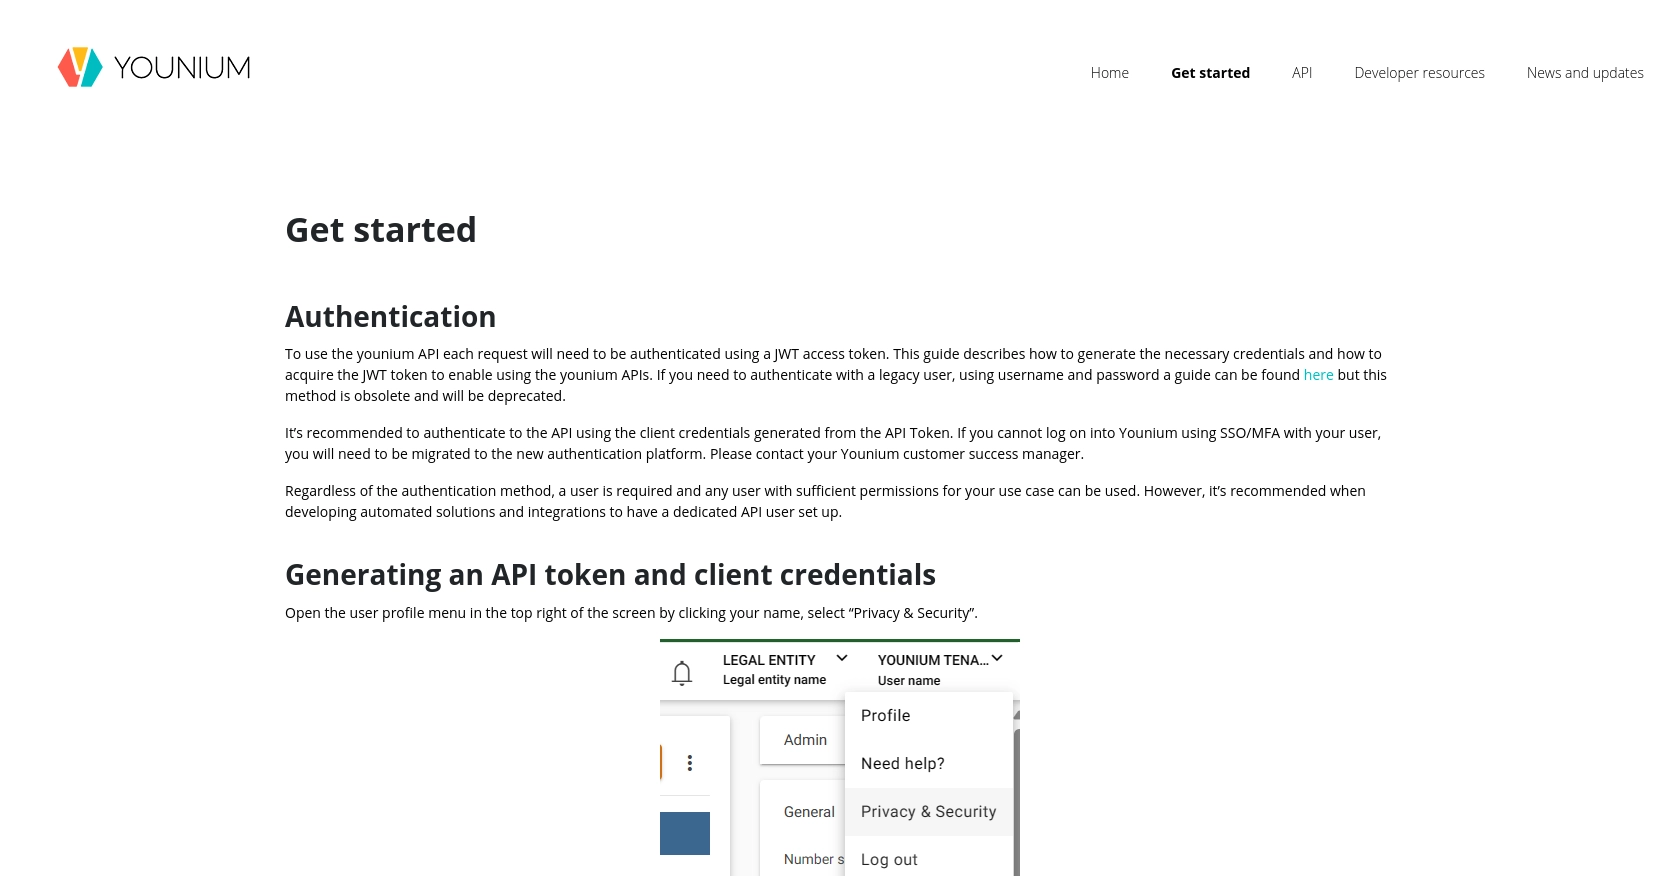
Younium uses JWT access tokens for API authentication. Here's how to generate the necessary credentials:
- Open the user profile menu by clicking your name in the top right corner and select “Privacy & Security”.
- In the left panel, click on “Personal Tokens” and then “Generate Token”.
- Provide a relevant description for the token and click “Create”.
- Copy the generated Client ID and Secret Key. These credentials are crucial for generating the JWT token and will not be visible again.
Acquiring a JWT Token for Younium API Access
With your Client ID and Secret Key, you can now generate a JWT token:
// Set the endpoint for token generation
$url = 'https://api.sandbox.younium.com/auth/token';

// Prepare the request headers and body
$headers = [
    'Content-Type: application/json'
];
$body = json_encode([
    'clientId' => 'Your_Client_ID',
    'secret' => 'Your_Secret_Key'
]);

// Use cURL to make the POST request
$ch = curl_init($url);
curl_setopt($ch, CURLOPT_HTTPHEADER, $headers);
curl_setopt($ch, CURLOPT_POST, true);
curl_setopt($ch, CURLOPT_POSTFIELDS, $body);
curl_setopt($ch, CURLOPT_RETURNTRANSFER, true);

$response = curl_exec($ch);
curl_close($ch);

// Decode the response to get the access token
$data = json_decode($response, true);
$accessToken = $data['accessToken'];
Replace Your_Client_ID and Your_Secret_Key with the credentials you generated earlier. The access token is valid for 24 hours, after which you'll need to acquire a new one.
For more details on authentication, refer to the Younium Authentication Guide.
sbb-itb-96038d7
Making API Calls to Create or Update Invoices with Younium in PHP
Now that you have your JWT access token, you can proceed to make API calls to create or update invoices using the Younium API. This section will guide you through the necessary steps and provide sample PHP code to help you interact with the API effectively.
Setting Up PHP Environment for Younium API Integration
Before making API calls, ensure your PHP environment is set up correctly. You should have PHP 7.4 or later installed, along with the cURL extension enabled, as it will be used to make HTTP requests.
Creating an Invoice with Younium API
To create an invoice, you'll need to send a POST request to the Younium API's invoice endpoint. Here's how you can do it:
// Set the API endpoint for creating invoices
$url = 'https://api.sandbox.younium.com/invoices';

// Prepare the request headers
$headers = [
    'Authorization: Bearer ' . $accessToken,
    'Content-Type: application/json',
    'api-version: 2.1'
];

// Define the invoice data
$invoiceData = [
    'accountId' => '12345',
    'currency' => 'USD',
    'invoiceDate' => '2023-10-01',
    'dueDate' => '2023-10-15',
    'lineItems' => [
        [
            'description' => 'Software Subscription',
            'quantity' => 1,
            'unitPrice' => 100.00
        ]
    ]
];

// Convert the invoice data to JSON
$body = json_encode($invoiceData);

// Use cURL to make the POST request
$ch = curl_init($url);
curl_setopt($ch, CURLOPT_HTTPHEADER, $headers);
curl_setopt($ch, CURLOPT_POST, true);
curl_setopt($ch, CURLOPT_POSTFIELDS, $body);
curl_setopt($ch, CURLOPT_RETURNTRANSFER, true);

$response = curl_exec($ch);
curl_close($ch);

// Decode the response
$data = json_decode($response, true);

// Check if the invoice was created successfully
if (isset($data['id'])) {
    echo 'Invoice created successfully with ID: ' . $data['id'];
} else {
    echo 'Failed to create invoice: ' . $data['error']['message'];
}
Replace the accountId and other relevant fields with your actual data. The response will include the invoice ID if the creation is successful.
Updating an Invoice with Younium API
To update an existing invoice, you'll need to send a PUT request to the invoice endpoint with the invoice ID. Here's an example:
// Set the API endpoint for updating an invoice
$invoiceId = '67890';
$url = 'https://api.sandbox.younium.com/invoices/' . $invoiceId;

// Prepare the request headers
$headers = [
    'Authorization: Bearer ' . $accessToken,
    'Content-Type: application/json',
    'api-version: 2.1'
];

// Define the updated invoice data
$updatedInvoiceData = [
    'dueDate' => '2023-10-20',
    'lineItems' => [
        [
            'description' => 'Updated Software Subscription',
            'quantity' => 2,
            'unitPrice' => 90.00
        ]
    ]
];

// Convert the updated invoice data to JSON
$body = json_encode($updatedInvoiceData);

// Use cURL to make the PUT request
$ch = curl_init($url);
curl_setopt($ch, CURLOPT_HTTPHEADER, $headers);
curl_setopt($ch, CURLOPT_CUSTOMREQUEST, 'PUT');
curl_setopt($ch, CURLOPT_POSTFIELDS, $body);
curl_setopt($ch, CURLOPT_RETURNTRANSFER, true);

$response = curl_exec($ch);
curl_close($ch);

// Decode the response
$data = json_decode($response, true);

// Check if the invoice was updated successfully
if (isset($data['id'])) {
    echo 'Invoice updated successfully with ID: ' . $data['id'];
} else {
    echo 'Failed to update invoice: ' . $data['error']['message'];
}
Ensure you replace $invoiceId with the actual ID of the invoice you wish to update. The response will confirm the update if successful.
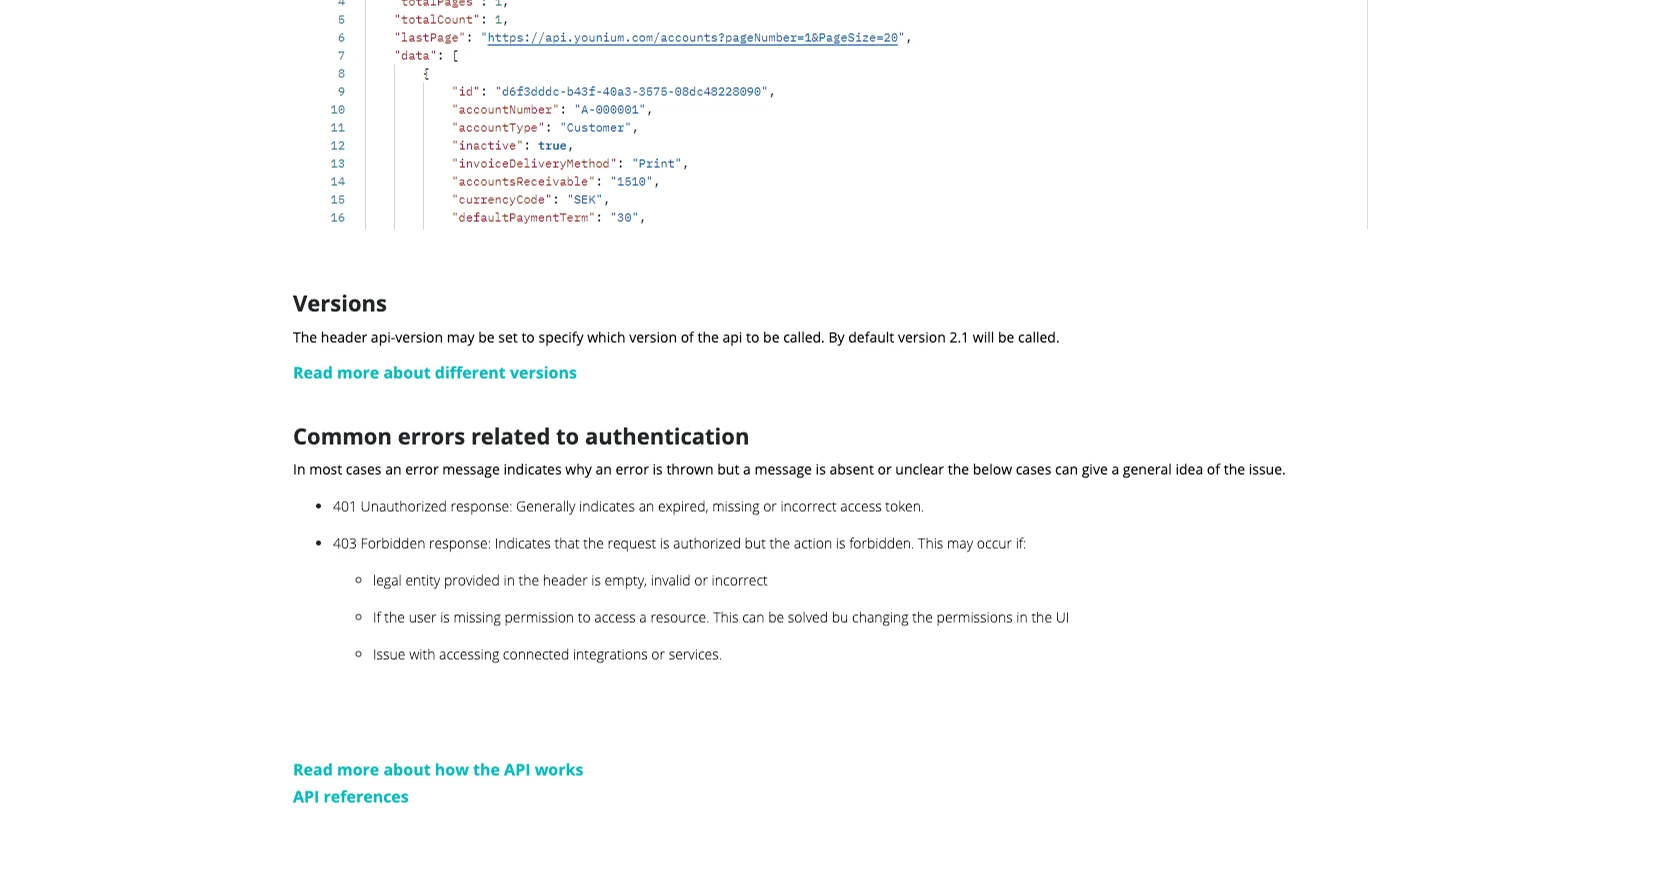
Handling Errors and Verifying API Requests
When making API calls, it's crucial to handle potential errors. The Younium API may return error codes such as 400 for bad requests or 401 for unauthorized access. Always check the response and handle errors gracefully in your application.
To verify that your requests are successful, you can log into your Younium sandbox account and check the invoices section to see if the changes reflect as expected.
For more detailed information on API calls, refer to the Younium API Documentation.
Conclusion and Best Practices for Using Younium API in PHP
Integrating with the Younium API using PHP can significantly enhance your financial operations by automating invoice management. By following the steps outlined in this guide, you can efficiently create and update invoices, ensuring accuracy and reducing manual errors.
Best Practices for Secure and Efficient Younium API Integration
- Secure Storage of Credentials: Always store your Client ID, Secret Key, and JWT tokens securely. Consider using environment variables or secure vaults to protect sensitive information.
- Handle Rate Limiting: Be mindful of the API's rate limits to avoid throttling. Implement exponential backoff strategies to handle retries gracefully.
- Data Standardization: Ensure that data fields are standardized and consistent across your application to prevent discrepancies in financial records.
- Error Handling: Implement robust error handling to manage API responses effectively. Log errors for debugging and provide user-friendly messages for better user experience.
Streamlining Integrations with Endgrate
While integrating with the Younium API can be straightforward, managing multiple integrations can become complex. Endgrate offers a unified API solution that simplifies integration processes across various platforms, including Younium. By leveraging Endgrate, you can save time and resources, allowing your team to focus on core product development.
Explore how Endgrate can enhance your integration strategy by visiting Endgrate and discover a seamless, intuitive integration experience for your business.
Read More

Ready to get started?
