How to Create Recipients with the Mailshake API in PHP
Introduction to Mailshake API Integration
Mailshake is a powerful sales engagement platform designed to streamline email outreach and follow-up processes. It offers a suite of tools that help businesses automate and personalize their email campaigns, making it easier to connect with prospects and leads.
Integrating with the Mailshake API allows developers to enhance their email marketing strategies by programmatically managing campaigns, recipients, and more. For example, a developer might want to create recipients using the Mailshake API in PHP to efficiently add new leads to a campaign, ensuring timely and personalized communication.
Setting Up Your Mailshake API Account for Testing
Before you can start integrating with the Mailshake API, you need to set up your account to obtain the necessary credentials. This involves creating an API key that will allow your PHP application to authenticate and interact with Mailshake's services.
Creating a Mailshake Account
If you don't have a Mailshake account, begin by signing up for a free trial or a subscription plan that suits your needs. Visit the Mailshake website and follow the registration process to create your account.
Generating Your Mailshake API Key
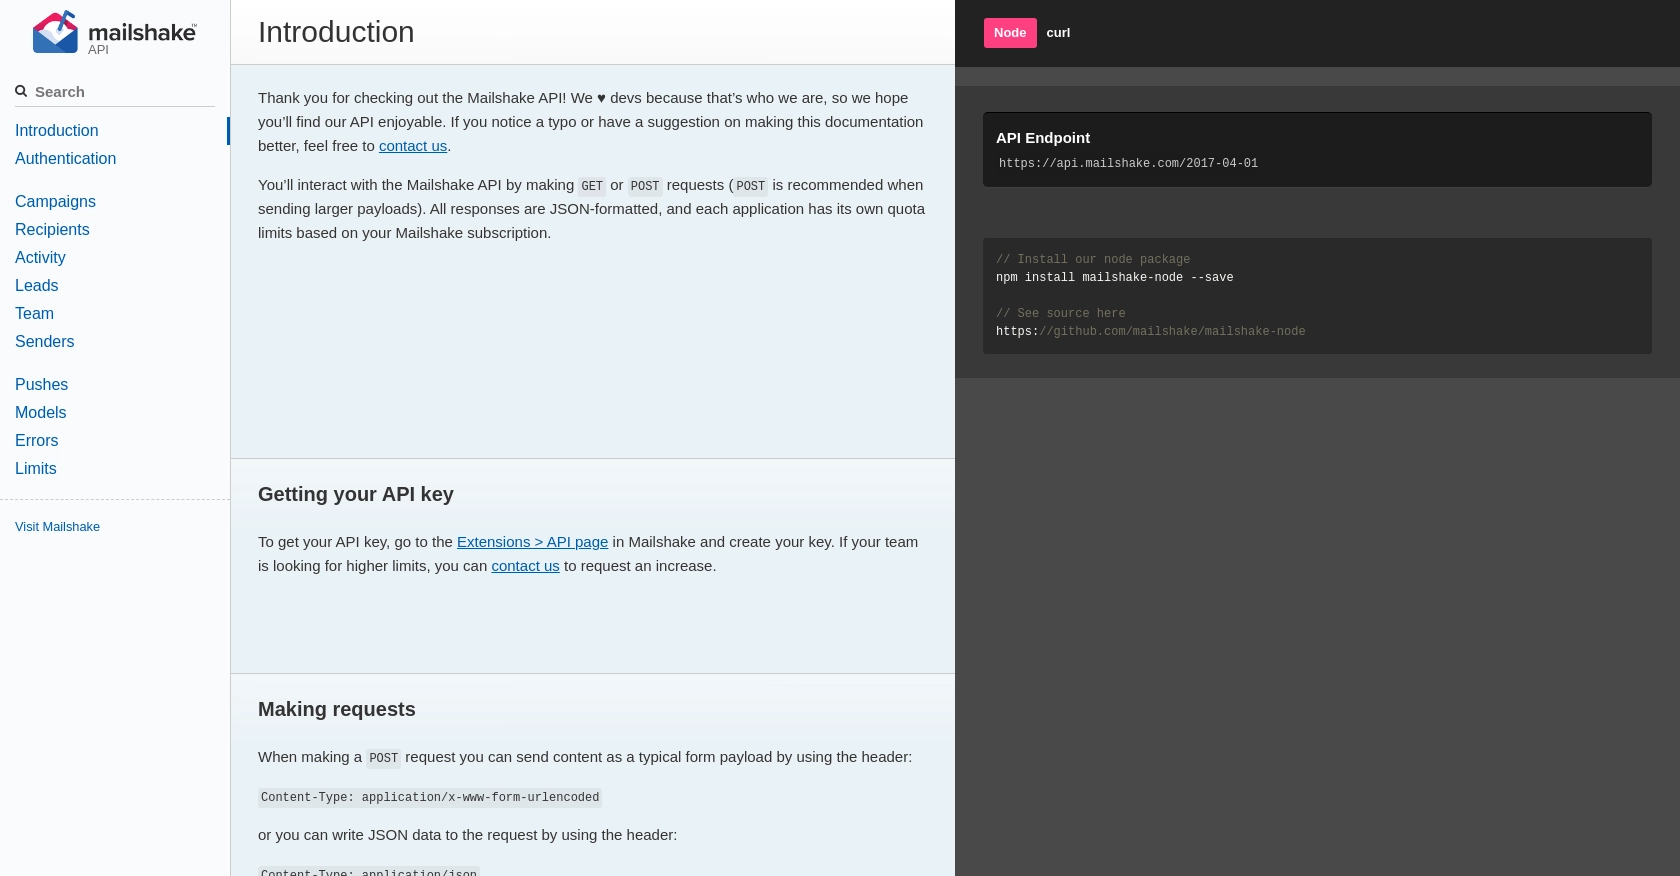
Once your account is set up, you need to generate an API key. This key will be used to authenticate your API requests.
- Log in to your Mailshake account.
- Navigate to the Extensions section in the dashboard.
- Click on API to access the API settings page.
- Select the option to create a new API key.
- Copy the generated API key and store it securely, as you will need it for authentication in your PHP application.
Understanding Mailshake API Authentication
Mailshake uses a simple API key-based authentication method. You can include your API key as a query string parameter, part of your JSON body, or via an HTTP Authorization header. Here’s an example of how to include it in a header:
Authorization: Basic [base-64 encoded version of your api key]Ensure you replace my-api-key with your actual API key.
Testing Your Mailshake API Connection
To verify that your API key is working correctly, you can test the connection by making a simple request to the Mailshake API. Use the following PHP code snippet to test your authentication:
$ch = curl_init();
curl_setopt($ch, CURLOPT_URL, "https://api.mailshake.com/2017-04-01/me");
curl_setopt($ch, CURLOPT_RETURNTRANSFER, 1);
curl_setopt($ch, CURLOPT_HTTPHEADER, array(
    'Authorization: Basic ' . base64_encode('my-api-key:')
));
$response = curl_exec($ch);
curl_close($ch);

echo $response;
If the connection is successful, you should receive a response containing information about the authenticated user. For more details on authentication, visit the Mailshake API documentation.
sbb-itb-96038d7
Making API Calls to Add Recipients with Mailshake in PHP
To create recipients using the Mailshake API in PHP, you'll need to make a POST request to the appropriate endpoint. This section will guide you through the process of setting up your PHP environment, writing the code to interact with the Mailshake API, and handling potential errors.
Setting Up PHP Environment for Mailshake API Integration
Before you begin, ensure that you have PHP installed on your system. You can check your PHP version by running the following command in your terminal:
php -vMake sure you have PHP version 7.0 or higher. Additionally, you'll need the cURL extension enabled in your PHP configuration to make HTTP requests.
Installing Necessary PHP Dependencies
For this tutorial, we'll use cURL to make HTTP requests. Ensure that the cURL extension is enabled in your php.ini file. You can verify this by running:
php -m | grep curlIf cURL is not listed, enable it by uncommenting the line extension=curl in your php.ini file and restarting your web server.
Writing PHP Code to Add Recipients to a Mailshake Campaign
Now, let's write the PHP code to add recipients to a Mailshake campaign. Create a new PHP file named add_recipients.php and add the following code:
<?php
$apiKey = 'your-api-key';
$campaignID = 1; // Replace with your actual campaign ID
$listOfEmails = '"John Doe" <john@doe.com>, "Jane Doe" <jane@doe.com>';

$ch = curl_init();
curl_setopt($ch, CURLOPT_URL, "https://api.mailshake.com/2017-04-01/recipients/add");
curl_setopt($ch, CURLOPT_RETURNTRANSFER, 1);
curl_setopt($ch, CURLOPT_POST, 1);
curl_setopt($ch, CURLOPT_POSTFIELDS, http_build_query([
    'campaignID' => $campaignID,
    'addAsNewList' => true,
    'listOfEmails' => $listOfEmails
]));
curl_setopt($ch, CURLOPT_HTTPHEADER, [
    'Authorization: Basic ' . base64_encode($apiKey . ':'),
    'Content-Type: application/x-www-form-urlencoded'
]);

$response = curl_exec($ch);
curl_close($ch);

echo $response;
?>
Replace your-api-key with your actual Mailshake API key. This script initializes a cURL session, sets the necessary options for the POST request, and sends the request to add recipients to the specified campaign.
Handling API Responses and Errors
After executing the request, the response will contain information about the operation's success or failure. You can handle errors by checking the response for error codes. Here’s an example of how you might handle errors:
<?php
$responseData = json_decode($response, true);

if (isset($responseData['error'])) {
    echo "Error: " . $responseData['error'];
} else {
    echo "Recipients added successfully!";
}
?>
Refer to the Mailshake API documentation for more details on error codes and handling.
Verifying Recipient Addition in Mailshake
To verify that the recipients have been successfully added, log in to your Mailshake account and navigate to the campaign's recipient list. You should see the newly added recipients listed there.
Conclusion and Best Practices for Using Mailshake API in PHP
Integrating with the Mailshake API using PHP allows developers to efficiently manage email campaigns and recipients, enhancing their outreach strategies. By following the steps outlined in this guide, you can successfully add recipients to your Mailshake campaigns, ensuring timely and personalized communication with your leads.
Best Practices for Secure and Efficient Mailshake API Integration
- Secure API Key Storage: Always store your API key securely, using environment variables or secure vaults, to prevent unauthorized access.
- Handle Rate Limits: Be mindful of Mailshake's rate limits and plan your API calls accordingly to avoid hitting the limit. Refer to the Mailshake API documentation for specific rate limit details.
- Data Standardization: Ensure that the data you send to Mailshake is standardized and validated to prevent errors and ensure smooth processing.
- Error Handling: Implement robust error handling in your application to gracefully manage API errors and provide informative feedback to users.
Leverage Endgrate for Streamlined API Integrations
While integrating with individual APIs like Mailshake can be beneficial, managing multiple integrations can become complex and time-consuming. Endgrate offers a unified API solution that simplifies the integration process, allowing you to focus on your core product development. By using Endgrate, you can build once for each use case and enjoy an intuitive integration experience for your customers.
Explore how Endgrate can help you save time and resources by visiting Endgrate today.
Read More

Ready to get started?
