How to Get Invoices with the Younium API in Javascript
Introduction to Younium API Integration
Younium is a comprehensive subscription management platform designed to streamline billing and invoicing processes for B2B SaaS companies. It offers robust tools for managing subscriptions, invoices, and financial operations, making it an essential solution for businesses looking to optimize their revenue management.
Integrating with the Younium API allows developers to automate and enhance financial workflows, such as retrieving invoice data for analysis or reporting purposes. For example, a developer might use the Younium API to fetch invoices and integrate them into a custom dashboard, providing real-time insights into billing operations.
Setting Up Your Younium Sandbox Account for API Integration
Before you can start interacting with the Younium API, you'll need to set up a sandbox account. This environment allows you to test API calls without affecting your production data, ensuring a safe space for development and experimentation.
Create a Younium Sandbox Account
To begin, you need to create a sandbox account on Younium:
- Visit the Younium Developer Portal.
- Sign up for a sandbox account by following the on-screen instructions.
- Once registered, log in to your sandbox environment to access the dashboard.
Generate API Token and Client Credentials
Younium uses JWT access tokens for API authentication. Follow these steps to generate the necessary credentials:
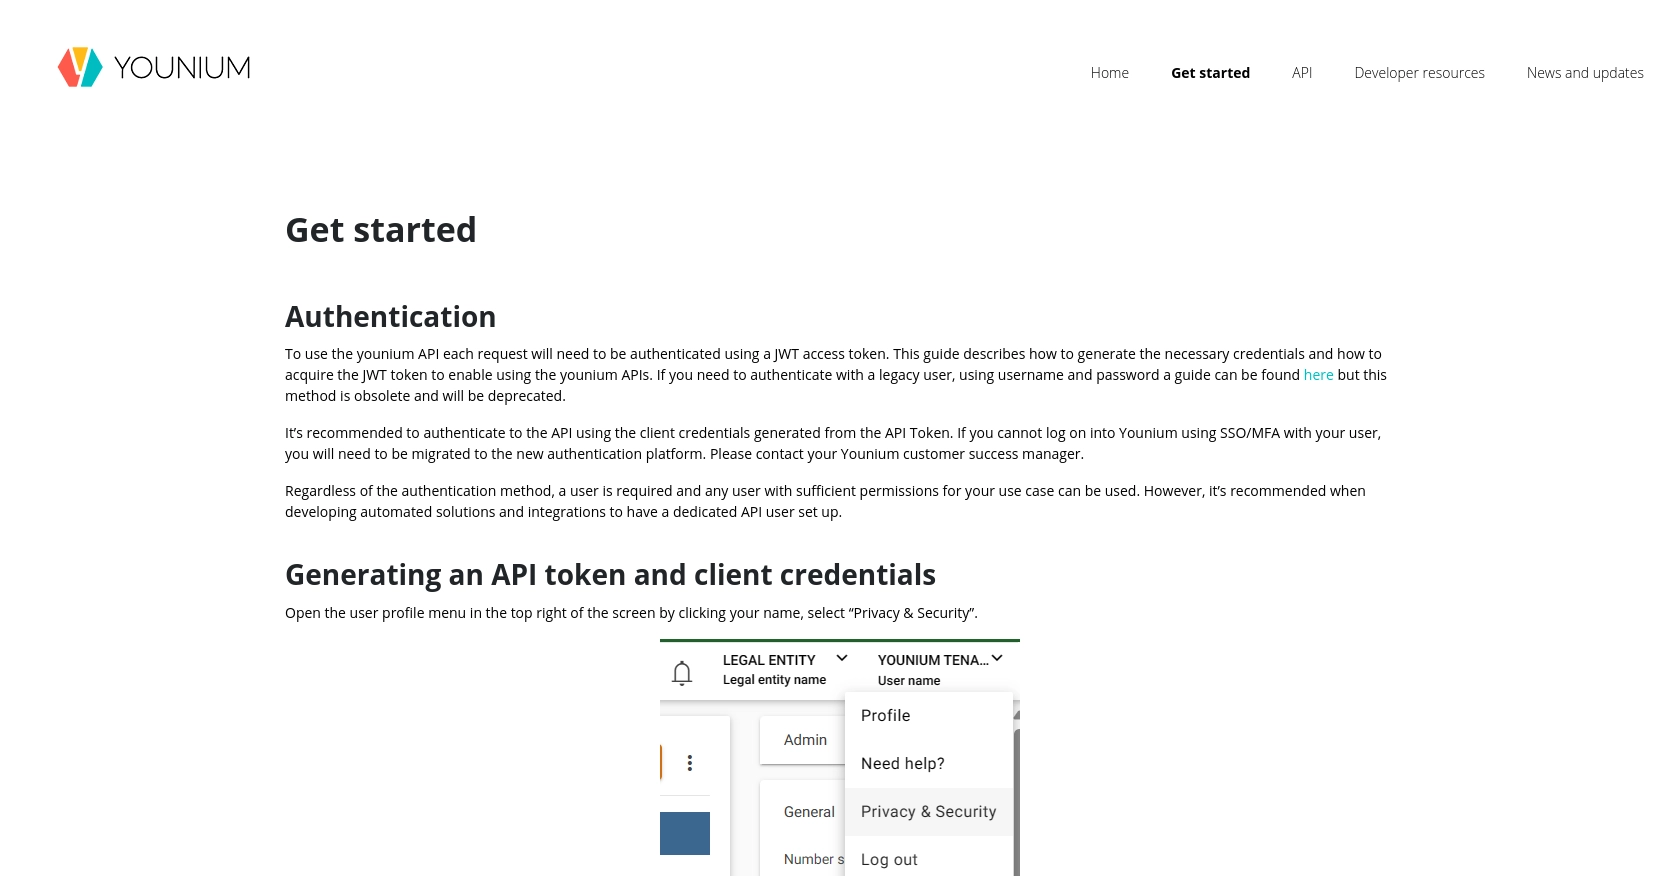
- In the sandbox dashboard, click on your name in the top right corner to open the user profile menu.
- Select “Privacy & Security” from the dropdown menu.
- Navigate to “Personal Tokens” on the left panel and click “Generate Token”.
- Provide a relevant description for the token and click “Create”.
- Copy the generated Client ID and Secret Key. These credentials will not be visible again, so ensure they are stored securely.
Acquire a JWT Access Token
With your client credentials ready, you can now acquire a JWT access token:
// Example POST request to acquire JWT token
const fetch = require('node-fetch');

const getToken = async () => {
    const response = await fetch('https://api.sandbox.younium.com/auth/token', {
        method: 'POST',
        headers: {
            'Content-Type': 'application/json'
        },
        body: JSON.stringify({
            clientId: 'Your_Client_ID',
            secret: 'Your_Secret_Key'
        })
    });

    const data = await response.json();
    console.log(data.accessToken);
};

getToken();
Replace Your_Client_ID and Your_Secret_Key with the credentials you generated earlier. If successful, this request will return a JWT access token, which is valid for 24 hours.
Handling Authentication Errors
If you encounter errors during authentication, refer to the following common issues:
- 401 Unauthorized: This indicates an expired, missing, or incorrect access token.
- 403 Forbidden: This occurs if the legal entity specified is invalid or if the user lacks necessary permissions.
For more details, consult the Younium Authentication Documentation.
sbb-itb-96038d7
Making API Calls to Retrieve Invoices with Younium API in JavaScript
Once you have your JWT access token, you can proceed to make API calls to the Younium API to retrieve invoices. This section will guide you through the process of setting up your JavaScript environment and executing the necessary API call to fetch invoice data.
Setting Up Your JavaScript Environment for Younium API Integration
Before making API calls, ensure you have the following prerequisites installed on your machine:
- Node.js (version 14 or later)
- npm (Node Package Manager)
To install the required dependencies, open your terminal and run the following command:
npm install node-fetchThis will install the node-fetch library, which is used to make HTTP requests in Node.js.
Executing the API Call to Fetch Invoices from Younium
With your environment set up, you can now write the JavaScript code to fetch invoices from the Younium API. Create a file named get_invoices.js and add the following code:
const fetch = require('node-fetch');

const getInvoices = async () => {
    const response = await fetch('https://api.sandbox.younium.com/invoices', {
        method: 'GET',
        headers: {
            'Authorization': 'Bearer Your_JWT_Token',
            'Content-Type': 'application/json',
            'api-version': '2.1'
        }
    });

    if (response.ok) {
        const data = await response.json();
        console.log(data);
    } else {
        console.error('Error fetching invoices:', response.status, response.statusText);
    }
};

getInvoices();
Replace Your_JWT_Token with the JWT access token you acquired earlier. This script sends a GET request to the Younium API's invoice endpoint, using the token for authentication.
Understanding the API Response and Handling Errors
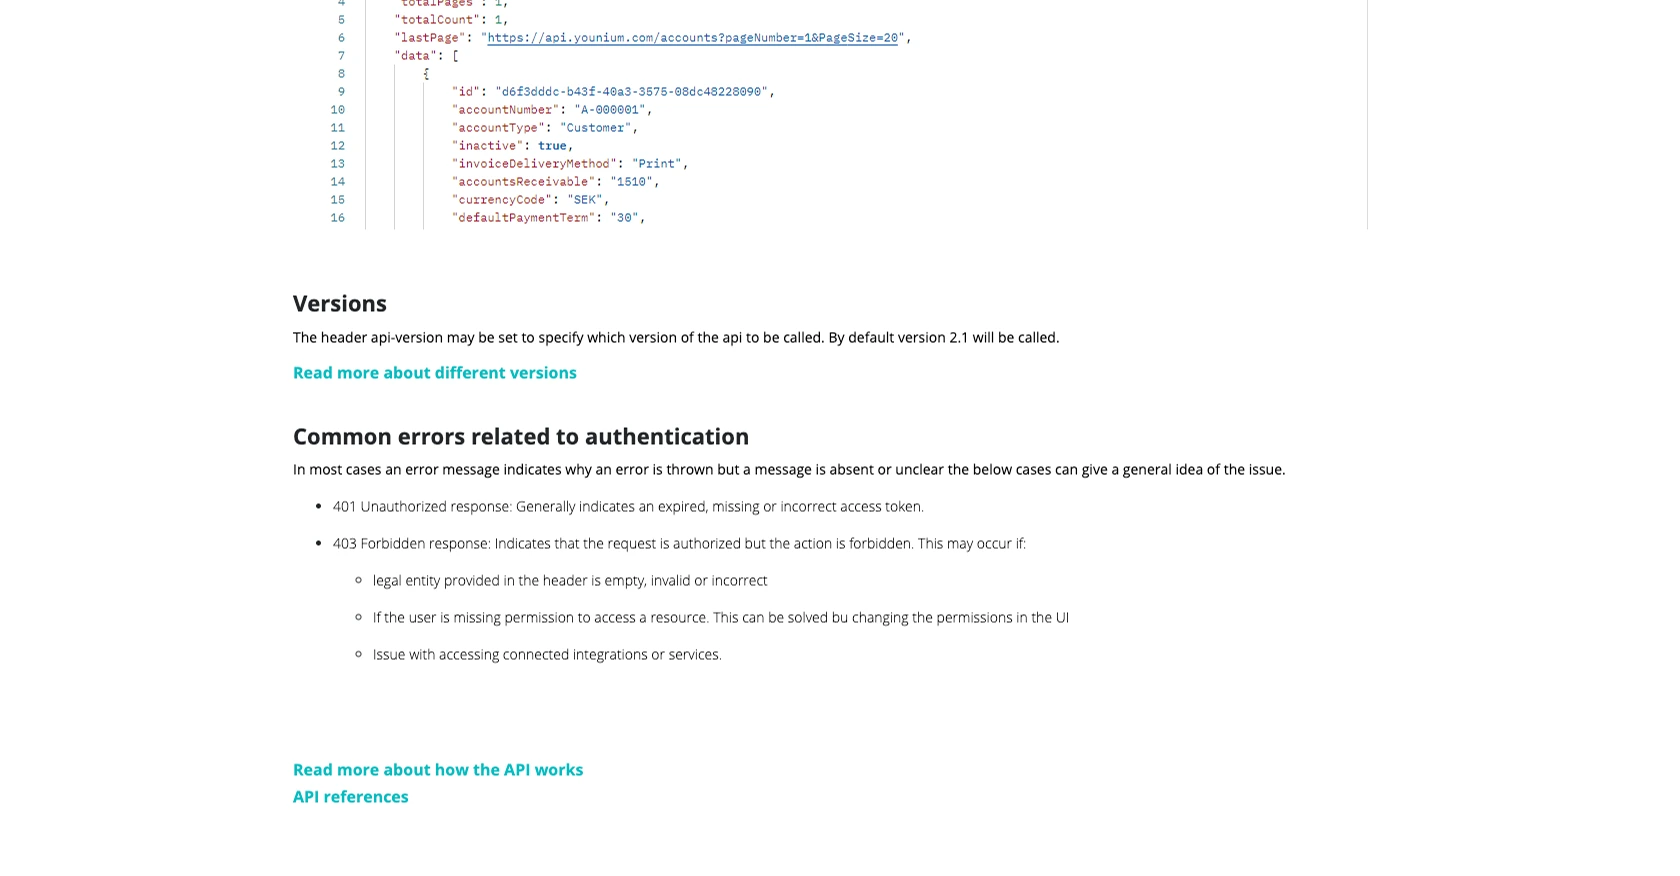
Upon successful execution, the API will return a JSON response containing the invoice data. You can verify the request's success by checking the response status and reviewing the returned data.
If the request fails, the script will log an error message with the status code and status text. Common error codes include:
- 400 Bad Request: Indicates a malformed request.
- 401 Unauthorized: Suggests an expired or invalid JWT token.
- 403 Forbidden: Occurs if the specified legal entity is incorrect or if permissions are insufficient.
For more information on error handling, refer to the Younium API Documentation.
Conclusion and Best Practices for Younium API Integration
Integrating with the Younium API using JavaScript provides a powerful way to automate and streamline your billing and invoicing processes. By following the steps outlined in this guide, you can efficiently retrieve invoice data and incorporate it into your applications for enhanced financial management.
Best Practices for Secure and Efficient Younium API Usage
- Secure Storage of Credentials: Always store your Client ID, Secret Key, and JWT tokens securely. Consider using environment variables or secure vaults to protect sensitive information.
- Token Management: Remember that JWT tokens are valid for 24 hours. Implement a mechanism to refresh tokens automatically to ensure uninterrupted API access.
- Rate Limiting Awareness: Be mindful of any rate limits imposed by the Younium API to avoid throttling. Implement retry logic with exponential backoff for handling rate limit errors gracefully.
- Data Standardization: When integrating invoice data into other systems, ensure consistent data formats and structures to maintain data integrity and compatibility.
Enhance Your Integration Strategy with Endgrate
While building custom integrations with the Younium API can be rewarding, it can also be time-consuming and complex. Endgrate offers a streamlined solution by providing a unified API endpoint that connects to multiple platforms, including Younium.
By leveraging Endgrate, you can save time and resources, allowing you to focus on your core product development. With Endgrate, you build once for each use case and enjoy an intuitive integration experience for your customers.
Explore how Endgrate can simplify your integration needs by visiting Endgrate's website and discover the benefits of outsourcing your integration efforts.
Read More

Ready to get started?
