Using the Applied Epic API to Get People (with Javascript examples)
Introduction to Applied Epic API
Applied Epic is a comprehensive insurance management platform that offers a wide range of tools for agencies to streamline their operations. It provides capabilities for managing customer relationships, policies, claims, and more, all within a single, integrated system.
Developers may want to integrate with the Applied Epic API to access and manage customer data efficiently. For example, using the API to retrieve a list of people associated with an account can help automate customer relationship management tasks, such as updating contact information or sending personalized communications.
Setting Up Your Applied Epic Test/Sandbox Account
Before you can start interacting with the Applied Epic API, you'll need to set up a test or sandbox account. This environment allows developers to safely experiment with API calls without affecting live data. Follow these steps to get started:
Sign Up for an Applied Epic Developer Account
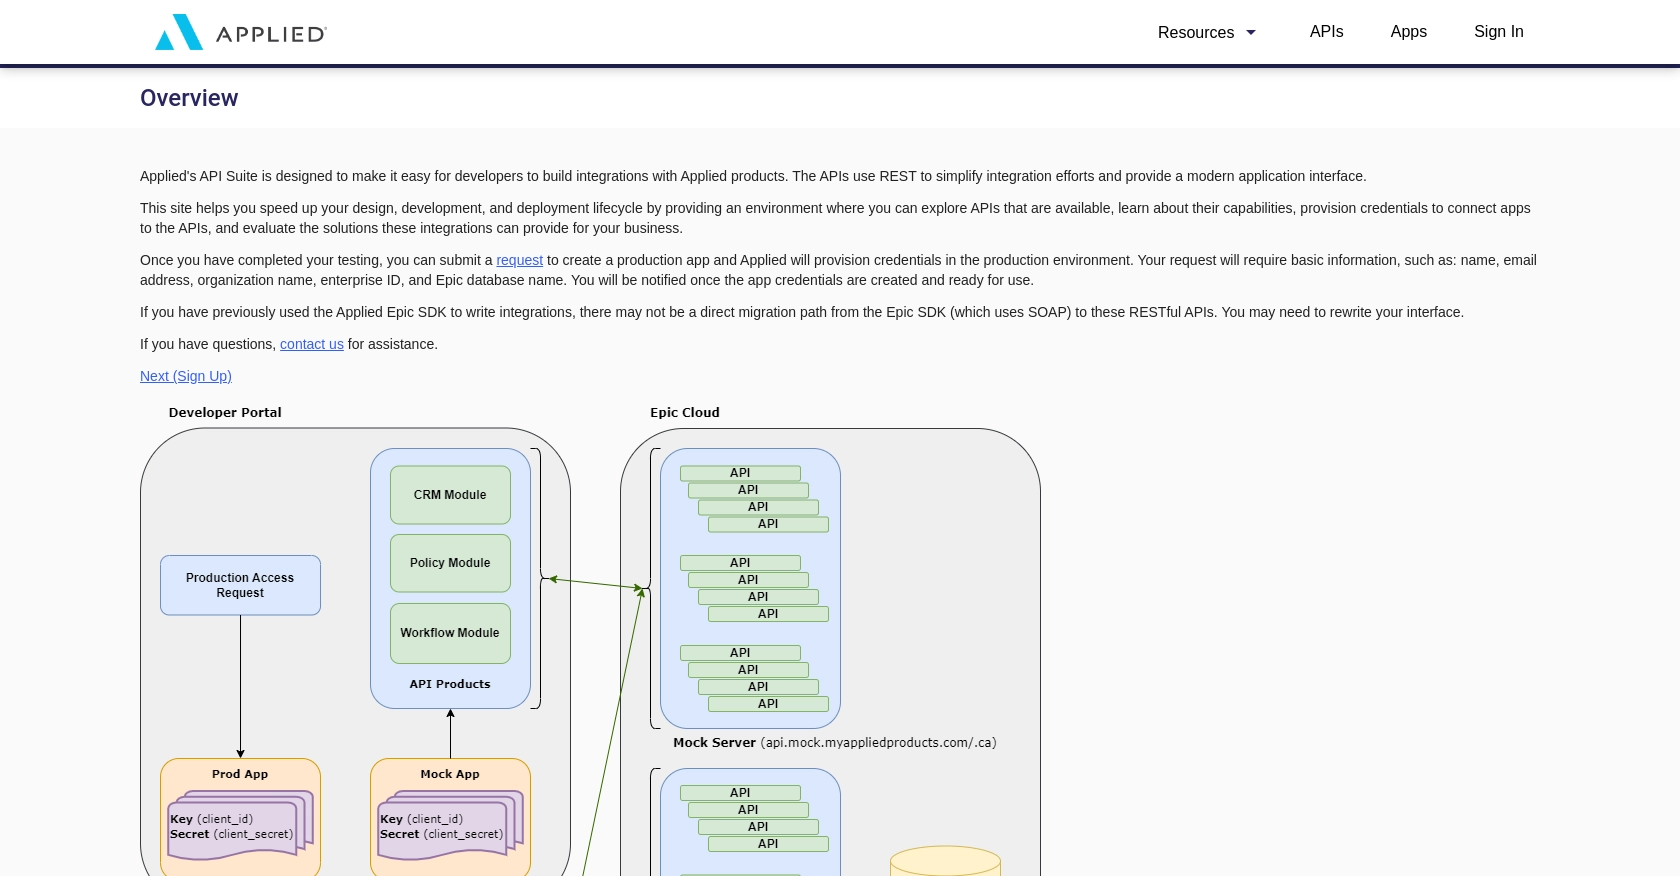
To access the Applied Epic API, you first need to create a developer account. Visit the Applied Epic Developer Portal and follow the instructions to sign up. Once registered, you'll gain access to the sandbox environment where you can test your API integrations.
Creating an Application for API Access
After setting up your developer account, the next step is to create an application within the Applied Epic platform. This application will provide you with the necessary credentials to authenticate your API requests.
- Log in to your Applied Epic Developer account.
- Navigate to the "Applications" section and click on "Create New Application."
- Fill in the required details, such as application name and description.
- Once your application is created, note down the client ID and client secret. These will be used for authentication.
Authenticating with Custom Authentication
The Applied Epic API uses a custom authentication method. To authenticate your requests, you'll need to use the client ID and client secret obtained from your application setup.
Here's a basic example of how to set up authentication in JavaScript:
// Example of setting up authentication headers
const clientId = 'your_client_id';
const clientSecret = 'your_client_secret';

const headers = {
    'Authorization': `Basic ${btoa(clientId + ':' + clientSecret)}`,
    'Content-Type': 'application/json'
};
Replace your_client_id and your_client_secret with the actual values from your Applied Epic application.
Testing Your API Connection
With your sandbox account and application set up, you can now test your API connection. Use the following endpoint to retrieve a list of people:
fetch('https://api.myappliedproducts.com/crm/v1/people', {
    method: 'GET',
    headers: headers
})
.then(response => response.json())
.then(data => console.log(data))
.catch(error => console.error('Error:', error));
This code snippet demonstrates how to make a GET request to the Applied Epic API to retrieve people data. Ensure your headers include the correct authentication details.
sbb-itb-96038d7
Making API Calls to Retrieve People Data from Applied Epic
To effectively interact with the Applied Epic API using JavaScript, you'll need to ensure your development environment is set up correctly. This section will guide you through the process of making API calls to retrieve people data, including the necessary JavaScript setup and handling potential errors.
Setting Up Your JavaScript Environment
Before making API calls, confirm that your JavaScript environment is ready. Ensure you have a modern browser or a Node.js environment that supports the Fetch API. This tutorial assumes you are familiar with JavaScript ES6 syntax.
Fetching People Data from Applied Epic API
With your environment ready, you can now proceed to make a GET request to the Applied Epic API to retrieve a list of people associated with an account. Below is a step-by-step guide:
// Define the API endpoint and authentication headers
const endpoint = 'https://api.myappliedproducts.com/crm/v1/people';
const clientId = 'your_client_id';
const clientSecret = 'your_client_secret';

const headers = {
    'Authorization': `Basic ${btoa(clientId + ':' + clientSecret)}`,
    'Content-Type': 'application/json'
};

// Make the GET request
fetch(endpoint, {
    method: 'GET',
    headers: headers
})
.then(response => {
    if (!response.ok) {
        throw new Error(`HTTP error! Status: ${response.status}`);
    }
    return response.json();
})
.then(data => {
    console.log('People Data:', data);
})
.catch(error => console.error('Error fetching people data:', error));
Replace your_client_id and your_client_secret with the credentials obtained from your Applied Epic application setup. This code snippet demonstrates how to authenticate and fetch data using the Fetch API.
Understanding the API Response
Upon a successful request, the API will return a JSON object containing the people data. Here is an example of what the response might look like:
{
    "total": 2000,
    "_embedded": {
        "people": [
            {
                "id": "00000000-0000-0000-0000-000000000000",
                "prefix": "Ms.",
                "firstName": "Alice",
                "lastName": "Smith",
                "dateOfBirth": "2023-05-07",
                "version": 1
            }
            // Additional people objects...
        ]
    }
}
The response includes a list of people with attributes such as id, firstName, lastName, and dateOfBirth. You can iterate over this data to perform further operations or display it in your application.
Handling Errors and Status Codes
When making API calls, it's crucial to handle potential errors gracefully. The Applied Epic API may return various status codes indicating the result of your request:
- 200 OK: The request was successful, and the data is returned.
- 400 Bad Request: The request was malformed or contains invalid parameters.
- 401 Unauthorized: Authentication failed due to invalid credentials.
- 403 Forbidden: The request is not allowed, possibly due to insufficient permissions.
Ensure your application checks for these status codes and handles them appropriately, such as displaying error messages or retrying the request.
Conclusion and Best Practices for Using the Applied Epic API
Integrating with the Applied Epic API allows developers to efficiently manage customer data and automate various tasks within the insurance management platform. By following the steps outlined in this guide, you can successfully authenticate and retrieve people data using JavaScript.
Best Practices for Secure and Efficient API Integration
- Securely Store Credentials: Always store your client ID and client secret securely, using environment variables or secure vaults, to prevent unauthorized access.
- Handle Rate Limiting: Be mindful of any rate limits imposed by the API. Implement retry logic with exponential backoff to handle rate limit errors gracefully.
- Data Transformation: Standardize and transform data fields as needed to ensure consistency across your application and other integrated systems.
- Error Handling: Implement robust error handling to manage different status codes and provide meaningful feedback to users or logs for debugging.
Streamlining API Integrations with Endgrate
While integrating with the Applied Epic API can enhance your application's capabilities, managing multiple integrations can be complex and time-consuming. Endgrate offers a unified API solution that simplifies the integration process across various platforms, including Applied Epic.
By leveraging Endgrate, you can save time and resources, allowing your team to focus on core product development. With a single API endpoint, you can manage multiple integrations efficiently, providing a seamless experience for your customers.
Explore how Endgrate can transform your integration strategy by visiting Endgrate's website and discover the benefits of a streamlined, intuitive integration experience.
Read More

Ready to get started?
