Using the Avalara API to Create Invoices in Python
Introduction to Avalara API for Invoice Creation
Avalara is a comprehensive tax compliance solution that simplifies the complexities of tax calculations and compliance for businesses of all sizes. It offers a cloud-based platform that automates tax calculations, returns filing, and exemption certificate management, ensuring businesses remain compliant with ever-changing tax regulations.
Integrating with Avalara's API allows developers to automate the creation of invoices, streamlining the billing process and ensuring accurate tax calculations. For example, a developer can use the Avalara API to generate invoices directly from a sales platform, automatically applying the correct tax rates based on the customer's location and transaction details.
This article will guide you through using Python to interact with the Avalara API, focusing on creating invoices efficiently and accurately.
Setting Up Your Avalara Test/Sandbox Account for API Integration
Before you can start creating invoices using the Avalara API, you need to set up a test or sandbox account. This allows you to safely experiment with the API without affecting live data. Avalara provides a sandbox environment that mimics the production environment, enabling developers to test their integrations thoroughly.
Creating an Avalara Sandbox Account
To begin, you'll need to create a sandbox account on the Avalara developer portal. Follow these steps to get started:
- Visit the Avalara Developer Portal.
- Click on the "Sign Up" button to create a new account. If you already have an account, simply log in.
- Once logged in, navigate to the "Sandbox" section to create your sandbox environment.
- Follow the prompts to set up your sandbox account, ensuring you have access to the necessary API features for invoice creation.
Generating API Credentials for Avalara Integration
With your sandbox account ready, the next step is to generate the API credentials needed for authentication. Avalara uses Basic HTTP Authentication, which requires a username and password encoded in Base64. Here's how to obtain your credentials:
- Log in to your Avalara sandbox account.
- Navigate to the "Settings" section and select "License Key."
- Click on "Reset License Key" to generate a new key. Note that this action will invalidate any previous keys.
- Record your account ID and the newly generated license key. These will be used to authenticate your API requests.
Encoding Your Avalara API Credentials
To use Basic HTTP Authentication, you need to encode your account ID and license key in Base64. Follow these steps:
import base64

# Replace with your account ID and license key
account_id = "your_account_id"
license_key = "your_license_key"

# Concatenate account ID and license key with a colon
credentials = f"{account_id}:{license_key}"

# Encode the credentials in Base64
encoded_credentials = base64.b64encode(credentials.encode()).decode()

print(f"Basic {encoded_credentials}")
Use the output from the above code as your authorization header in API requests.
For more detailed information on Avalara authentication, refer to the Avalara Authentication Documentation.
sbb-itb-96038d7
Making API Calls to Avalara for Invoice Creation Using Python
With your Avalara sandbox account set up and API credentials ready, you can now proceed to make API calls to create invoices. This section will guide you through the process of using Python to interact with Avalara's API, focusing on creating transactions that represent invoices.
Setting Up Your Python Environment for Avalara API Integration
Before making API calls, ensure you have Python installed on your machine. This tutorial uses Python 3.11.1. Additionally, you'll need the requests library to handle HTTP requests. Install it using the following command:
pip install requests
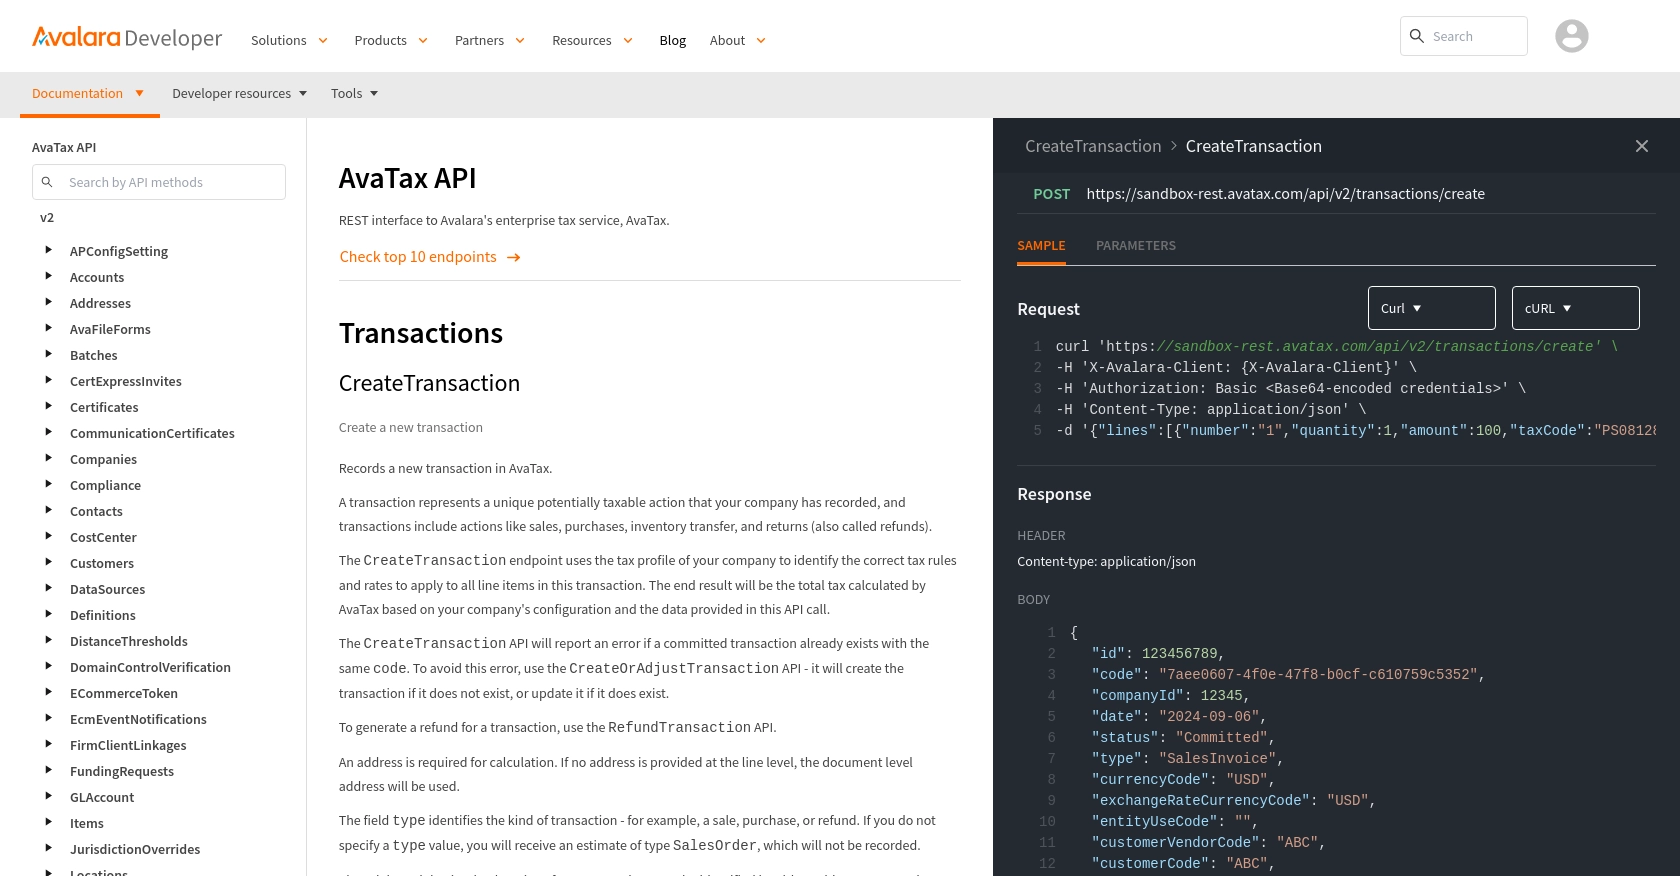
Creating an Invoice with Avalara's CreateTransaction API
To create an invoice, you'll use the CreateTransaction endpoint of Avalara's API. This endpoint records a new transaction, applying the correct tax rules and rates based on the provided data.
Here's a sample Python script to create an invoice:
import requests
import base64

# Replace with your account ID and license key
account_id = "your_account_id"
license_key = "your_license_key"

# Encode credentials in Base64
credentials = f"{account_id}:{license_key}"
encoded_credentials = base64.b64encode(credentials.encode()).decode()

# Set the API endpoint and headers
url = "https://sandbox-rest.avatax.com/api/v2/transactions/create"
headers = {
    "Authorization": f"Basic {encoded_credentials}",
    "Content-Type": "application/json"
}

# Define the transaction data
transaction_data = {
    "lines": [
        {
            "number": "1",
            "quantity": 1,
            "amount": 100,
            "taxCode": "PS081282",
            "itemCode": "Y0001",
            "description": "Yarn"
        }
    ],
    "type": "SalesInvoice",
    "companyCode": "DEFAULT",
    "date": "2024-09-06",
    "customerCode": "ABC",
    "purchaseOrderNo": "2024-09-06-001",
    "addresses": {
        "singleLocation": {
            "line1": "2000 Main Street",
            "city": "Irvine",
            "region": "CA",
            "country": "US",
            "postalCode": "92614"
        }
    },
    "commit": True,
    "currencyCode": "USD",
    "description": "Yarn"
}

# Make the POST request to create the transaction
response = requests.post(url, headers=headers, json=transaction_data)

# Check if the request was successful
if response.status_code == 201:
    print("Invoice Created Successfully")
    print(response.json())
else:
    print("Failed to Create Invoice")
    print(response.json())
Verifying the Success of Your API Call
After running the script, you should see a response indicating the success of the invoice creation. The response will include details of the transaction, such as the total tax calculated and the transaction ID. You can verify the creation of the invoice by checking the Avalara sandbox environment.
Handling Errors and Common Error Codes
If the API call fails, the response will contain error details. Common error codes include:
- 400 Bad Request: The request was malformed. Check your JSON structure and required fields.
- 401 Unauthorized: Authentication failed. Verify your credentials.
- 500 Internal Server Error: An error occurred on Avalara's server. Try again later.
For more information on handling errors, refer to the Avalara API Documentation.
Best Practices for Using Avalara API in Python
When integrating with Avalara's API, it's essential to follow best practices to ensure efficient and secure operations. Here are some recommendations:
- Securely Store Credentials: Always store your Avalara account ID and license key securely. Avoid hardcoding them in your scripts. Consider using environment variables or a secure vault.
- Handle Rate Limiting: Avalara's API may have rate limits. Implement logic to handle HTTP 429 responses by retrying requests after a delay. Check Avalara's documentation for specific rate limit details.
- Data Validation: Ensure all data sent to the API is validated and sanitized to prevent errors and maintain data integrity.
- Monitor API Usage: Regularly monitor your API usage and logs to identify any unusual patterns or errors.
- Keep Libraries Updated: Ensure that your Python and library versions are up-to-date to benefit from the latest features and security patches.
Streamlining Integrations with Endgrate
Developing and maintaining integrations can be time-consuming and resource-intensive. Endgrate offers a solution by providing a unified API endpoint that connects to multiple platforms, including Avalara. This allows you to build once for each use case, saving time and capital.
With Endgrate, you can focus on your core product while outsourcing integrations, ensuring an easy and intuitive experience for your customers. Explore how Endgrate can simplify your integration needs by visiting Endgrate.
Read More

Ready to get started?
