Using the Brevo API to Get Contacts (with Javascript examples)

Introduction to Brevo API
Brevo is a versatile platform that offers a comprehensive suite of tools for managing email marketing, SMS campaigns, and contact management. It is designed to help businesses streamline their communication efforts and enhance customer engagement through personalized and automated messaging solutions.
Integrating with Brevo's API allows developers to efficiently manage contacts, automate marketing workflows, and access detailed analytics. For example, a developer might use the Brevo API to retrieve a list of contacts and segment them based on specific attributes, enabling targeted marketing campaigns that improve conversion rates.
This article will guide you through using JavaScript to interact with the Brevo API, specifically focusing on retrieving contacts. By following this tutorial, you'll learn how to set up your environment, authenticate requests, and handle API responses effectively.
Setting Up Your Brevo Account for API Access
Before you can start using the Brevo API to manage contacts, you'll need to set up your Brevo account and obtain an API key. This key will allow you to authenticate your requests and interact with Brevo's services programmatically.
Creating a Brevo Account
If you don't already have a Brevo account, you can sign up for free on the Brevo signup page. Follow the instructions to create your account and confirm your email address.
Generating an API Key in Brevo
Once your account is set up, follow these steps to generate an API key:
- Log in to your Brevo account.
- Click on your profile name at the top-right corner of the dashboard.
- Select SMTP & API from the dropdown menu.
- Navigate to the API keys tab.
- Click on Generate a new API key.
- Name your API key for easy identification.
- Click Generate and copy the API key to a secure location.
This API key will be used to authenticate your requests to the Brevo API. Ensure you keep it safe and do not share it publicly.
For more detailed instructions, you can refer to the official Brevo documentation on getting started with Brevo.

sbb-itb-96038d7
Making API Calls to Retrieve Contacts from Brevo Using JavaScript
To interact with the Brevo API and retrieve contacts using JavaScript, you'll need to set up your development environment and write code that makes HTTP requests to the API endpoints. This section will guide you through the process, including setting up the necessary dependencies and handling API responses.
Setting Up Your JavaScript Environment for Brevo API Integration
Before making API calls, ensure you have Node.js installed on your machine. You can download it from the official Node.js website. Node.js will allow you to run JavaScript code outside of a browser environment.
Next, initialize a new Node.js project and install the required dependencies by running the following commands in your terminal:
mkdir brevo-api-integration
cd brevo-api-integration
npm init -y
npm install sib-api-v3-sdk
Writing JavaScript Code to Fetch Contacts from Brevo
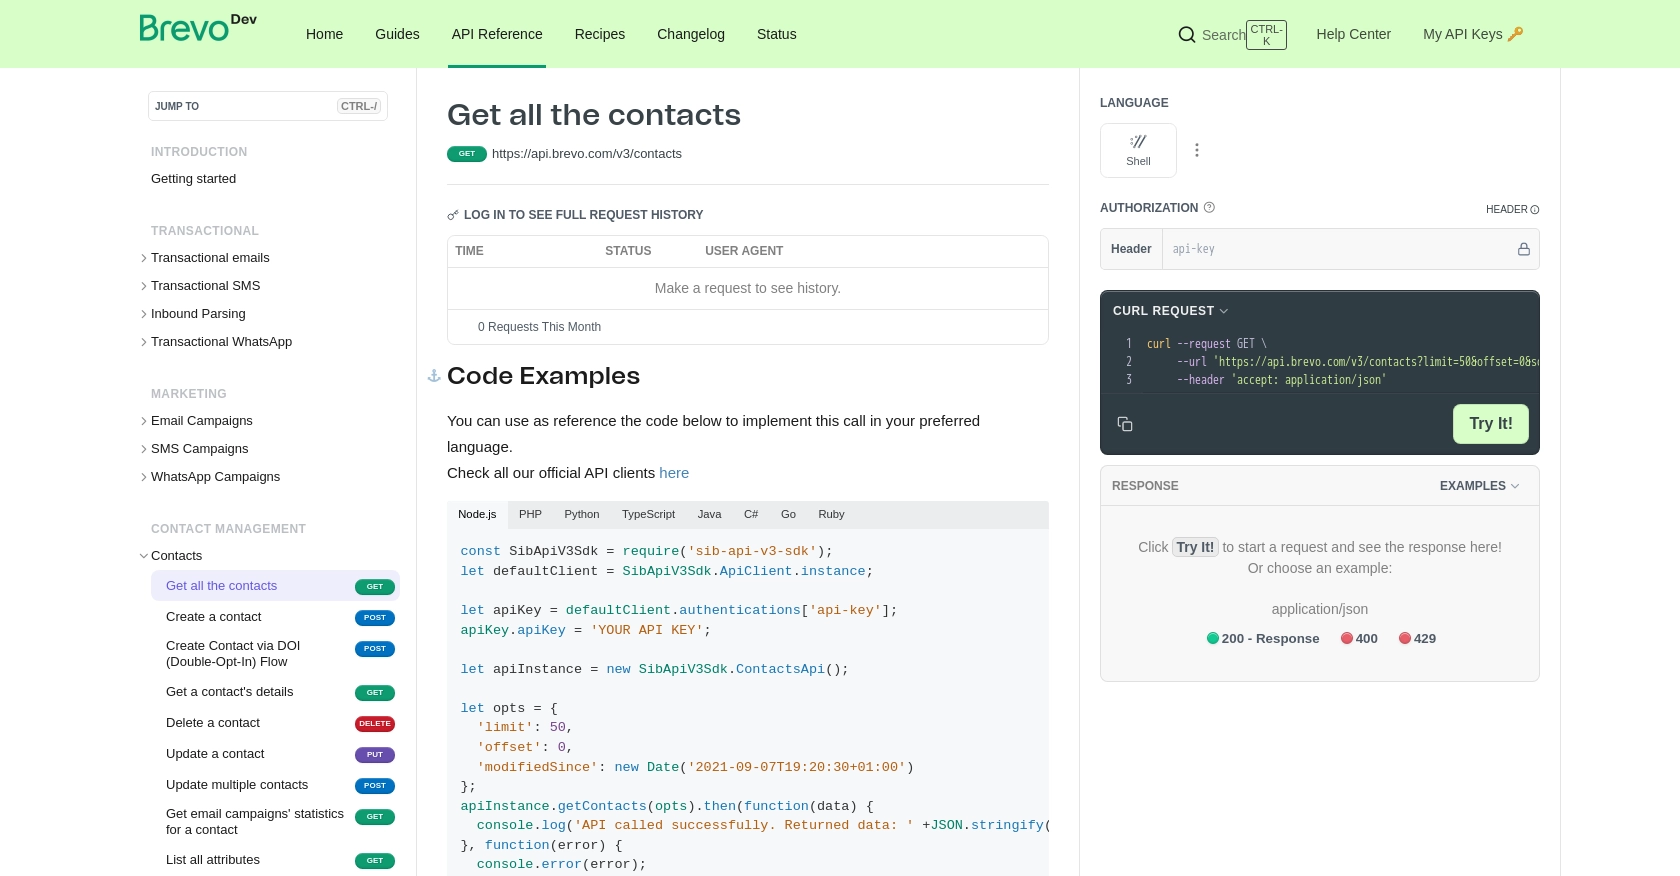
With your environment set up, you can now write the JavaScript code to interact with the Brevo API. Create a new file named getContacts.js and add the following code:
const SibApiV3Sdk = require('sib-api-v3-sdk');
let defaultClient = SibApiV3Sdk.ApiClient.instance;

// Configure API key authorization
let apiKey = defaultClient.authentications['api-key'];
apiKey.apiKey = 'YOUR_API_KEY';

// Create an instance of the Contacts API
let apiInstance = new SibApiV3Sdk.ContactsApi();

// Set options for the API call
let opts = {
  'limit': 50,
  'offset': 0,
  'modifiedSince': new Date('2021-09-07T19:20:30+01:00')
};

// Make the API call to get contacts
apiInstance.getContacts(opts).then(function(data) {
  console.log('API called successfully. Returned data: ' + JSON.stringify(data));
}, function(error) {
  console.error(error);
});
Replace 'YOUR_API_KEY' with the API key you generated earlier. This code sets up the API client, configures the API key for authentication, and makes a request to retrieve contacts from Brevo.
Running the JavaScript Code and Handling Responses
To execute the code and fetch contacts, run the following command in your terminal:
node getContacts.js
If the request is successful, you should see the returned contact data printed in the console. This data includes details such as email addresses, contact IDs, and other attributes.
In case of errors, the code will log the error message to the console. Common error codes include:
- 400 Bad Request: The request was invalid. Check your parameters.
- 401 Unauthorized: The API key is missing or incorrect.
- 429 Too Many Requests: You have exceeded the API rate limit.
For more information on handling errors, refer to the Brevo API documentation.

Conclusion and Best Practices for Using Brevo API with JavaScript
Integrating with the Brevo API using JavaScript provides a powerful way to manage contacts and streamline your marketing efforts. By following the steps outlined in this guide, you can efficiently retrieve and handle contact data, enabling more targeted and effective marketing campaigns.
Best Practices for Secure and Efficient Brevo API Integration
- Secure API Key Storage: Always store your API key securely and avoid hardcoding it in your source files. Consider using environment variables or secure vaults to manage sensitive information.
- Handle Rate Limits: Be mindful of Brevo's API rate limits to avoid disruptions. Implement retry logic with exponential backoff to handle
429 Too Many Requestserrors gracefully. - Data Transformation: Standardize and transform data fields as needed to ensure consistency across your applications and integrations.
- Error Handling: Implement robust error handling to manage API response errors effectively. Log errors for monitoring and debugging purposes.
Enhancing Your Integration Strategy with Endgrate
While integrating with Brevo is a great step towards optimizing your marketing workflows, managing multiple integrations can become complex and time-consuming. This is where Endgrate can help.
Endgrate offers a unified API endpoint that simplifies integration processes, allowing you to focus on your core product. By using Endgrate, you can build once for each use case and leverage an intuitive integration experience for your customers. Visit Endgrate to learn more about how you can streamline your integration strategy and save valuable time and resources.
Read More
Ready to get started?
