Using the Clickup API to Get Tasks (with Javascript examples)
Introduction to ClickUp API Integration
ClickUp is a versatile project management platform that offers a wide range of features to help teams organize, track, and manage their work efficiently. With capabilities such as task management, time tracking, and goal setting, ClickUp is designed to enhance productivity and collaboration across various industries.
Integrating with ClickUp's API allows developers to automate and streamline workflows by accessing and managing tasks programmatically. For example, a developer might use the ClickUp API to retrieve tasks from a specific project list and display them in a custom dashboard, enabling team members to monitor progress and deadlines more effectively.
Setting Up Your ClickUp Test Account for API Integration
Before you begin interacting with the ClickUp API, it's essential to set up a test or sandbox account. This allows you to safely experiment with API calls without affecting your live data. ClickUp provides a straightforward way to create a personal API token or set up OAuth for broader integrations.
Creating a ClickUp Account
If you don't already have a ClickUp account, you can sign up for a free account on the ClickUp website. This will give you access to the platform's features and allow you to generate the necessary API credentials.
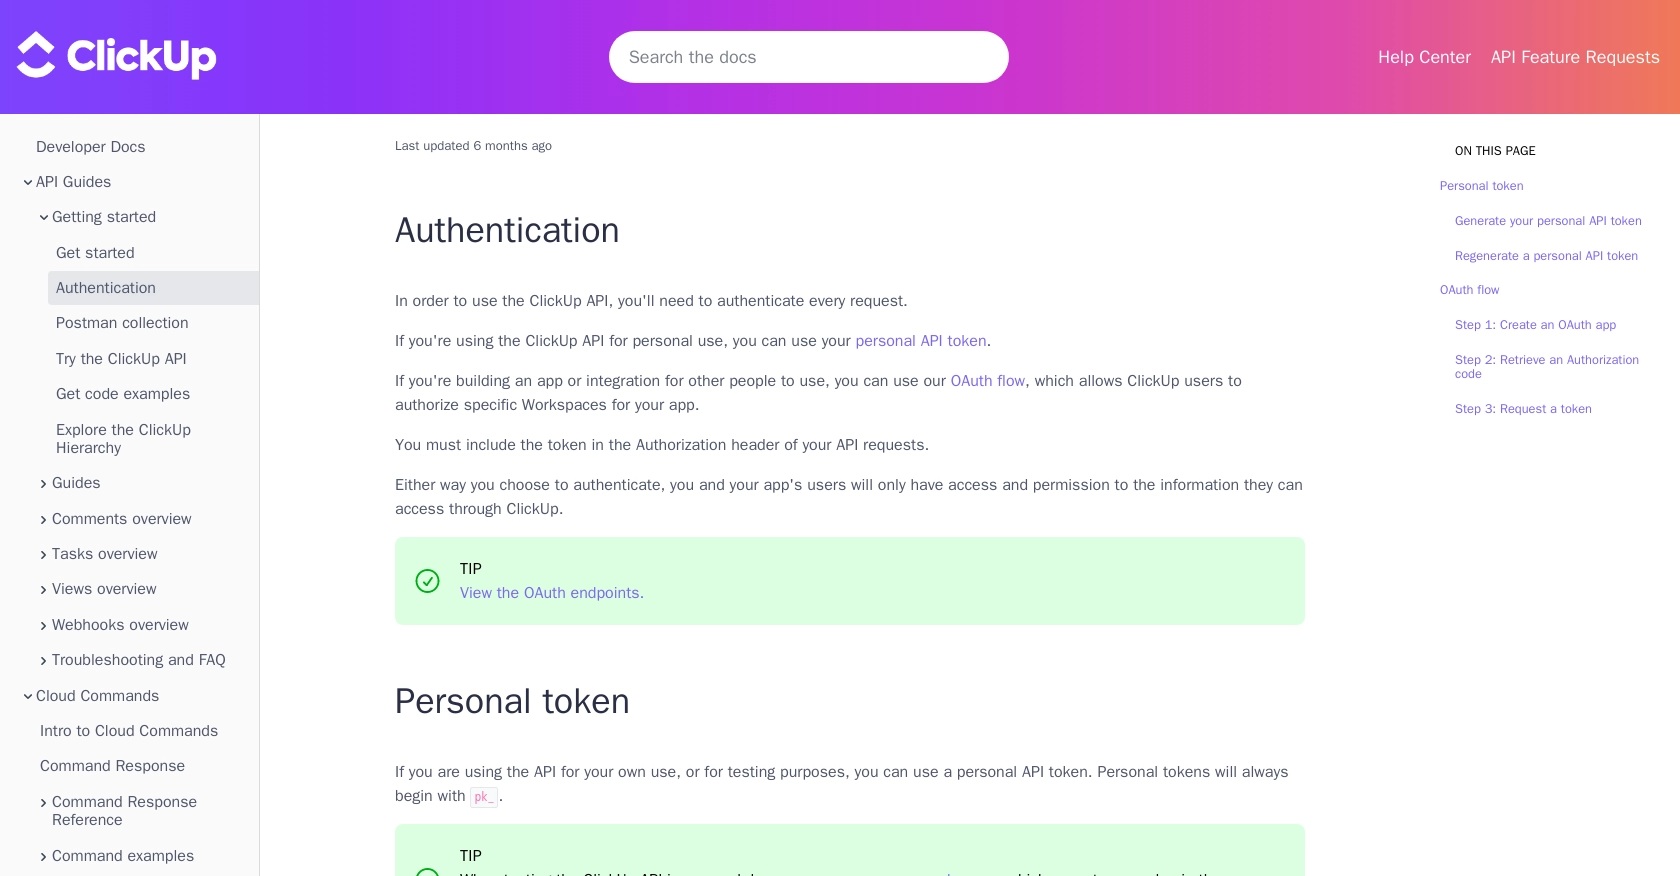
Generating a Personal API Token in ClickUp
For personal use or testing, you can generate a personal API token. Follow these steps:
- Log into your ClickUp account.
- In ClickUp 3.0, click your avatar in the upper-right corner and select Settings.
- Scroll down to the Apps section in the sidebar.
- Under API Token, click Generate.
- Copy and save your personal API token, which will begin with
pk_.
This token will be used in the Authorization header of your API requests.
Setting Up OAuth for ClickUp API Access
If you're developing an application for others to use, you'll need to implement the OAuth flow. Here's how to create an OAuth app:
- Log into ClickUp and click on your avatar in the lower-left corner.
- Select Integrations and then click on ClickUp API.
- Click Create an App and provide a name and redirect URL for your app.
- Once created, you'll receive a
client_idandsecret.
Use these credentials to authenticate users and access their ClickUp resources. For more details, refer to the ClickUp authentication documentation.
sbb-itb-96038d7
Making API Calls to Retrieve ClickUp Tasks Using JavaScript
To interact with the ClickUp API and retrieve tasks, you'll need to use JavaScript to make HTTP requests. This section will guide you through the necessary steps, including setting up your environment, writing the code, and handling potential errors.
Setting Up Your JavaScript Environment for ClickUp API Integration
Before making API calls, ensure you have a modern JavaScript environment set up. You can use Node.js or a browser-based environment. For this tutorial, we'll use Node.js, which allows for server-side JavaScript execution.
- Ensure you have Node.js installed. You can download it from the official Node.js website.
- Initialize a new Node.js project by running
npm init -yin your terminal. - Install the
axioslibrary to handle HTTP requests by runningnpm install axios.
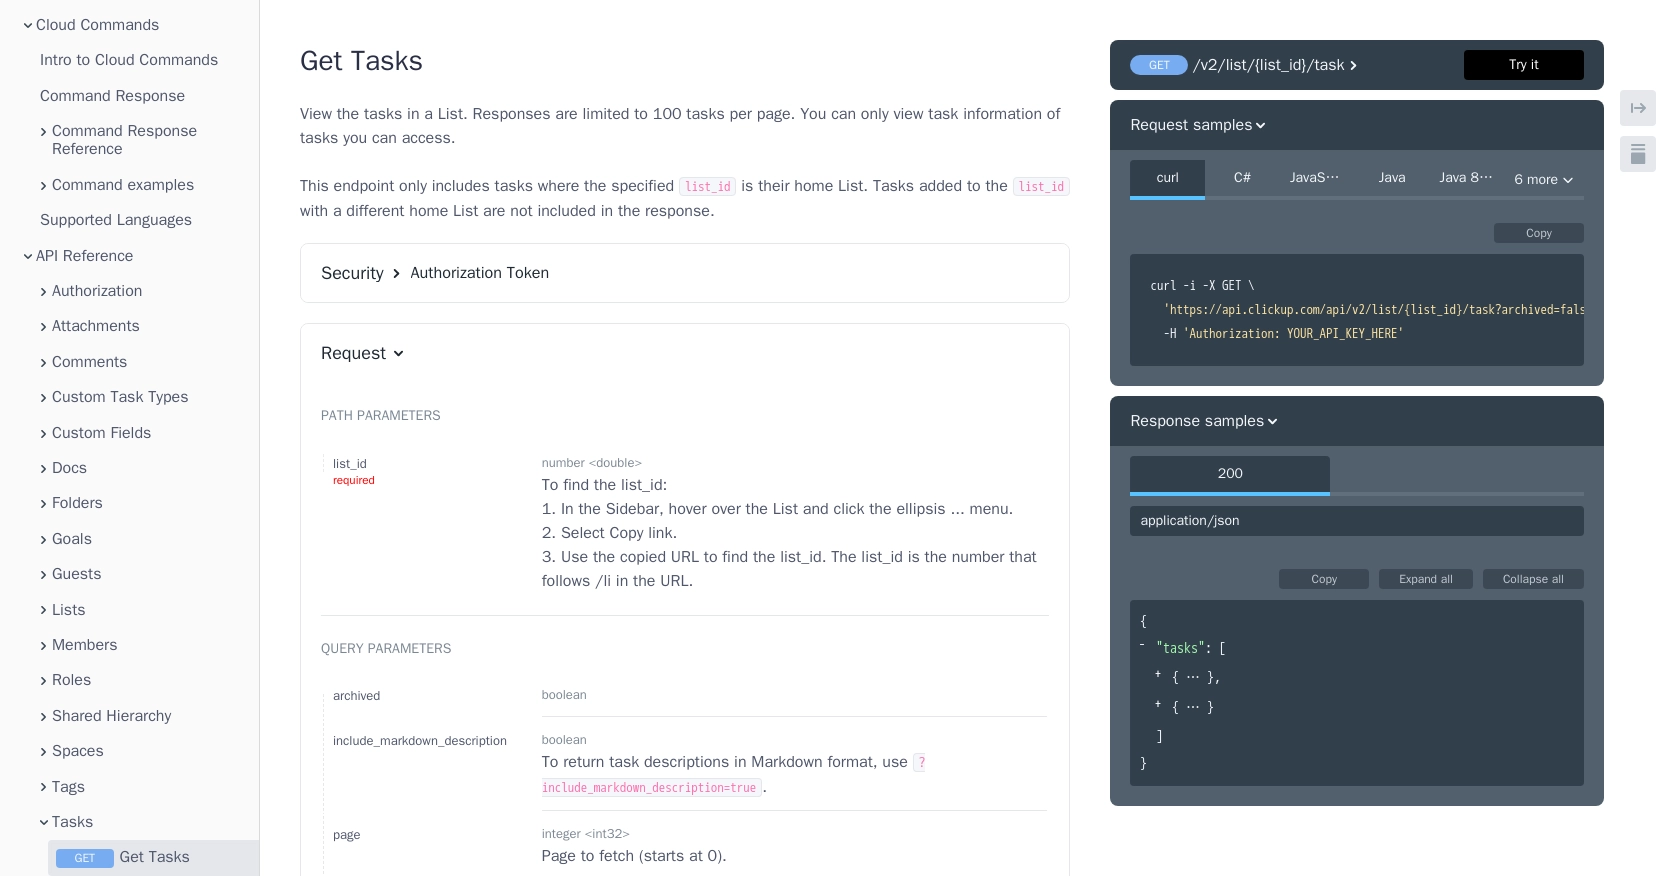
Writing JavaScript Code to Fetch Tasks from ClickUp
With your environment set up, you can now write the JavaScript code to fetch tasks from ClickUp. The following example demonstrates how to use the axios library to make a GET request to the ClickUp API.
const axios = require('axios');

// Replace with your actual list_id and personal API token
const listId = 'your_list_id';
const apiToken = 'pk_your_personal_api_token';

// Set the API endpoint URL
const endpoint = `https://api.clickup.com/api/v2/list/${listId}/task`;

// Configure the request headers
const headers = {
    'Authorization': apiToken
};

// Make the GET request to the ClickUp API
axios.get(endpoint, { headers })
    .then(response => {
        // Handle successful response
        const tasks = response.data.tasks;
        tasks.forEach(task => {
            console.log(`Task ID: ${task.id}, Name: ${task.name}`);
        });
    })
    .catch(error => {
        // Handle errors
        console.error('Error fetching tasks:', error.response ? error.response.data : error.message);
    });
Replace your_list_id and pk_your_personal_api_token with your actual ClickUp list ID and personal API token. This code will log the ID and name of each task in the specified list.
Verifying API Call Success and Handling Errors
After running the code, you should see the tasks from your ClickUp list printed in the console. If the request is successful, the response will include task details such as ID and name. You can verify the tasks by checking your ClickUp account.
In case of errors, the code will log the error message. Common issues include invalid API tokens or incorrect list IDs. Ensure your credentials are correct and that you have access to the specified list.
For more information on error codes and handling, refer to the ClickUp API documentation.
Best Practices for Using ClickUp API in JavaScript
When working with the ClickUp API, it's crucial to follow best practices to ensure efficient and secure integrations. Here are some recommendations:
- Securely Store API Credentials: Always store your API tokens and OAuth credentials securely. Avoid hardcoding them directly in your codebase. Consider using environment variables or secure vaults to manage sensitive information.
- Handle Rate Limiting: Be aware of ClickUp's API rate limits to prevent your application from being throttled. Implement retry logic with exponential backoff to handle rate limit errors gracefully.
- Optimize API Calls: Minimize the number of API requests by fetching only the necessary data. Use query parameters effectively to filter and sort tasks, reducing the payload size and improving performance.
- Implement Error Handling: Ensure robust error handling in your application. Log errors for debugging and provide user-friendly messages to inform users of any issues.
- Keep Data Consistent: When integrating with multiple systems, ensure data consistency by standardizing data fields and formats across platforms.
Streamlining Integrations with Endgrate
Building and maintaining integrations can be time-consuming and complex. Endgrate simplifies this process by offering a unified API endpoint that connects to multiple platforms, including ClickUp. By using Endgrate, you can:
- Save Time and Resources: Focus on your core product development while Endgrate handles the integration complexities.
- Build Once, Use Everywhere: Develop a single integration for multiple platforms, reducing redundancy and maintenance efforts.
- Enhance User Experience: Provide your customers with a seamless and intuitive integration experience.
Explore how Endgrate can transform your integration strategy by visiting Endgrate's website and discover the benefits of a streamlined integration process.
Read More

Ready to get started?
