Using the Sage 100 API to Get Invoices (with Javascript examples)

Introduction to Sage 100 API Integration
Sage 100 is a comprehensive enterprise resource planning (ERP) solution designed to help businesses manage their accounting, inventory, and operations efficiently. Known for its robust features and flexibility, Sage 100 is a popular choice among small to medium-sized enterprises looking to streamline their business processes.
Integrating with the Sage 100 API allows developers to access and manipulate data within the Sage 100 system, enabling seamless automation and data synchronization. For example, a developer might use the Sage 100 API to retrieve invoice data, which can then be used to generate financial reports or integrate with other business applications.
In this article, we will explore how to interact with the Sage 100 API using JavaScript to fetch invoice details. This guide will provide step-by-step instructions to help you efficiently access and manage invoice data within the Sage 100 platform.
Setting Up a Sage 100 Test/Sandbox Account for API Integration
Before you can start interacting with the Sage 100 API, it's essential to set up a test or sandbox account. This environment allows you to safely experiment with API calls without affecting live data. Follow these steps to configure your Sage 100 environment for API access.
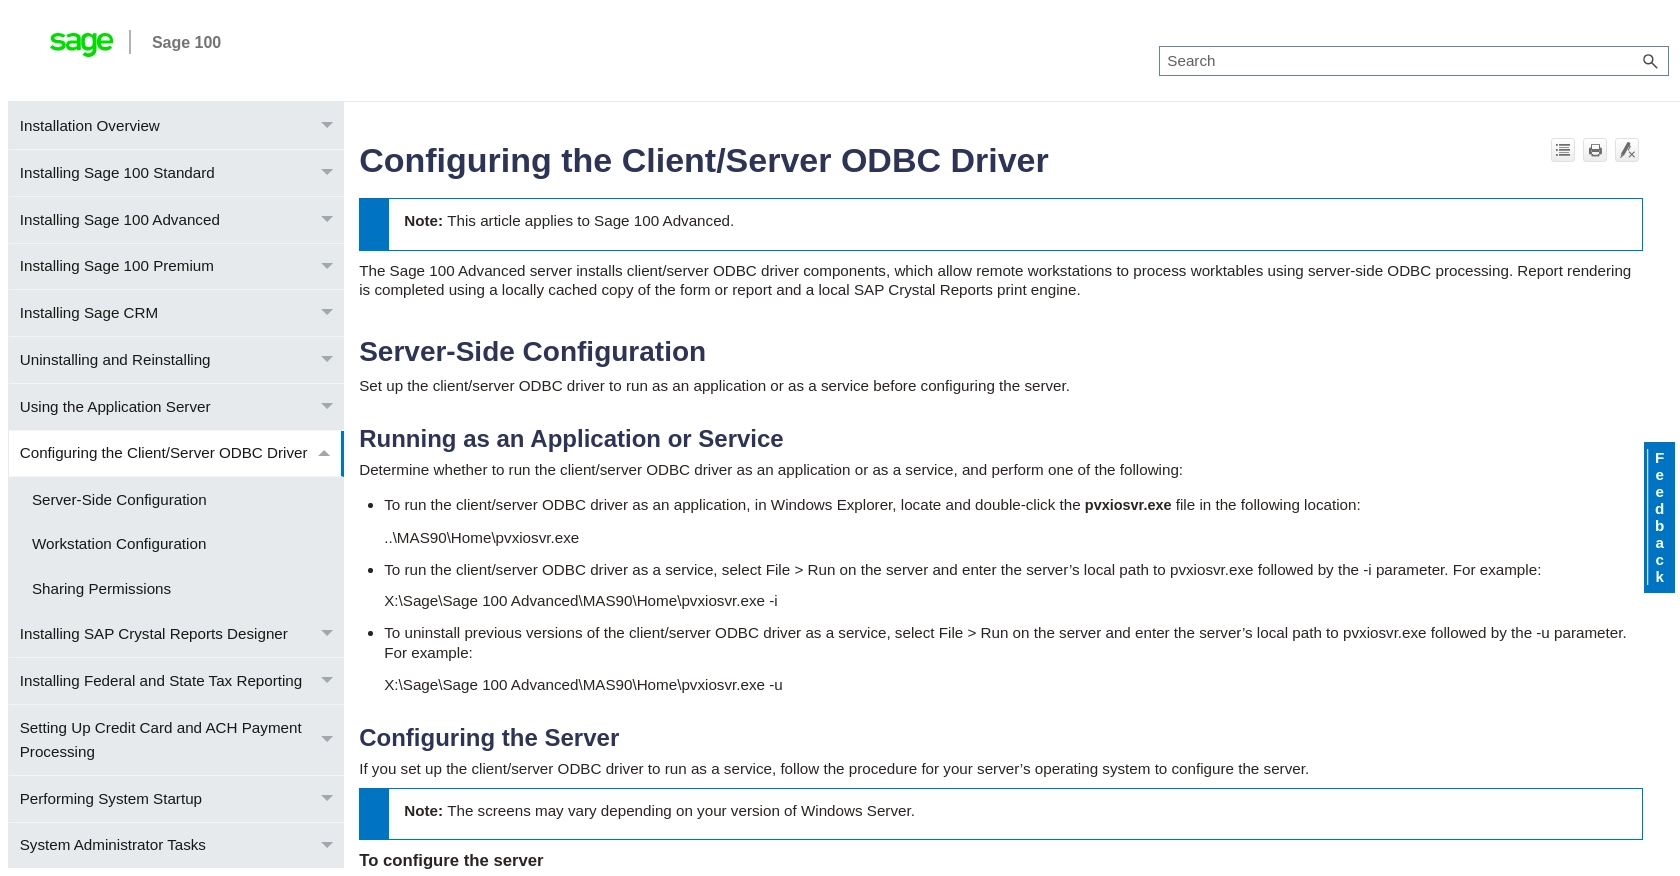
Installing and Configuring the Sage 100 ODBC Driver
To connect to the Sage 100 database, you need to install and configure the Sage 100 ODBC driver. This driver facilitates communication between your application and the Sage 100 system.
- Ensure the Sage 100 ODBC driver is installed on your system. You can download it from the Sage website or contact your Sage 100 administrator.
- Access the ODBC Data Source Administrator on your system. This can typically be found in the Control Panel under Administrative Tools.
- Create a new DSN (Data Source Name) that connects to the Sage 100 ERP system. Provide the correct server, database, and authentication settings.
For detailed instructions, refer to the Sage 100 ODBC Driver Configuration Guide.
Creating a Sage 100 API Application
Once the ODBC driver is configured, you need to set up an application within Sage 100 to obtain the necessary credentials for API access.
- Log in to your Sage 100 account and navigate to the API management section.
- Create a new application and note down the client ID and client secret. These credentials will be used to authenticate your API requests.
Configuring Authentication for Sage 100 API
Sage 100 uses a custom authentication method. Ensure you have the following details ready:
- Client ID
- Client Secret
- DSN Name configured in the ODBC Data Source Administrator
Use these credentials to establish a connection to the Sage 100 API using JavaScript.
Testing the ODBC Connection
Before making API calls, verify that your ODBC connection is working correctly:
- Open the ODBC Data Source Administrator and select your DSN.
- Click on the "Test Connection" button to ensure that the connection is successful.
If the connection fails, double-check your DSN settings and ensure that the Sage 100 ODBC service is running properly.
sbb-itb-96038d7
Making API Calls to Retrieve Invoices from Sage 100 Using JavaScript
To interact with the Sage 100 API and retrieve invoice data, you'll need to use JavaScript to establish a connection and perform API calls. This section will guide you through the process of setting up your JavaScript environment, making API requests, and handling responses.
Setting Up Your JavaScript Environment for Sage 100 API
Before making API calls, ensure you have the necessary tools and libraries installed:
- Node.js: Install Node.js from the official website to run JavaScript outside the browser.
- Axios: Use Axios, a promise-based HTTP client, to simplify API requests. Install it using npm:
npm install axiosWriting JavaScript Code to Fetch Invoices from Sage 100
With your environment set up, you can now write JavaScript code to connect to the Sage 100 API and retrieve invoice data. Below is a sample code snippet to get you started:
const axios = require('axios');

// Define the API endpoint and authentication details
const endpoint = 'https://your-sage100-api-endpoint.com/invoices';
const config = {
    headers: {
        'Content-Type': 'application/json',
        'Authorization': 'Bearer YOUR_ACCESS_TOKEN'
    }
};

// Function to fetch invoices
async function fetchInvoices() {
    try {
        const response = await axios.get(endpoint, config);
        const invoices = response.data;
        console.log('Invoices:', invoices);
    } catch (error) {
        console.error('Error fetching invoices:', error);
    }
}

// Call the function to fetch invoices
fetchInvoices();
Replace YOUR_ACCESS_TOKEN with the actual token obtained during authentication. This code uses Axios to send a GET request to the Sage 100 API endpoint for invoices. If successful, it logs the retrieved invoice data to the console.
Verifying Successful API Requests and Handling Errors
After executing the API call, verify the success of your request by checking the response data:
- Ensure the response status code is 200, indicating a successful request.
- Check the returned data to confirm it matches the expected invoice information from your Sage 100 sandbox account.
Handle potential errors by implementing error-catching mechanisms in your code. The try-catch block in the example above captures and logs any errors that occur during the API call.
Testing and Debugging Your Sage 100 API Integration
To ensure your integration works as expected, perform thorough testing:
- Test with various invoice data to confirm the API returns accurate results.
- Use console logs and debugging tools to trace and resolve any issues.
By following these steps, you can effectively retrieve invoice data from the Sage 100 API using JavaScript, enabling seamless integration and data management.
Conclusion and Best Practices for Sage 100 API Integration Using JavaScript
Integrating with the Sage 100 API using JavaScript provides a powerful way to automate and streamline business processes by accessing and managing invoice data efficiently. By following the steps outlined in this guide, developers can establish a robust connection to the Sage 100 system and perform seamless data operations.
Best Practices for Secure and Efficient Sage 100 API Usage
- Secure Storage of Credentials: Always store your client ID, client secret, and access tokens securely. Consider using environment variables or secure vaults to prevent unauthorized access.
- Handle Rate Limiting: Be mindful of the API's rate limits to avoid throttling. Implement retry logic with exponential backoff to manage request limits effectively.
- Data Transformation and Standardization: Ensure that the data retrieved from the Sage 100 API is transformed and standardized to fit your application's requirements, facilitating smooth integration with other systems.
Enhancing Integration Capabilities with Endgrate
For developers looking to expand their integration capabilities beyond Sage 100, consider leveraging Endgrate. By using Endgrate, you can:
- Save time and resources by outsourcing complex integrations, allowing you to focus on your core product development.
- Build once for each use case and apply it across multiple integrations, reducing redundancy and enhancing efficiency.
- Provide an intuitive integration experience for your customers, simplifying the process of connecting with various platforms.
Explore the possibilities with Endgrate by visiting Endgrate's website and discover how it can transform your integration strategy.
Read More
- https://endgrate.com/provider/sage100
- https://help-sage100.na.sage.com/InstallGuide/2022/Content/InstallGuide/Config_ODBC_Driver.htm
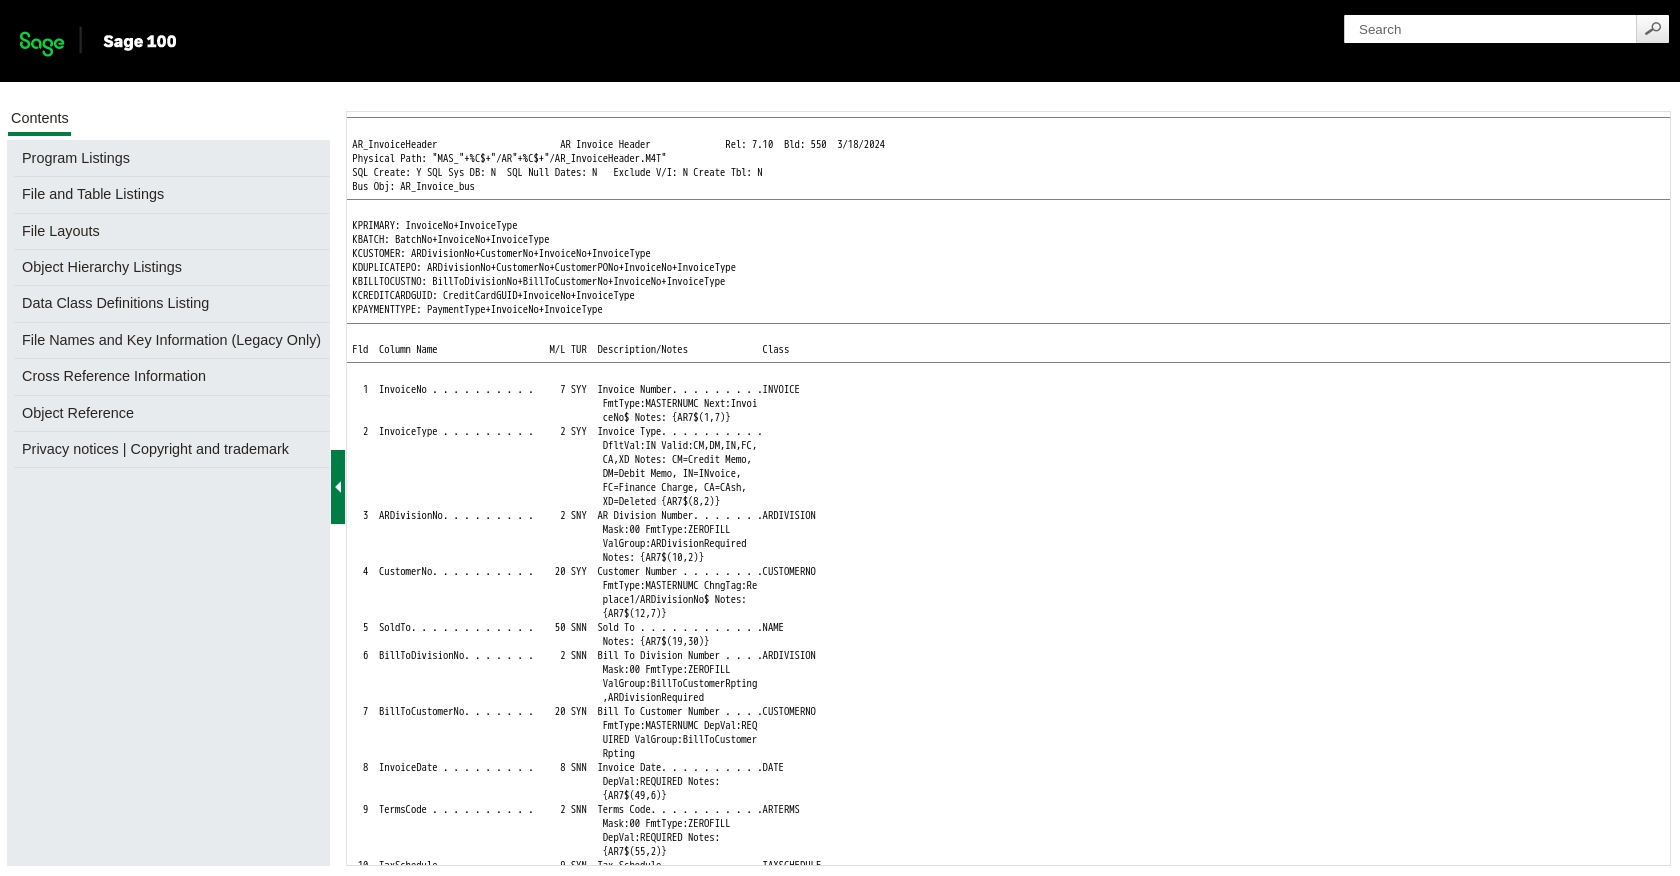
- https://help-sage100.na.sage.com/2022/FLOR/index.htm#File_Layouts/Accounts_Receivable/AR_InvoiceHeader.htm?Highlight=AR_InvoiceHeader
- https://help-sage100.na.sage.com/2022/FLOR/index.htm#File_Layouts/Accounts_Receivable/AR_InvoiceDetail.htm?Highlight=AR_InvoiceDetail

Ready to get started?
