Using the Salesloft API to Create or Update People (with Javascript examples)

Introduction to Salesloft API Integration
Salesloft is a powerful sales engagement platform designed to enhance the efficiency and effectiveness of sales teams. By providing tools for managing customer interactions, tracking sales activities, and automating repetitive tasks, Salesloft helps businesses streamline their sales processes and improve productivity.
Integrating with the Salesloft API allows developers to automate and customize interactions with the platform. For example, you can use the API to create or update people records, ensuring that your sales team always has access to the most current contact information. This can be particularly useful for syncing data between Salesloft and other CRM systems, enabling seamless data flow and reducing manual data entry.
Setting Up a Salesloft Test/Sandbox Account
Before you can start integrating with the Salesloft API, you need to set up a test or sandbox account. This will allow you to safely experiment with API calls without affecting live data.
Creating a Salesloft Account
If you don't already have a Salesloft account, you can sign up for a free trial on the Salesloft website. This will give you access to the platform's features and allow you to create a sandbox environment for testing.
- Visit the Salesloft website and click on the "Get Started" button.
- Follow the instructions to create your account. You may need to verify your email address to complete the registration process.
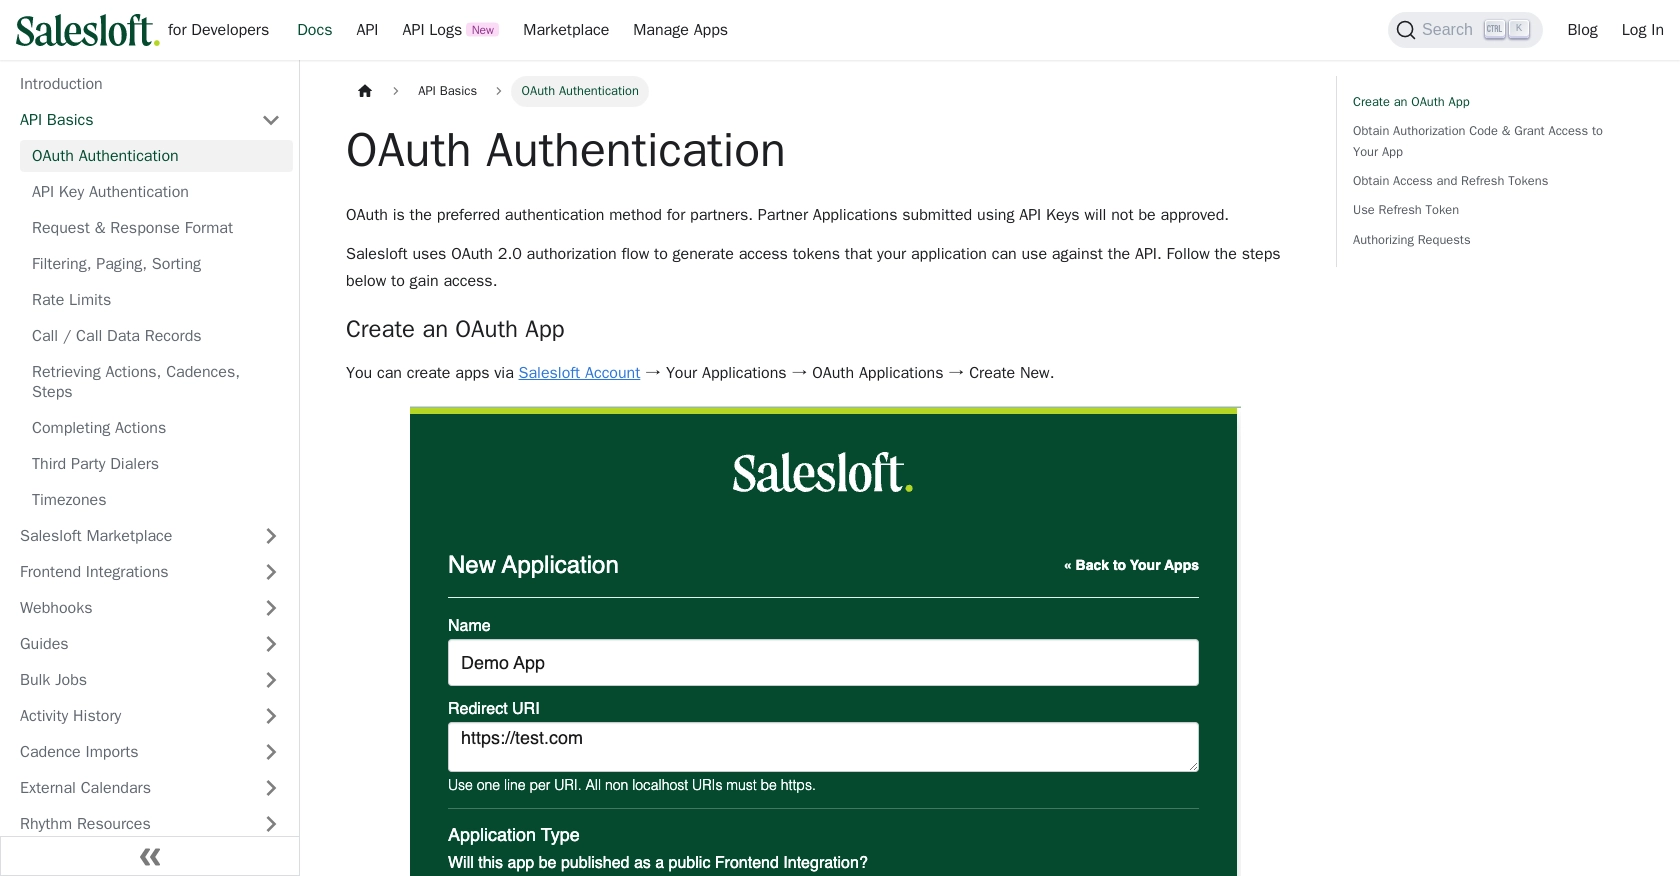
Creating an OAuth Application in Salesloft
Salesloft uses OAuth 2.0 for authentication, which requires you to create an OAuth application. This will provide you with the necessary credentials to authorize API requests.
- Log in to your Salesloft account and navigate to Your Applications under the account settings.
- Select OAuth Applications and click on Create New.
- Fill out the required fields, including the application name and redirect URI, then click Save.
- Once saved, you will receive your Client ID and Client Secret. Keep these credentials secure as they will be used to authenticate your API requests.
Obtaining Authorization Code and Access Tokens
To interact with the Salesloft API, you need to obtain an authorization code and exchange it for access and refresh tokens.
- Direct users to the following authorization endpoint, replacing
YOUR_CLIENT_IDandYOUR_REDIRECT_URIwith your application's details: - Upon user approval, the redirect URI will receive a query parameter
code. Use this code to request access tokens: - The response will include an
access_tokenand arefresh_token. Use the access token for API requests and the refresh token to obtain new access tokens when needed.
https://accounts.salesloft.com/oauth/authorize?client_id=YOUR_CLIENT_ID&redirect_uri=YOUR_REDIRECT_URI&response_type=codePOST https://accounts.salesloft.com/oauth/token
{
"client_id": "YOUR_CLIENT_ID",
"client_secret": "YOUR_CLIENT_SECRET",
"code": "AUTHORIZATION_CODE",
"grant_type": "authorization_code",
"redirect_uri": "YOUR_REDIRECT_URI"
}For more detailed information, refer to the Salesloft OAuth Authentication documentation.
sbb-itb-96038d7
Making API Calls to Create or Update People in Salesloft Using JavaScript
To interact with the Salesloft API for creating or updating people records, you'll need to use JavaScript to make HTTP requests. This section will guide you through the process, including setting up your environment, writing the code, and handling responses and errors.
Setting Up Your JavaScript Environment
Before you begin, ensure you have Node.js installed on your machine. You will also need the axios library to make HTTP requests. Install it using npm:
npm install axiosCreating a Person in Salesloft
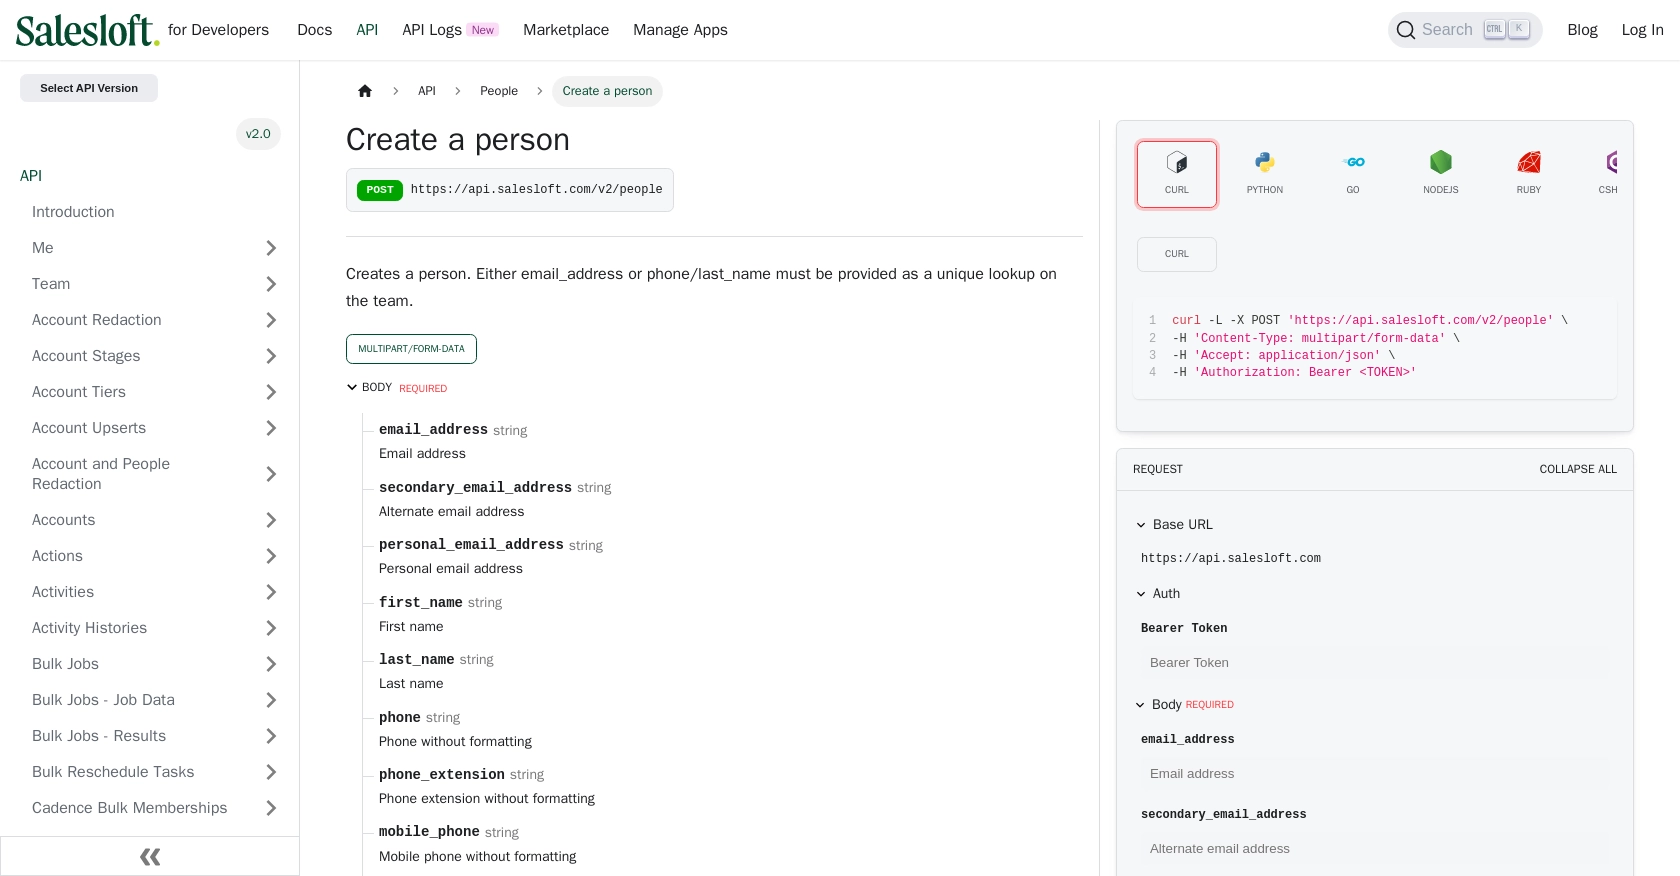
To create a person in Salesloft, you'll need to send a POST request to the Salesloft API endpoint. Here's a step-by-step guide:
- Create a new JavaScript file, for example,
createPerson.js. - Import the
axioslibrary and set up your API endpoint and headers: - Define the person data you want to create:
- Make the POST request to create the person:
const axios = require('axios');

const endpoint = 'https://api.salesloft.com/v2/people';
const headers = {
    'Content-Type': 'application/json',
    'Authorization': 'Bearer YOUR_ACCESS_TOKEN'
};const personData = {
email_address: 'example@salesloft.com',
first_name: 'John',
last_name: 'Doe'
};axios.post(endpoint, personData, { headers })
.then(response => {
console.log('Person created:', response.data);
})
.catch(error => {
console.error('Error creating person:', error.response.data);
});Updating a Person in Salesloft
To update an existing person, you'll need their unique ID. The process is similar to creating a person:
- Create a new JavaScript file, for example,
updatePerson.js. - Set up your API endpoint with the person's ID:
- Define the updated data:
- Make the PUT request to update the person:
const personId = 'PERSON_ID';
const updateEndpoint = `https://api.salesloft.com/v2/people/${personId}`;const updatedData = {
first_name: 'Jane',
last_name: 'Smith'
};axios.put(updateEndpoint, updatedData, { headers })
.then(response => {
console.log('Person updated:', response.data);
})
.catch(error => {
console.error('Error updating person:', error.response.data);
});Handling API Responses and Errors
When making API calls, it's crucial to handle responses and errors effectively:
- Check the response status to ensure the request was successful. A status code of 200 indicates success.
- Handle errors by checking the error response data. Common error codes include 403 (forbidden) and 422 (unprocessable entity).
For more details on error handling, refer to the Salesloft Request & Response Format documentation.
Verifying API Call Success in Salesloft
After making API calls, verify the changes in your Salesloft sandbox account:
- Log in to your Salesloft account and navigate to the People section.
- Check for the newly created or updated person record to confirm the API call's success.
By following these steps, you can efficiently manage people records in Salesloft using JavaScript, ensuring your sales team has access to up-to-date contact information.
Conclusion and Best Practices for Using Salesloft API with JavaScript
Integrating with the Salesloft API using JavaScript provides a powerful way to automate and enhance your sales processes. By following the steps outlined in this guide, you can efficiently create and update people records, ensuring your sales team has access to the most current data.
Best Practices for Secure and Efficient Salesloft API Integration
- Securely Store Credentials: Always keep your Client ID, Client Secret, and access tokens secure. Avoid hardcoding them in your source code and consider using environment variables or secure vaults.
- Handle Rate Limits: Be mindful of Salesloft's rate limits, which are set at 600 cost per minute. Implement logic to handle rate limit responses and consider optimizing your requests to avoid hitting these limits. For more details, refer to the Salesloft Rate Limits documentation.
- Implement Error Handling: Properly handle errors by checking response status codes and error messages. This will help you debug issues and ensure a smooth integration experience.
- Data Standardization: Ensure that the data you send to Salesloft is standardized and validated to prevent errors and maintain data integrity.
Streamline Your Integrations with Endgrate
While integrating with Salesloft directly can be rewarding, it can also be time-consuming and complex, especially if you need to manage multiple integrations. Endgrate offers a unified API solution that simplifies the integration process, allowing you to focus on your core product while we handle the complexities of API interactions.
With Endgrate, you can build once for each use case and leverage our intuitive platform to provide a seamless integration experience for your customers. Visit Endgrate to learn more about how we can help you save time and resources on your integration projects.
Read More
- https://endgrate.com/provider/salesloft
- https://developers.salesloft.com/docs/platform/api-basics/oauth-authentication/
- https://developers.salesloft.com/docs/platform/api-basics/request-response-format/
- https://developers.salesloft.com/docs/platform/api-basics/filtering-paging-sorting/
- https://developers.salesloft.com/docs/platform/api-basics/rate-limits/
- https://developers.salesloft.com/docs/api/people-create/

Ready to get started?
