Using the Salesloft API to Get Calls (with Javascript examples)
Introduction to Salesloft API Integration
Salesloft is a powerful sales engagement platform that empowers sales teams to connect with prospects more effectively. With a suite of tools designed to enhance productivity and streamline workflows, Salesloft is a favorite among sales professionals looking to optimize their outreach strategies.
Integrating with the Salesloft API allows developers to access and manage call data, enabling seamless integration with other systems and applications. For example, a developer might use the Salesloft API to retrieve call records and analyze them to improve sales strategies or integrate call data into a CRM for a comprehensive view of customer interactions.
Setting Up Your Salesloft Test Account for API Integration
Before you can start interacting with the Salesloft API, you'll need to set up a test account and configure OAuth authentication. This process ensures that you have the necessary credentials to access and manage call data securely.
Creating a Salesloft Account
If you don't already have a Salesloft account, you can sign up for a free trial or demo account on the Salesloft website. This will give you access to the platform's features and allow you to explore its capabilities.
- Visit the Salesloft website and click on the "Sign Up" button.
- Follow the on-screen instructions to create your account.
- Once your account is set up, log in to access the Salesloft dashboard.
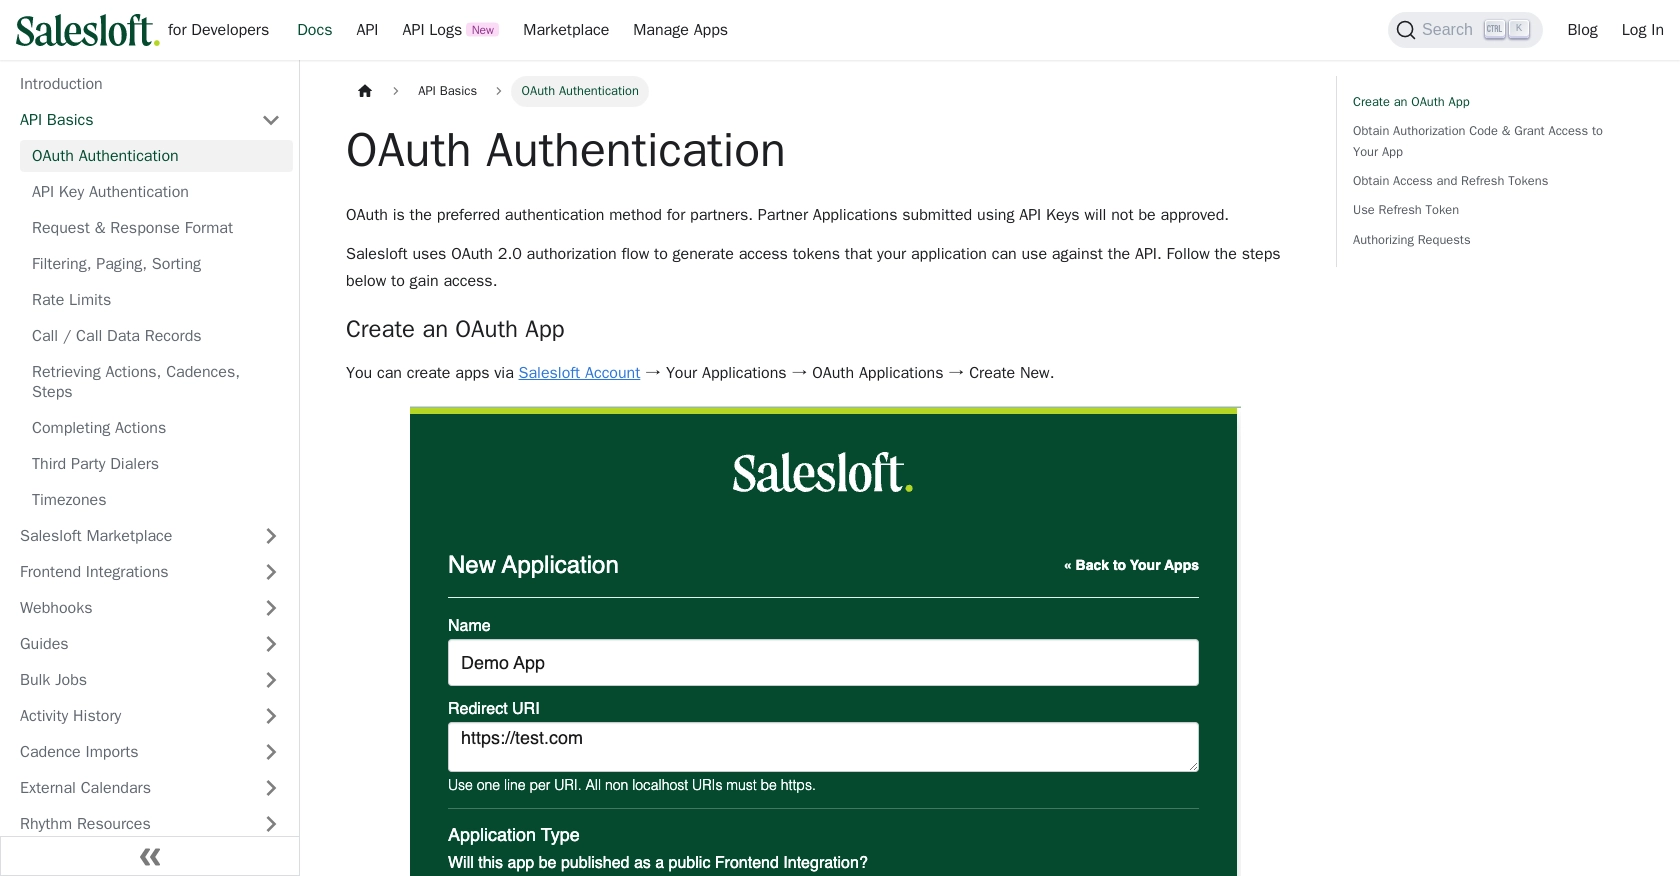
Creating an OAuth Application in Salesloft
To interact with the Salesloft API, you'll need to create an OAuth application. This will provide you with the client ID and client secret required for authentication.
- Navigate to your Salesloft account settings.
- Go to Your Applications and select OAuth Applications.
- Click on Create New to start a new application.
- Fill in the required fields, including the application name and redirect URI.
- Save the application to generate your client ID and client secret.
Obtaining Authorization Code and Access Tokens
With your OAuth application set up, you can now obtain an authorization code and access tokens to authenticate API requests.
- Direct users to the following URL, replacing
YOUR_CLIENT_IDandYOUR_REDIRECT_URIwith your application's details: - Once users authorize the application, you'll receive a code in the redirect URI.
- Use this code to request an access token by making a POST request to the token endpoint:
- Store the access token securely, as it will be used to authenticate your API requests.
https://accounts.salesloft.com/oauth/authorize?client_id=YOUR_CLIENT_ID&redirect_uri=YOUR_REDIRECT_URI&response_type=codePOST https://accounts.salesloft.com/oauth/token
{
"client_id": "YOUR_CLIENT_ID",
"client_secret": "YOUR_CLIENT_SECRET",
"code": "AUTHORIZATION_CODE",
"grant_type": "authorization_code",
"redirect_uri": "YOUR_REDIRECT_URI"
}For more detailed information on OAuth authentication, refer to the Salesloft OAuth Authentication documentation.
sbb-itb-96038d7
Making API Calls to Retrieve Salesloft Call Data Using JavaScript
Once you have set up your Salesloft account and obtained the necessary OAuth tokens, you can begin making API calls to retrieve call data. This section will guide you through the process of using JavaScript to interact with the Salesloft API, specifically focusing on fetching call records.
Prerequisites for JavaScript API Integration with Salesloft
Before proceeding, ensure you have the following:
- Node.js installed on your machine.
- A text editor or IDE for writing JavaScript code.
- The
axioslibrary for making HTTP requests. You can install it using npm:
npm install axiosFetching Call Records from Salesloft API
To retrieve call records, you'll need to make a GET request to the Salesloft API endpoint. Below is an example of how to achieve this using JavaScript and the axios library:
const axios = require('axios');

// Set the API endpoint and headers
const endpoint = 'https://api.salesloft.com/v2/activities/calls';
const headers = {
    'Authorization': 'Bearer YOUR_ACCESS_TOKEN',
    'Accept': 'application/json'
};

// Function to fetch call records
async function fetchCallRecords() {
    try {
        const response = await axios.get(endpoint, { headers });
        const callData = response.data.data;

        // Display the call records
        callData.forEach(call => {
            console.log(`Call ID: ${call.id}, To: ${call.to}, Duration: ${call.duration} seconds`);
        });
    } catch (error) {
        console.error('Error fetching call records:', error.response ? error.response.data : error.message);
    }
}

// Execute the function
fetchCallRecords();
Replace YOUR_ACCESS_TOKEN with the access token you obtained during the OAuth setup. This script initializes the API endpoint and headers, then defines a function to fetch and display call records. It handles errors by logging them to the console.
Verifying API Call Success in Salesloft
After running the script, you should see the call records printed in your console. To verify the success of your API call, you can cross-check the retrieved data with the call records available in your Salesloft dashboard.
Handling Errors and Understanding Response Codes
When making API calls, it's crucial to handle potential errors. The Salesloft API may return various HTTP status codes indicating success or failure:
- 200 OK: The request was successful, and the call records are returned.
- 403 Forbidden: The request was valid, but you don't have permission to access the resource.
- 404 Not Found: The requested resource could not be found.
- 422 Unprocessable Entity: The request was well-formed but could not be processed due to semantic errors.
For more detailed information on handling errors, refer to the Salesloft Request & Response Format documentation.

Conclusion and Best Practices for Salesloft API Integration
Integrating with the Salesloft API using JavaScript provides a powerful way to access and manage call data, enhancing your sales strategies and CRM capabilities. By following the steps outlined in this guide, you can efficiently retrieve call records and handle potential errors effectively.
Best Practices for Secure and Efficient Salesloft API Usage
- Secure Storage of Credentials: Always store your OAuth tokens securely. Consider using environment variables or secure vaults to keep sensitive information safe.
- Handling Rate Limits: Be mindful of the Salesloft API's rate limits, which are set at 600 cost per minute. Monitor your API usage and implement retry logic to handle rate limit errors gracefully. For more details, refer to the Salesloft Rate Limits documentation.
- Data Transformation and Standardization: When integrating call data into other systems, ensure that data fields are transformed and standardized to match the target system's requirements.
Enhancing Integration Capabilities with Endgrate
While integrating with the Salesloft API can be highly beneficial, managing multiple integrations can become complex and time-consuming. Endgrate offers a streamlined solution by providing a unified API endpoint that connects to various platforms, including Salesloft.
By leveraging Endgrate, you can save time and resources, allowing you to focus on your core product development. Build once for each use case and enjoy an intuitive integration experience for your customers. Explore how Endgrate can simplify your integration processes by visiting Endgrate.
Read More
- https://endgrate.com/provider/salesloft
- https://developers.salesloft.com/docs/platform/api-basics/oauth-authentication/
- https://developers.salesloft.com/docs/platform/api-basics/request-response-format/
- https://developers.salesloft.com/docs/platform/api-basics/filtering-paging-sorting/
- https://developers.salesloft.com/docs/platform/api-basics/rate-limits/
- https://developers.salesloft.com/docs/api/activities-calls-index/

Ready to get started?
