Using the Shopify API to Create or Update Product Variants in Javascript

Introduction to Shopify API for Product Variant Management
Shopify is a leading e-commerce platform that empowers businesses to create and manage their online stores with ease. It offers a robust set of tools and APIs that allow developers to extend and customize the platform to meet specific business needs.
Integrating with the Shopify API enables developers to efficiently manage product data, including creating and updating product variants. This can be particularly useful for businesses that offer products with multiple options, such as size or color, allowing them to maintain accurate inventory and streamline operations.
For example, a developer might use the Shopify API to automatically update product variant details when inventory levels change, ensuring that customers always see the most up-to-date information on the store.
Setting Up Your Shopify Test Account for API Integration
Before diving into the Shopify API to create or update product variants using JavaScript, you'll need to set up a Shopify test account. This will allow you to safely experiment with API calls without affecting a live store.
Creating a Shopify Partner Account
To begin, you'll need a Shopify Partner account, which provides access to development stores where you can test your app. Follow these steps to create your account:
- Visit the Shopify Partners page and sign up for a free account.
- Fill out the required information and submit your application.
- Once approved, log in to your Shopify Partner dashboard.
Setting Up a Shopify Development Store
With your Partner account ready, you can now create a development store:
- In the Shopify Partner dashboard, navigate to the "Stores" section.
- Click on "Add store" and select "Development store."
- Fill in the store details and click "Create store."
This development store will serve as your sandbox environment for testing API interactions.
Enabling Shopify API Access
To interact with the Shopify API, you'll need to create a custom app within your development store:
- Log in to your development store and go to "Apps" in the sidebar.
- Click on "Develop apps" and then "Create an app."
- Enter an app name and select the app developer.
- Click "Create app" to proceed.
Configuring OAuth for Shopify API Authentication
Shopify uses OAuth for API authentication. Follow these steps to configure it:
- In your app settings, navigate to "API credentials."
- Under "Access scopes," select the necessary permissions for managing product variants, such as
write_productsandread_products. - Click "Save" to apply the changes.
- Copy the API key and secret key provided, as you'll need them for authentication.
Generating an Access Token
With OAuth configured, you can now generate an access token to authenticate your API requests:
- Use the API key and secret key to initiate the OAuth flow.
- Direct the user to the authorization URL to grant permissions.
- Once authorized, exchange the authorization code for an access token.
For detailed steps on OAuth implementation, refer to the Shopify API authentication documentation.
With your test account and app set up, you're ready to start making API calls to manage product variants in Shopify using JavaScript.

sbb-itb-96038d7
Making API Calls to Shopify for Product Variant Management Using JavaScript
To interact with Shopify's API for creating or updating product variants, you'll need to use JavaScript to make HTTP requests. This section will guide you through the necessary steps, including setting up your environment, writing the code, and handling responses.
Setting Up Your JavaScript Environment for Shopify API Integration
Before you begin coding, ensure you have the following prerequisites:
- Node.js installed on your machine.
- A code editor like Visual Studio Code.
- Familiarity with JavaScript and RESTful API concepts.
You'll also need to install the axios library, which simplifies making HTTP requests:
npm install axios
Creating a New Product Variant with Shopify API
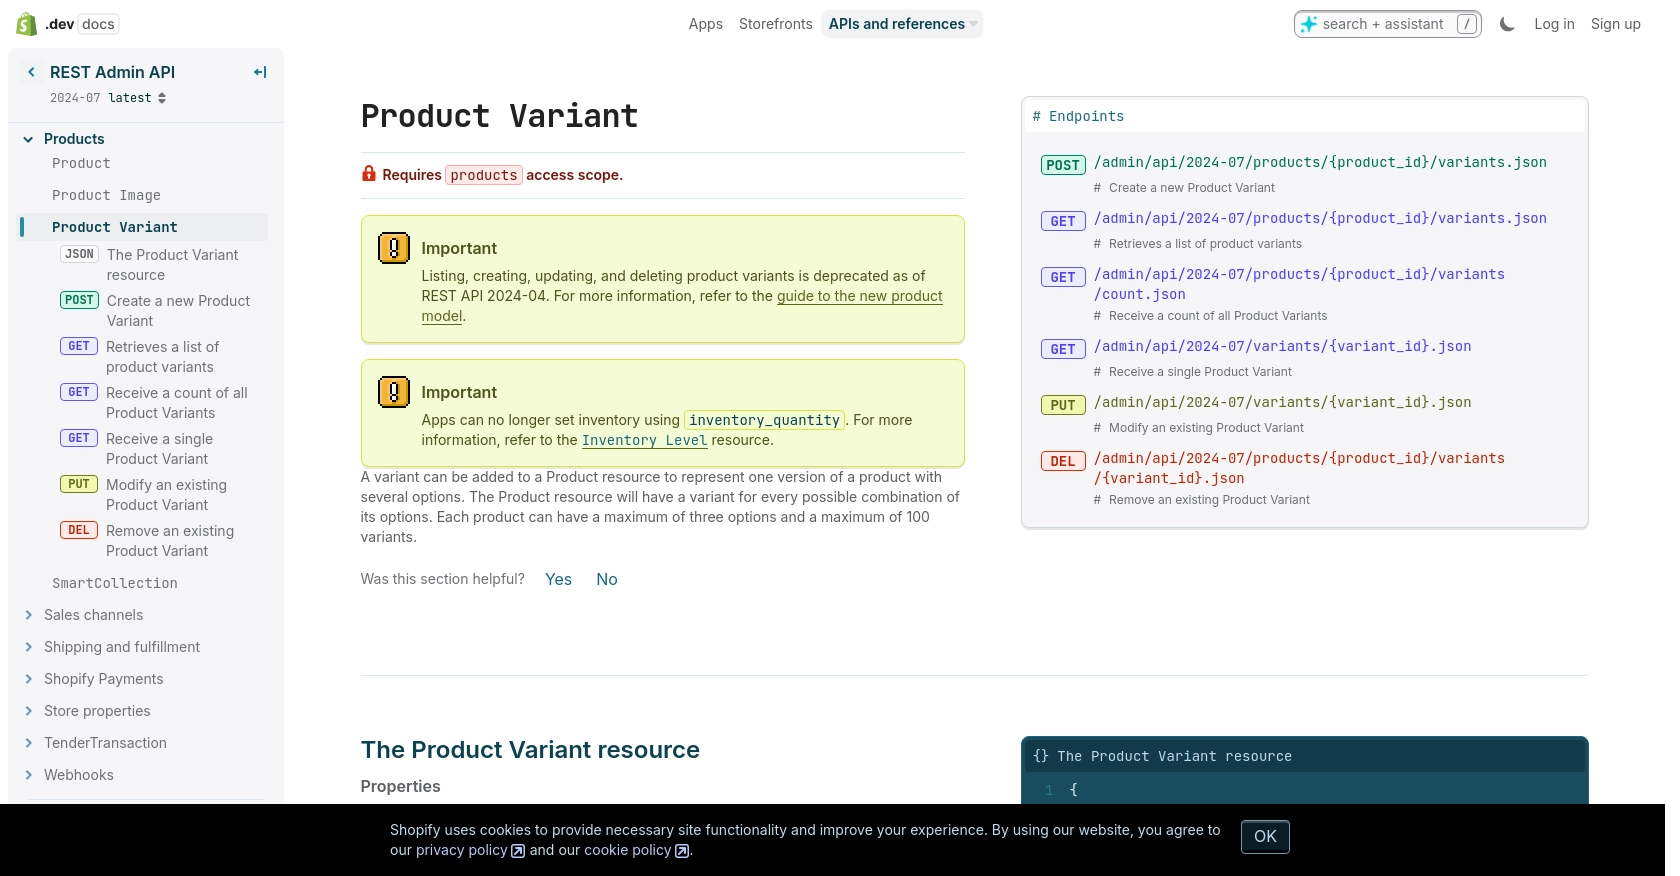
To create a new product variant, you'll need to make a POST request to the Shopify API endpoint. Here's a step-by-step guide:
const axios = require('axios');

const createProductVariant = async () => {
    const url = 'https://your-development-store.myshopify.com/admin/api/2024-07/products/{product_id}/variants.json';
    const accessToken = 'your_access_token';

    const variantData = {
        variant: {
            option1: 'Yellow',
            price: '1.00'
        }
    };

    try {
        const response = await axios.post(url, variantData, {
            headers: {
                'X-Shopify-Access-Token': accessToken,
                'Content-Type': 'application/json'
            }
        });
        console.log('Product Variant Created:', response.data);
    } catch (error) {
        console.error('Error creating product variant:', error.response.data);
    }
};

createProductVariant();
Replace {product_id} and your_access_token with your actual product ID and access token. This code sends a POST request to create a new variant with the specified options and price.
Updating an Existing Product Variant with Shopify API
To update an existing product variant, use a PUT request. Here's how you can do it:
const updateProductVariant = async () => {
    const url = 'https://your-development-store.myshopify.com/admin/api/2024-07/variants/{variant_id}.json';
    const accessToken = 'your_access_token';

    const updatedData = {
        variant: {
            id: 808950810,
            price: '2.00'
        }
    };

    try {
        const response = await axios.put(url, updatedData, {
            headers: {
                'X-Shopify-Access-Token': accessToken,
                'Content-Type': 'application/json'
            }
        });
        console.log('Product Variant Updated:', response.data);
    } catch (error) {
        console.error('Error updating product variant:', error.response.data);
    }
};

updateProductVariant();
Replace {variant_id} and your_access_token with the actual variant ID and access token. This code updates the price of the specified variant.
Handling Shopify API Responses and Errors
When making API calls, it's crucial to handle responses and errors effectively. Shopify's API provides status codes that indicate the success or failure of a request:
- 200 OK: The request was successful.
- 201 Created: A new resource was successfully created.
- 401 Unauthorized: Authentication failed. Check your access token.
- 429 Too Many Requests: You've hit the rate limit. Wait before retrying.
For more details on status codes, refer to the Shopify API documentation.
By following these steps, you can efficiently manage product variants in Shopify using JavaScript, ensuring your store's inventory is always up-to-date.

Conclusion and Best Practices for Shopify API Integration
Integrating with the Shopify API to manage product variants using JavaScript can significantly enhance your e-commerce operations. By automating the creation and updating of product variants, you ensure that your store's inventory remains accurate and up-to-date, providing a seamless shopping experience for your customers.
Best Practices for Secure and Efficient Shopify API Usage
- Secure Storage of Credentials: Always store your API keys and access tokens securely. Consider using environment variables or secure vaults to prevent unauthorized access.
- Handle Rate Limiting: Shopify's API has a rate limit of 40 requests per app per store per minute. Implement logic to handle the
429 Too Many Requestserror by pausing and retrying requests after the specified time. - Data Standardization: Ensure that data fields are consistent across your application to avoid errors and maintain data integrity.
Enhancing Integration Efficiency with Endgrate
While building integrations with Shopify's API can be powerful, it can also be time-consuming and complex, especially if you need to manage multiple integrations. Endgrate offers a streamlined solution by providing a single API endpoint that connects to various platforms, including Shopify.
With Endgrate, you can save time and resources by outsourcing integrations, allowing you to focus on your core product. Build once for each use case and enjoy an intuitive integration experience for your customers.
Explore how Endgrate can simplify your integration process by visiting Endgrate today.
Read More
Ready to get started?
