Using the Shopify API to Get Customers (with Javascript examples)

Introduction to Shopify API Integration
Shopify is a leading e-commerce platform that empowers businesses to create and manage their online stores with ease. It offers a comprehensive suite of tools for managing products, processing orders, and engaging with customers. With its robust API, Shopify allows developers to build custom integrations that enhance the functionality of online stores.
Integrating with the Shopify API can be particularly beneficial for developers looking to access and manage customer data. For example, you might want to retrieve customer information to personalize marketing campaigns or analyze purchasing behavior. This article will guide you through using JavaScript to interact with the Shopify API, specifically focusing on retrieving customer data.
Setting Up Your Shopify Developer Account for API Access
Before you can start interacting with the Shopify API, you'll need to set up a developer account and create a Shopify app. This will allow you to authenticate your requests and access customer data securely.
Step-by-Step Guide to Creating a Shopify Developer Account
- Sign Up for a Shopify Partner Account: Visit the Shopify Partners page and sign up for a free account. This will give you access to the Shopify Partner Dashboard, where you can create and manage your apps.
- Create a Development Store: Once your Partner account is set up, create a development store. This store will serve as your sandbox environment for testing your app and API interactions without affecting live data.
Creating a Shopify App for OAuth Authentication
Shopify uses OAuth for authenticating API requests. Follow these steps to create an app and obtain the necessary credentials:
- Navigate to the Apps Section: In your Shopify Partner Dashboard, go to the "Apps" section and click on "Create app."
- Configure App Details: Enter the app name and select the development store you created earlier. Provide a valid URL for the app's callback URL, which Shopify will use to redirect users after they authorize your app.
- Set Up API Scopes: Define the access scopes your app requires. For accessing customer data, ensure you request the necessary scopes such as
read_customersandwrite_customers. - Generate API Credentials: After configuring your app, Shopify will provide you with an API key and API secret. These credentials are essential for authenticating your API requests.
Obtaining and Using Access Tokens
With your app set up, you can now obtain an access token to authenticate your API requests:
- Initiate OAuth Flow: Direct users to the Shopify authorization URL, including your app's API key and requested scopes. Upon authorization, Shopify will redirect to your callback URL with a temporary code.
- Exchange Code for Access Token: Use the temporary code to request an access token from Shopify. This token will be used in the
X-Shopify-Access-Tokenheader for all API requests.
For more detailed information on setting up authentication, refer to the official Shopify documentation: Shopify Admin Guide and Shopify API Authentication.
sbb-itb-96038d7
Making API Calls to Retrieve Shopify Customers Using JavaScript
To interact with the Shopify API and retrieve customer data, you'll need to use JavaScript to make HTTP requests. This section will guide you through the process of setting up your environment, writing the necessary code, and handling responses effectively.
Setting Up Your JavaScript Environment for Shopify API Integration
Before making API calls, ensure you have Node.js installed on your machine. Node.js provides the runtime environment for executing JavaScript code outside of a browser. Additionally, you'll need the axios library to simplify HTTP requests.
- Install Node.js: Download and install Node.js from the official website.
- Initialize a New Project: Create a new directory for your project and run
npm init -yto initialize a new Node.js project. - Install Axios: Run
npm install axiosto add the Axios library to your project.
Writing JavaScript Code to Retrieve Customers from Shopify
With your environment set up, you can now write the JavaScript code to make API calls to Shopify and retrieve customer data. Below is an example of how to achieve this using Axios.
const axios = require('axios');
// Define the API endpoint and headers
const shopName = 'your-development-store';
const accessToken = 'your_access_token';
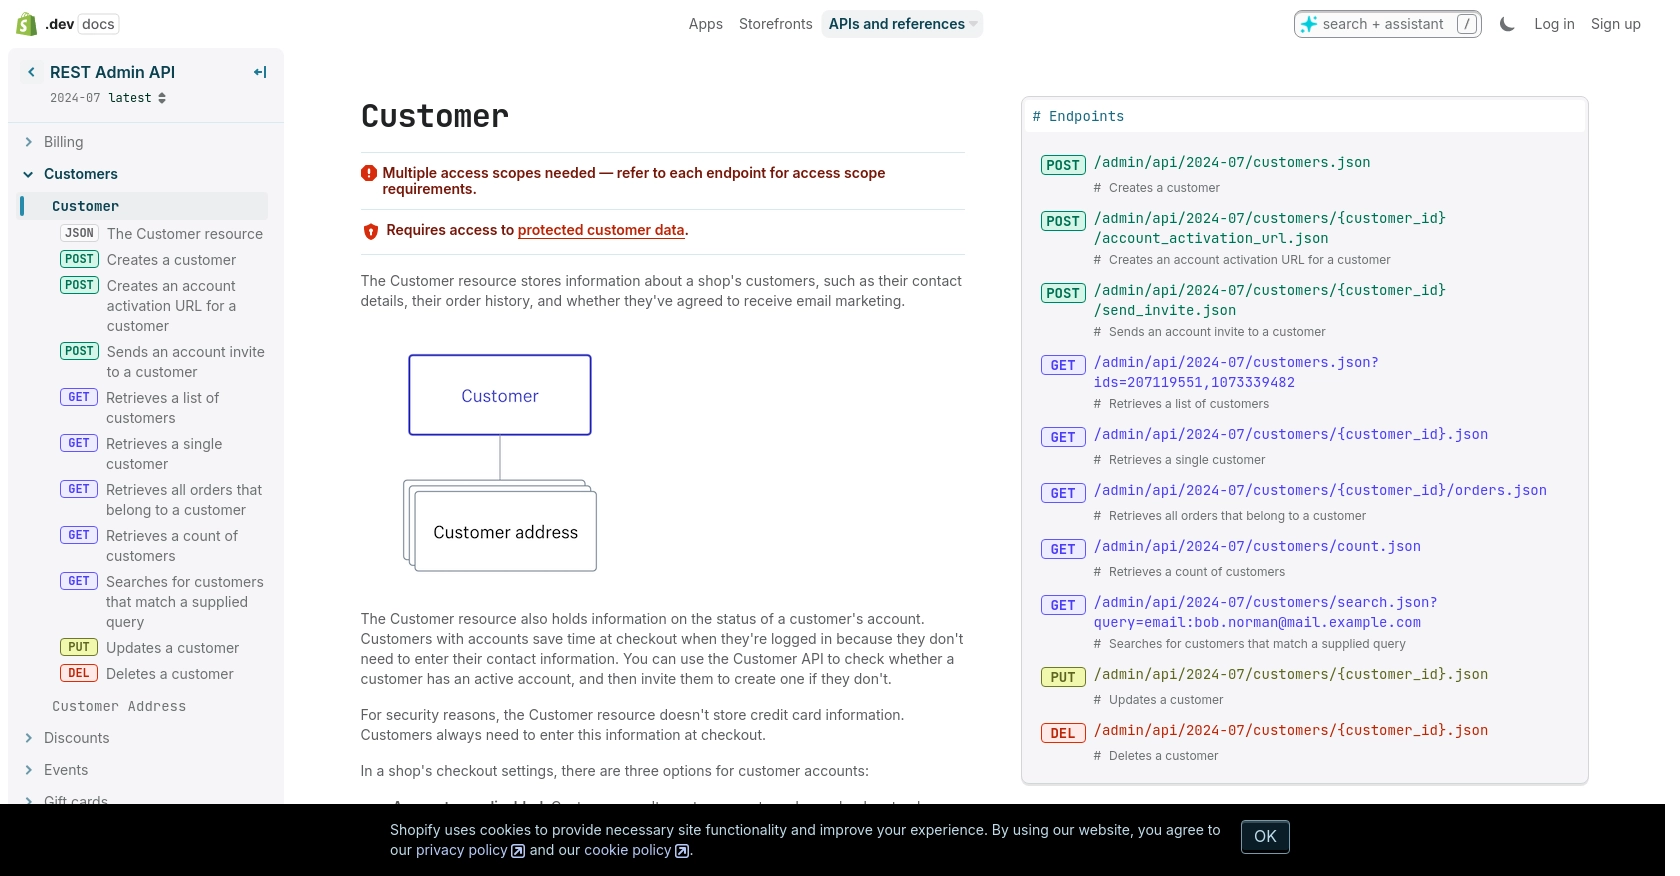
const endpoint = `https://${shopName}.myshopify.com/admin/api/2024-07/customers.json`;
const headers = {
'Content-Type': 'application/json',
'X-Shopify-Access-Token': accessToken
};
// Function to get customers
async function getCustomers() {
try {
const response = await axios.get(endpoint, { headers });
const customers = response.data.customers;
console.log(customers);
} catch (error) {
console.error('Error fetching customers:', error.response ? error.response.data : error.message);
}
}
// Call the function
getCustomers();
Replace your-development-store and your_access_token with your actual Shopify store name and access token. This script sets up the API endpoint and headers, then makes a GET request to retrieve customer data. The response is logged to the console.
Verifying API Call Success and Handling Errors
After running the script, you should see a list of customers printed in the console. To verify the request's success, you can cross-check the returned data with the customer information in your Shopify development store.
In case of errors, the script logs the error message. Common error codes include:
- 401 Unauthorized: Incorrect authentication credentials.
- 429 Too Many Requests: Rate limit exceeded. Wait before retrying.
- 5xx Server Errors: Internal Shopify errors. Check the Shopify status page for updates.
For more details on handling errors and understanding status codes, refer to the Shopify API documentation.
Conclusion and Best Practices for Shopify API Integration
Integrating with the Shopify API using JavaScript allows developers to efficiently manage customer data, enhancing the functionality of online stores. By following the steps outlined in this guide, you can set up a secure connection to Shopify, retrieve customer information, and handle API responses effectively.
Best Practices for Secure and Efficient Shopify API Usage
- Secure Storage of Credentials: Always store your API credentials securely. Avoid hardcoding them in your source code. Use environment variables or secure vaults to manage sensitive information.
- Handle Rate Limiting: Shopify imposes a rate limit of 40 requests per app per store per minute. Implement logic to handle the
429 Too Many Requestserror by pausing requests and retrying after the specified time. - Data Standardization: Ensure that customer data retrieved from Shopify is standardized and transformed as needed for your application. This will help maintain consistency across different systems.
- Monitor API Changes: Shopify's API is versioned, with updates released regularly. Stay informed about changes to ensure your integration remains compatible with the latest API version.
Streamlining Integrations with Endgrate
While building custom integrations with Shopify can be rewarding, it can also be time-consuming and complex. Endgrate offers a solution by providing a unified API endpoint that connects to multiple platforms, including Shopify. This allows developers to focus on core product development while outsourcing integration tasks.
With Endgrate, you can build once for each use case and leverage an intuitive integration experience for your customers. Explore how Endgrate can simplify your integration needs by visiting Endgrate.
Read More


Ready to get started?
