Using the Shopify API to Get Orders in Javascript

Introduction to Shopify API for Order Management
Shopify is a leading e-commerce platform that empowers businesses to create and manage online stores with ease. It offers a robust set of tools and features that cater to businesses of all sizes, from small startups to large enterprises. With its extensive API capabilities, Shopify enables developers to build custom integrations and enhance the functionality of their online stores.
Integrating with the Shopify API allows developers to access and manage various aspects of an online store, including orders, products, customers, and more. By leveraging the Shopify API, developers can automate order processing, streamline inventory management, and enhance customer experiences. For example, a developer might use the Shopify API to retrieve a list of recent orders and automatically update a third-party inventory system, ensuring that stock levels are always accurate.
This article will guide you through the process of using JavaScript to interact with the Shopify API to retrieve orders. You'll learn how to set up authentication, make API calls, and handle responses effectively, enabling you to integrate Shopify's powerful order management capabilities into your applications.
Setting Up Your Shopify Test Account for API Integration
Before diving into the Shopify API, it's essential to set up a test environment where you can safely experiment with API calls without affecting a live store. Shopify provides a development store option that allows developers to test and build apps with full access to the Shopify API.
Creating a Shopify Development Store
To begin, you'll need to create a Shopify Partner account if you don't already have one. Follow these steps to set up your development store:
- Visit the Shopify Partners website and sign up for a free account.
- Once logged in, navigate to the "Stores" section in your Partner Dashboard.
- Click on "Add store" and select "Development store" as the store type.
- Fill in the required details, such as store name and password, and click "Save."
Your development store is now ready, and you can use it to test API integrations without any restrictions.
Setting Up OAuth Authentication for Shopify API
Shopify uses OAuth 2.0 for authentication, which involves creating a custom app to obtain the necessary credentials. Follow these steps to set up OAuth authentication:
- In your Shopify Partner Dashboard, go to the "Apps" section and click "Create app."
- Select "Custom app" and provide the necessary details, such as app name and developer email.
- Under "API credentials," note down the API key and API secret key, which will be used for authentication.
- Set the required scopes for your app. For retrieving orders, you need the
read_ordersscope. - Save the app and install it on your development store to generate an access token.
With these credentials, you can now authenticate your API requests using the access token.
Generating Access Token for API Requests
To make authenticated API calls, you'll need to exchange your API key and secret for an access token. Here's how to do it:
- Direct the user to the following URL, replacing
{shop}with your development store's domain: - After the user authorizes the app, Shopify will redirect them to the specified
redirect_uriwith a temporary code. - Exchange this code for a permanent access token by making a POST request to:
client_id: Your API keyclient_secret: Your API secret keycode: The temporary code received from the authorization step
https://{shop}.myshopify.com/admin/oauth/authorize?client_id={api_key}&scope=read_orders&redirect_uri={redirect_uri}https://{shop}.myshopify.com/admin/oauth/access_tokenInclude the following parameters in the request body:
Upon successful exchange, you'll receive an access token, which you can use to authenticate your API requests.

sbb-itb-96038d7
Making API Calls to Retrieve Shopify Orders Using JavaScript
Once you have set up your Shopify development store and obtained the necessary access token, you can begin making API calls to retrieve orders. This section will guide you through the process of using JavaScript to interact with the Shopify API and fetch order data.
Setting Up Your JavaScript Environment for Shopify API Integration
Before making API calls, ensure you have a JavaScript environment ready. You can use Node.js for server-side JavaScript execution. Make sure you have Node.js installed on your machine. If not, download and install it from the official Node.js website.
Next, create a new project directory and initialize it with npm:
mkdir shopify-api-integration
cd shopify-api-integration
npm init -y
Install the axios library, which will help you make HTTP requests:
npm install axiosWriting JavaScript Code to Fetch Shopify Orders
Now that your environment is set up, you can write the JavaScript code to retrieve orders from Shopify. Create a new file named getOrders.js and add the following code:
const axios = require('axios');

// Replace with your store's domain and access token
const shop = '{shop}.myshopify.com';
const accessToken = '{access_token}';

// Define the API endpoint
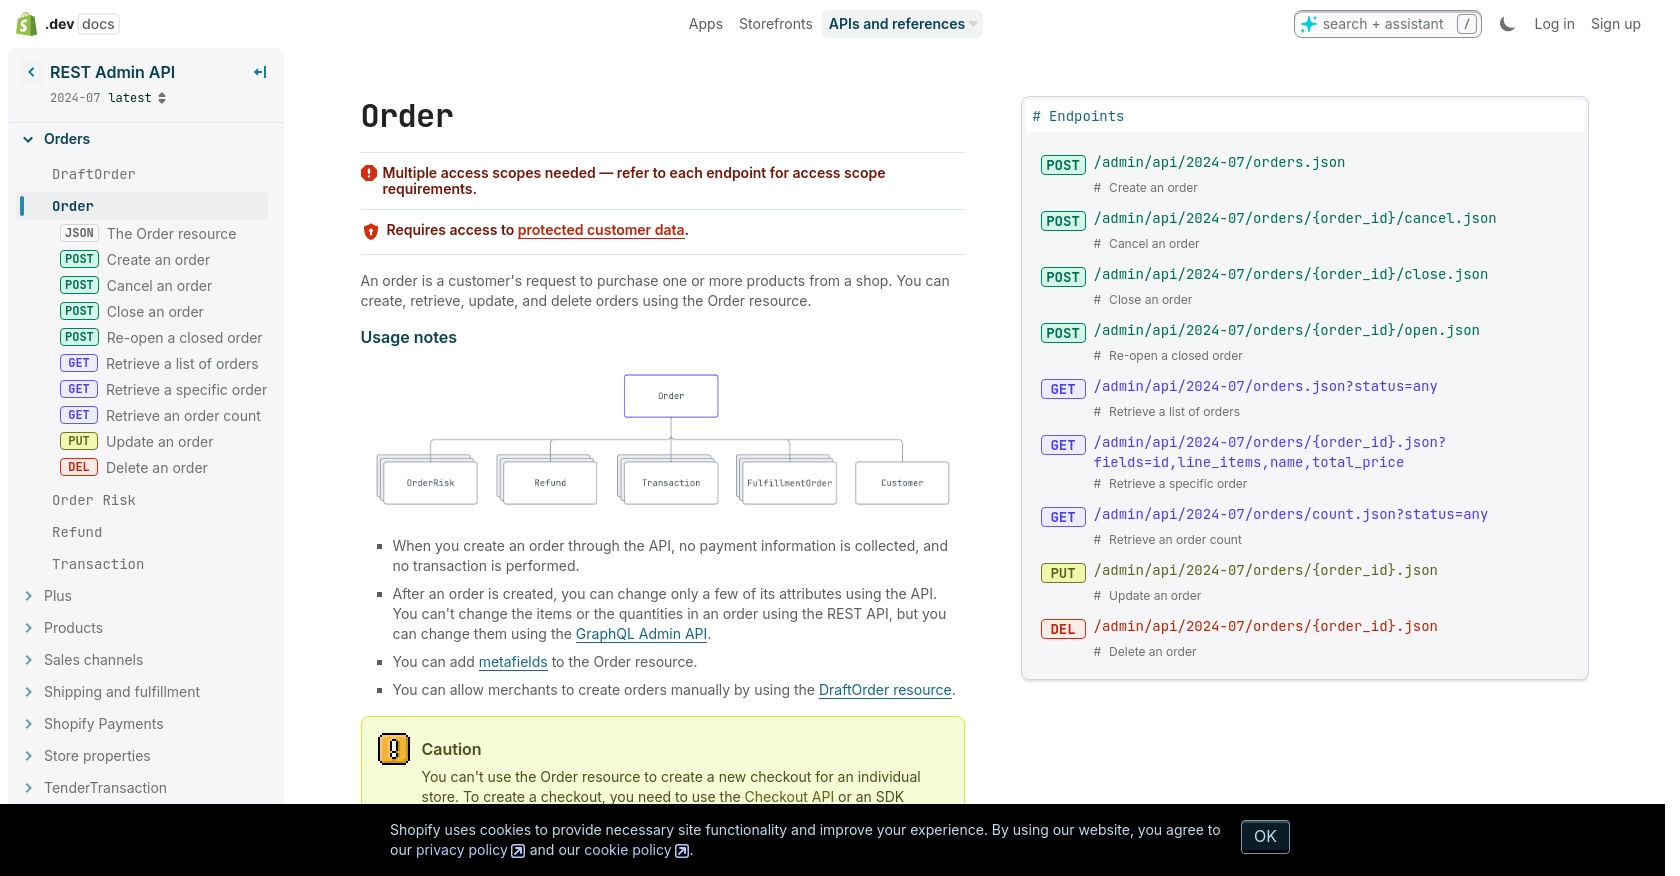
const endpoint = `https://${shop}/admin/api/2024-07/orders.json`;

// Set up headers for authentication
const headers = {
  'Content-Type': 'application/json',
  'X-Shopify-Access-Token': accessToken
};

// Function to fetch orders
async function fetchOrders() {
  try {
    const response = await axios.get(endpoint, { headers });
    const orders = response.data.orders;
    console.log('Orders:', orders);
  } catch (error) {
    console.error('Error fetching orders:', error.response ? error.response.data : error.message);
  }
}

// Call the function
fetchOrders();
Replace {shop} with your development store's domain and {access_token} with the access token you obtained earlier. This script uses the axios library to send a GET request to the Shopify API endpoint for retrieving orders.
Running the JavaScript Script to Retrieve Shopify Orders
To execute the script and fetch orders, run the following command in your terminal:
node getOrders.jsIf successful, the script will output a list of orders from your Shopify development store. If there are any errors, they will be logged to the console.
Handling Errors and Verifying API Call Success
When making API calls, it's crucial to handle potential errors gracefully. The Shopify API may return various HTTP status codes indicating the success or failure of your request. Common error codes include:
- 401 Unauthorized: Incorrect authentication credentials.
- 403 Forbidden: Insufficient access scopes.
- 429 Too Many Requests: Rate limit exceeded.
Refer to the Shopify authentication documentation and API call documentation for more details on handling errors and understanding response codes.
By following these steps, you can effectively retrieve orders from Shopify using JavaScript, allowing you to integrate Shopify's order management capabilities into your applications.

Conclusion: Best Practices for Shopify API Integration Using JavaScript
Integrating with the Shopify API using JavaScript provides a powerful way to enhance your e-commerce applications by automating order management and improving operational efficiency. By following the steps outlined in this guide, you can effectively set up authentication, make API calls, and handle responses to retrieve orders from your Shopify store.
Best Practices for Secure and Efficient Shopify API Usage
- Securely Store Credentials: Always store your API keys and access tokens securely. Avoid hardcoding them in your source code and consider using environment variables or secure vaults.
- Handle Rate Limiting: Shopify's API has a rate limit of 40 requests per app per store per minute. Implement logic to handle the
429 Too Many Requestserror by checking theRetry-Afterheader and pausing requests accordingly. - Optimize Data Handling: When retrieving large datasets, use pagination to manage the data efficiently. This ensures that your application remains responsive and performs well.
- Transform and Standardize Data: Consider transforming and standardizing data fields to match your application's requirements, making it easier to integrate with other systems.
Leverage Endgrate for Seamless Shopify Integrations
While building custom integrations can be rewarding, it can also be time-consuming and complex. Endgrate offers a streamlined solution for managing integrations across multiple platforms, including Shopify. By using Endgrate, you can:
- Save time and resources by outsourcing integration management, allowing you to focus on your core product development.
- Build once for each use case and apply it across different integrations, reducing redundancy and effort.
- Provide your customers with an intuitive and seamless integration experience, enhancing their satisfaction and loyalty.
Explore how Endgrate can simplify your integration processes and help you scale your business efficiently by visiting Endgrate.
Read More
Ready to get started?
