Using the Shopify API to Get Product Variants (with PHP examples)

Introduction to Shopify API
Shopify is a leading e-commerce platform that empowers businesses to create and manage their online stores with ease. Known for its robust features and user-friendly interface, Shopify provides a comprehensive solution for businesses looking to sell products online.
Integrating with Shopify's API allows developers to enhance the functionality of their e-commerce applications by accessing and manipulating store data. For example, using the Shopify API, developers can retrieve product variants, enabling them to display detailed product information, manage inventory, and customize the shopping experience for customers.
This article will guide you through the process of using PHP to interact with the Shopify API, specifically focusing on retrieving product variants. By following this tutorial, you'll learn how to efficiently access and manage product data on the Shopify platform.
Setting Up Your Shopify Developer Account and App for API Access
Before you can start interacting with the Shopify API, you need to set up a Shopify developer account and create an app to obtain the necessary credentials for authentication. This process involves creating a Shopify Partner account, setting up a development store, and configuring an app to use OAuth for secure API access.
Create a Shopify Partner Account
To begin, you'll need a Shopify Partner account. This account allows you to create development stores and apps for testing purposes.
- Visit the Shopify Partners page and sign up for a free account.
- Fill out the required information and complete the registration process.
Set Up a Shopify Development Store
Once your Partner account is ready, you can create a development store. This store is a sandbox environment where you can test your app without affecting a live store.
- Log in to your Shopify Partner account and navigate to the Stores section.
- Click on Add store and select Development store.
- Provide the necessary details, such as store name and password, and click Save.
Create a Shopify App for OAuth Authentication
To interact with the Shopify API, you need to create an app that will use OAuth to authenticate requests.
- In your Shopify Partner dashboard, go to the Apps section and click on Create app.
- Select Custom app and provide a name for your app.
- Under App setup, configure the app's permissions to access product data. Ensure you request the read_products scope to retrieve product variants.
- Click Save to create the app.
Generate API Credentials
After creating the app, you need to generate the API credentials that will be used for authentication.
- Navigate to the API credentials tab within your app settings.
- Click on Install app to install it on your development store.
- Once installed, you'll receive an API key and API secret key. Keep these credentials secure, as they are required for making API calls.
With your Shopify developer account, development store, and app set up, you're now ready to start interacting with the Shopify API using PHP. In the next section, we'll explore how to make API calls to retrieve product variants.
sbb-itb-96038d7
Making API Calls to Retrieve Shopify Product Variants Using PHP
To interact with the Shopify API and retrieve product variants, you'll need to use PHP to make HTTP requests. This section will guide you through the process of setting up your PHP environment, making the API call, and handling the response.
Setting Up Your PHP Environment for Shopify API Integration
Before making API calls, ensure you have the following prerequisites installed on your machine:
- PHP 7.4 or later
- cURL extension for PHP
To verify that cURL is enabled, you can create a PHP file with the following content and run it:
<?php
phpinfo();
?>
Look for the cURL section in the output to confirm it's enabled.
Installing Required PHP Libraries for Shopify API
To simplify HTTP requests, you can use the Guzzle library. Install it using Composer:
composer require guzzlehttp/guzzleWriting PHP Code to Retrieve Shopify Product Variants
Create a PHP file named get_product_variants.php and add the following code:
<?php
require 'vendor/autoload.php';
use GuzzleHttp\Client;
$client = new Client();
$storeName = 'your-development-store';
$accessToken = 'your_access_token';
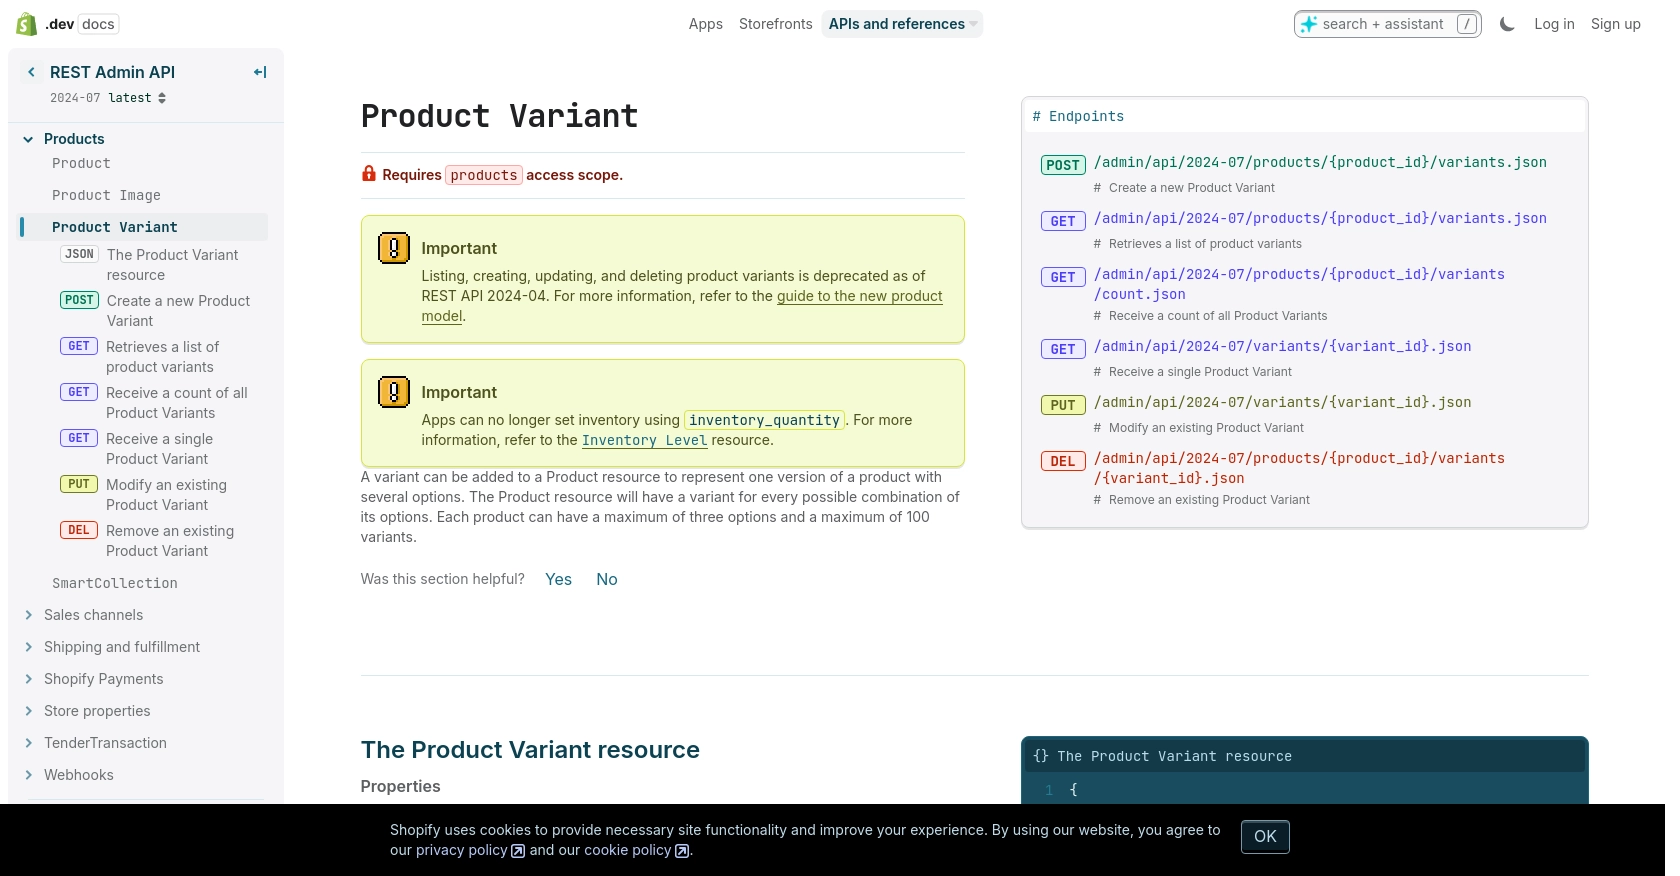
$productId = '632910392';
$response = $client->request('GET', "https://{$storeName}.myshopify.com/admin/api/2024-07/products/{$productId}/variants.json", [
'headers' => [
'X-Shopify-Access-Token' => $accessToken,
'Content-Type' => 'application/json',
],
]);
$data = json_decode($response->getBody(), true);
foreach ($data['variants'] as $variant) {
echo "Variant ID: " . $variant['id'] . " - Title: " . $variant['title'] . "<br>";
}
?>Replace your-development-store and your_access_token with your actual store name and access token.
Executing the PHP Script and Verifying the Output
Run the script from the command line:
php get_product_variants.phpYou should see a list of product variants with their IDs and titles displayed in the output.
Handling Shopify API Errors and Status Codes
When making API calls, it's essential to handle potential errors. Shopify API may return various status codes, such as:
- 401 Unauthorized: Invalid credentials.
- 404 Not Found: Resource not found.
- 429 Too Many Requests: Rate limit exceeded. Wait before retrying.
To handle these errors, you can modify the PHP code to check the response status:
if ($response->getStatusCode() !== 200) {
    echo "Error: " . $response->getStatusCode() . " - " . $response->getReasonPhrase();
    exit;
}
Verifying API Call Success in Shopify Development Store
After running the script, log in to your Shopify development store to verify that the product variants match the retrieved data. This ensures that your API call was successful and the data is accurate.
Conclusion: Best Practices for Shopify API Integration with PHP
Integrating with the Shopify API using PHP offers a powerful way to enhance your e-commerce applications by accessing and managing product data efficiently. By following the steps outlined in this tutorial, you can retrieve product variants and customize the shopping experience for your customers.
Best Practices for Secure and Efficient Shopify API Usage
- Secure API Credentials: Always keep your API key and secret key secure. Avoid hardcoding them in your scripts and consider using environment variables or secure vaults.
- Handle Rate Limiting: Shopify's API has a rate limit of 40 requests per app per store per minute. Implement logic to handle the
429 Too Many Requestserror by checking theRetry-Afterheader and pausing requests accordingly. More details can be found in the Shopify API documentation. - Validate API Responses: Always check the response status codes and handle errors gracefully. This ensures a robust integration that can recover from unexpected issues.
- Optimize Data Handling: Use pagination to manage large datasets and reduce the load on your application and Shopify's servers.
Transforming and Standardizing Shopify Product Data
When working with product data, consider transforming and standardizing fields to match your application's requirements. This may involve converting currency formats, adjusting weight units, or mapping product options to your internal data structures.
Streamlining Shopify Integrations with Endgrate
If managing multiple integrations becomes overwhelming, consider using a tool like Endgrate. Endgrate simplifies the integration process by providing a unified API endpoint that connects to multiple platforms, including Shopify. This allows you to focus on your core product while outsourcing the complexities of integration management.
By leveraging Endgrate, you can save time and resources, build once for each use case, and offer an intuitive integration experience for your customers.
Read More

Ready to get started?
