Using the Xero API to Create or Update Purchase Orders (with Python examples)
Introduction to Xero API for Purchase Orders
Xero is a powerful cloud-based accounting software platform designed to help businesses manage their finances efficiently. It offers a wide range of features, including invoicing, payroll, and financial reporting, making it a popular choice for small to medium-sized enterprises.
Integrating with Xero's API allows developers to automate and streamline accounting processes, such as creating and updating purchase orders. This can be particularly useful for businesses that need to manage inventory and supplier relationships effectively. For example, a developer might use the Xero API to automatically generate purchase orders based on inventory levels, ensuring that stock is replenished in a timely manner.
Setting Up Your Xero Sandbox Account for API Integration
Before you can start using the Xero API to create or update purchase orders, you'll need to set up a sandbox account. This will allow you to test your integration without affecting live data. Xero provides a free trial and sandbox environment specifically for developers to experiment with their API.
Creating a Xero Developer Account
To begin, you'll need to create a Xero developer account. Follow these steps:
- Visit the Xero Developer Portal and sign up for a developer account.
- Once registered, log in to your developer dashboard.
Setting Up a Xero Sandbox Organization
After creating your developer account, set up a sandbox organization:
- Navigate to the "My Apps" section in your developer dashboard.
- Click on "Try the API" and follow the prompts to create a new sandbox organization.
- This sandbox will serve as your testing environment for API calls.
Creating a Xero App for OAuth Authentication
Since the Xero API uses OAuth 2.0 for authentication, you'll need to create an app to obtain the necessary credentials:
- In the "My Apps" section, click on "New App" to create a new application.
- Fill in the required details, such as the app name and company URL.
- Under "OAuth 2.0 Redirect URI," enter a valid redirect URL for your application.
- Once your app is created, you'll receive a client ID and client secret, which are essential for authenticating API requests.
Configuring OAuth Scopes for Xero API Access
To interact with purchase orders, you'll need to configure the appropriate OAuth scopes:
- Navigate to the "Scopes" section of your app settings.
- Select the scopes related to purchase orders, such as "accounting.transactions" and "accounting.settings".
- Save your changes to ensure your app has the necessary permissions.
With your sandbox account and app set up, you're now ready to start making API calls to Xero. For more detailed information on OAuth 2.0 authentication, refer to the Xero OAuth 2.0 documentation.

sbb-itb-96038d7
Making API Calls to Xero for Purchase Orders Using Python
With your Xero sandbox account and app configured, you can now proceed to make API calls to create or update purchase orders. This section will guide you through the process using Python, ensuring you have the necessary tools and knowledge to interact with the Xero API effectively.
Setting Up Your Python Environment for Xero API Integration
To begin, ensure you have Python installed on your machine. This tutorial uses Python 3.11.1. Additionally, you'll need the following dependencies:
- The Python package installer
pip - The
requestslibrary for making HTTP requests - The
requests-oauthliblibrary for handling OAuth 2.0 authentication
Install the necessary libraries using the following commands:
pip install requests requests-oauthlibAuthenticating with Xero API Using OAuth 2.0
Before making any API calls, you need to authenticate using OAuth 2.0. Here's a basic example of how to obtain an access token:
from requests_oauthlib import OAuth2Session

# Replace with your client ID and secret
client_id = 'YOUR_CLIENT_ID'
client_secret = 'YOUR_CLIENT_SECRET'
redirect_uri = 'YOUR_REDIRECT_URI'

# Xero authorization URL
authorization_base_url = 'https://login.xero.com/identity/connect/authorize'
token_url = 'https://identity.xero.com/connect/token'

# Create an OAuth2 session
xero = OAuth2Session(client_id, redirect_uri=redirect_uri)

# Redirect user to Xero for authorization
authorization_url, state = xero.authorization_url(authorization_base_url)
print('Please go to %s and authorize access.' % authorization_url)

# Get the authorization verifier code from the callback URL
redirect_response = input('Paste the full redirect URL here: ')

# Fetch the access token
xero.fetch_token(token_url, client_secret=client_secret, authorization_response=redirect_response)

# Access token is now available in xero.token
print('Access token:', xero.token)
Replace YOUR_CLIENT_ID, YOUR_CLIENT_SECRET, and YOUR_REDIRECT_URI with your actual credentials. This script will guide you through the OAuth flow to obtain an access token.
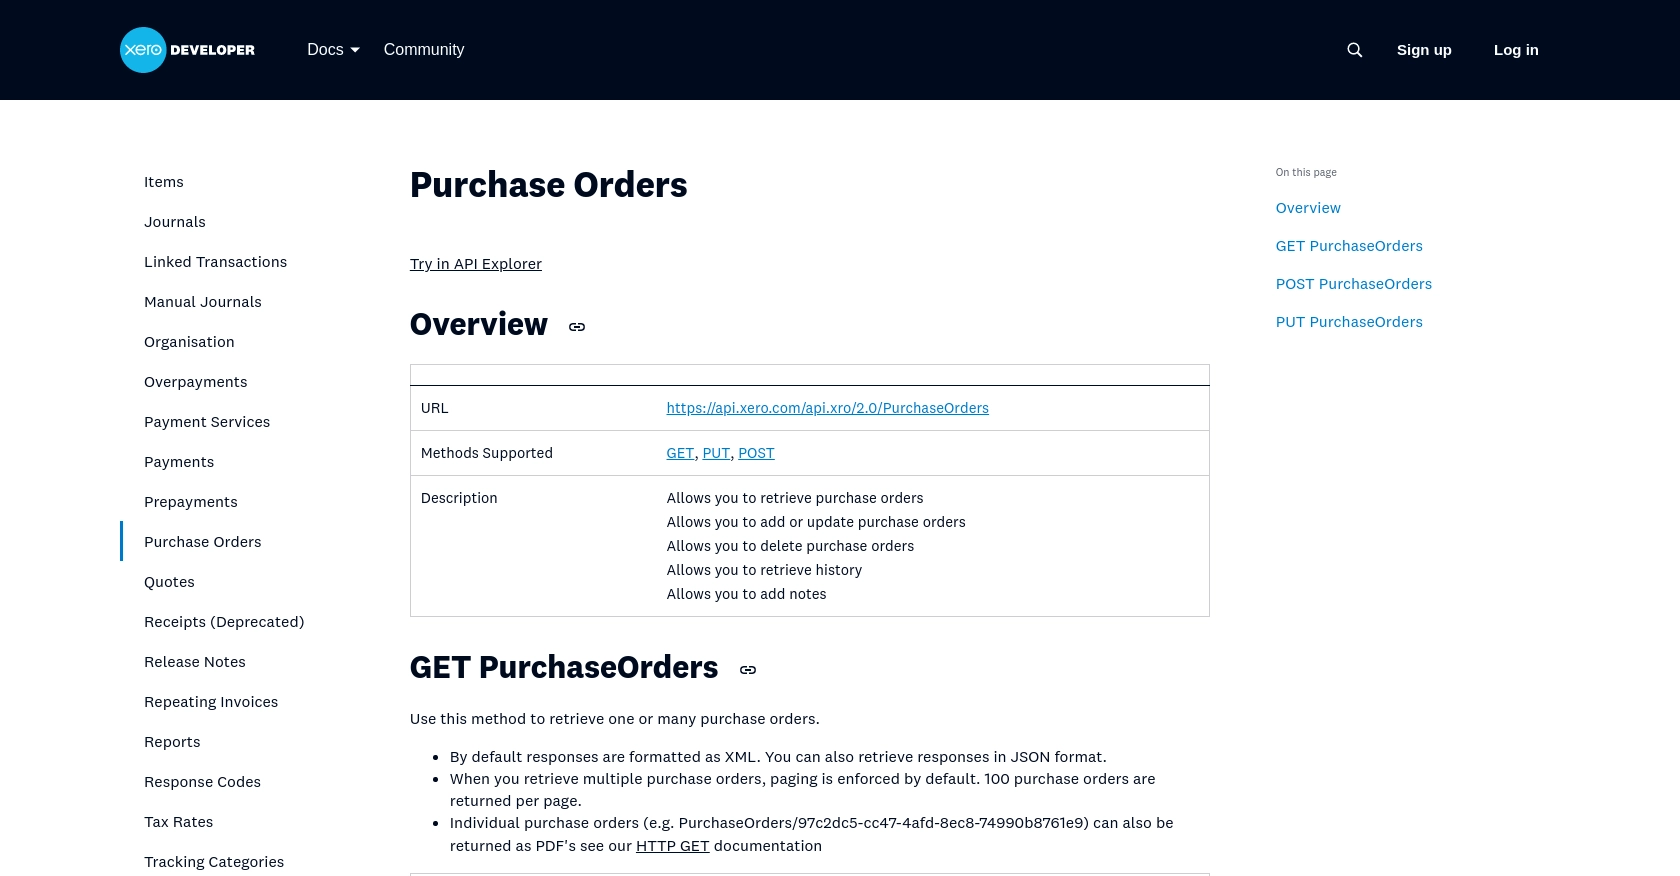
Creating or Updating Purchase Orders with Xero API
Once authenticated, you can make API calls to create or update purchase orders. Here's an example of how to create a purchase order:
import requests

# Xero API endpoint for purchase orders
url = 'https://api.xero.com/api.xro/2.0/PurchaseOrders'

# Headers including the access token
headers = {
    'Authorization': 'Bearer ' + xero.token['access_token'],
    'Content-Type': 'application/json'
}

# Sample purchase order data
purchase_order_data = {
    "Type": "ACCPAY",
    "Contact": {
        "Name": "Supplier Name"
    },
    "Date": "2023-10-01",
    "LineItems": [
        {
            "Description": "Item Description",
            "Quantity": 10,
            "UnitAmount": 100.00
        }
    ]
}

# Make the POST request to create a purchase order
response = requests.post(url, json=purchase_order_data, headers=headers)

# Check if the request was successful
if response.status_code == 200:
    print("Purchase order created successfully:", response.json())
else:
    print("Failed to create purchase order:", response.status_code, response.text)
This script sends a POST request to the Xero API to create a purchase order. Ensure you replace the sample data with your actual purchase order details.
Handling Errors and Verifying API Call Success
After making an API call, it's crucial to check the response status code to verify success. A status code of 200 indicates a successful request. If the request fails, the response will include an error message that can help diagnose the issue.
For more detailed error handling and information on error codes, refer to the Xero API documentation.
Best Practices for Using Xero API in Purchase Order Management
When integrating with the Xero API for purchase order management, it's essential to follow best practices to ensure security, efficiency, and reliability. Here are some key considerations:
Securely Storing OAuth Credentials
Ensure that your OAuth credentials, such as the client ID and client secret, are stored securely. Avoid hardcoding them in your source code. Instead, use environment variables or secure vaults to manage sensitive information.
Handling Xero API Rate Limits
Xero imposes rate limits on API requests to ensure fair usage and system stability. According to the Xero API documentation, be mindful of these limits and implement strategies to handle rate limiting gracefully. Consider implementing exponential backoff or retry mechanisms to manage requests efficiently.
Transforming and Standardizing Data Fields
When working with purchase orders, ensure that data fields are standardized and transformed as needed. This includes formatting dates, currency values, and other fields to match Xero's requirements, ensuring seamless integration.
Streamlining Integration with Endgrate
Building and maintaining integrations with multiple platforms can be time-consuming and complex. Endgrate simplifies this process by providing a unified API endpoint that connects to various platforms, including Xero.
- Save time and resources by outsourcing integrations and focusing on your core product development.
- Build once for each use case instead of multiple times for different integrations.
- Offer an easy, intuitive integration experience for your customers.
Explore how Endgrate can enhance your integration strategy by visiting Endgrate.
Read More
- https://endgrate.com/provider/xero
- https://developer.xero.com/documentation/api/accounting/requests-and-responses
- https://developer.xero.com/documentation/guides/oauth2/limits/
- https://developer.xero.com/documentation/guides/oauth2/overview
- https://developer.xero.com/documentation/guides/oauth2/scopes
- https://developer.xero.com/documentation/guides/oauth2/auth-flow
- https://developer.xero.com/documentation/guides/oauth2/tenants
- https://developer.xero.com/documentation/api/accounting/purchaseorders

Ready to get started?
