Using the Younium API to Create or Update Accounts (with PHP examples)
Introduction to Younium API Integration
Younium is a comprehensive subscription management platform tailored for B2B companies, offering a suite of tools to streamline billing, invoicing, and revenue recognition processes. Its robust API allows developers to seamlessly integrate Younium's functionalities into their existing systems, enhancing operational efficiency and data accuracy.
Connecting with the Younium API can empower developers to automate account management tasks, such as creating or updating customer accounts. For example, a developer might use the Younium API to automatically update account details when a customer's subscription changes, ensuring that all records are current and accurate.
Setting Up Your Younium Test/Sandbox Account for API Integration
Before diving into the Younium API integration, it's essential to set up a test or sandbox account. This environment allows developers to experiment with API calls without affecting live data, ensuring a smooth and error-free integration process.
Creating a Younium Sandbox Account
To begin, you'll need to create a sandbox account on Younium. This account will serve as your testing ground for API interactions. Follow these steps:
- Visit the Younium Developer Portal and sign up for a sandbox account.
- Once registered, log in to your account and navigate to the dashboard.
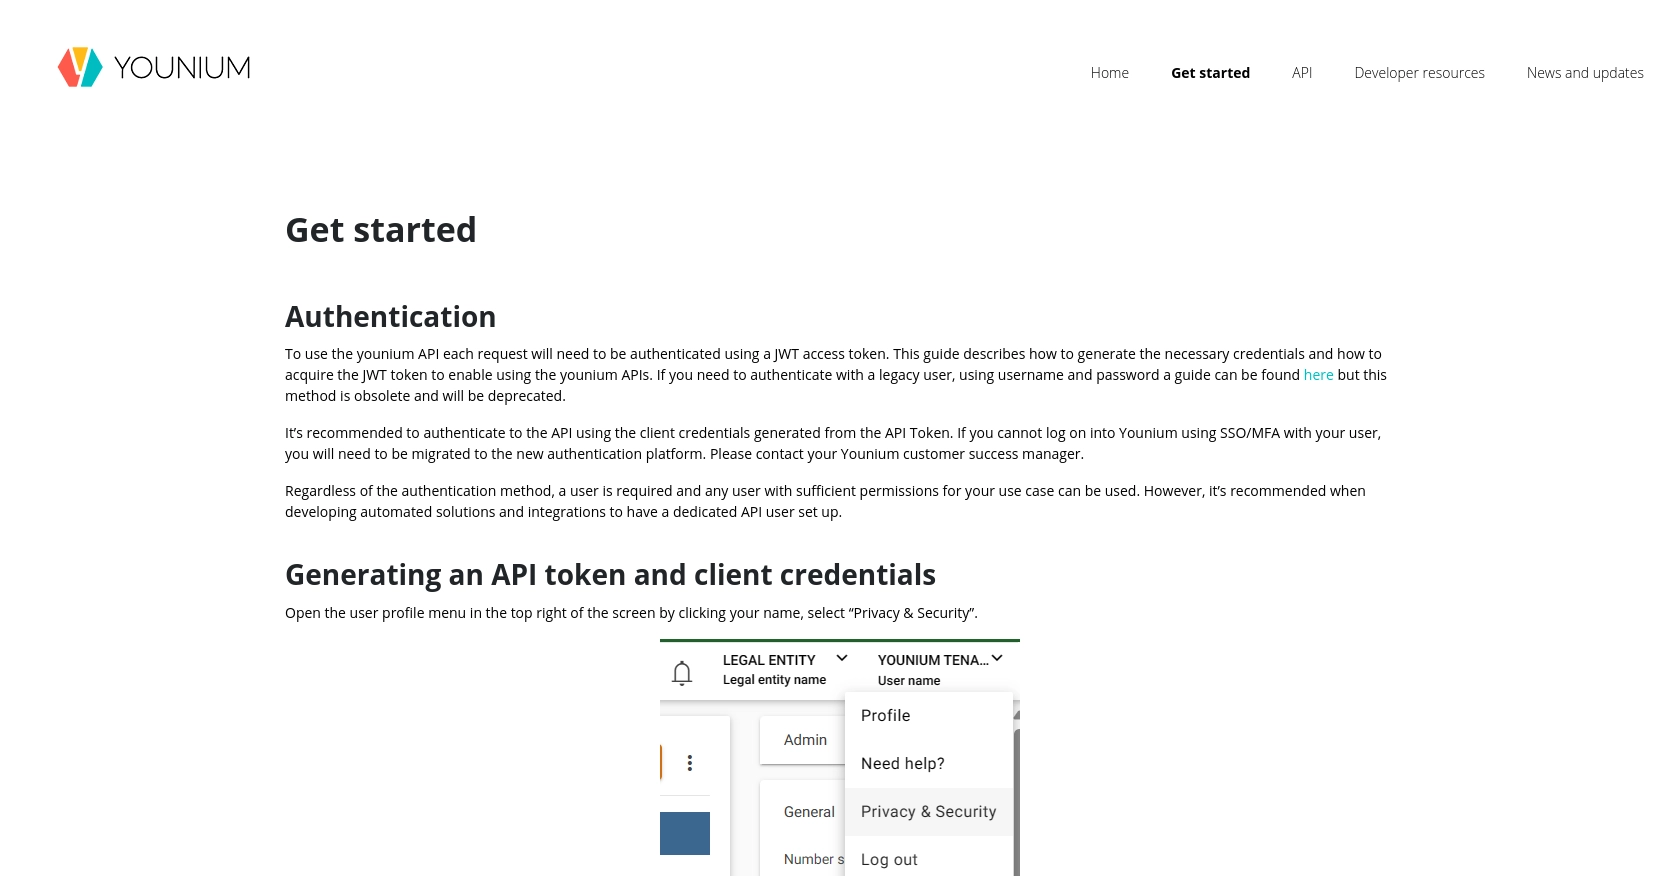
Generating API Tokens and Client Credentials
Authentication with the Younium API requires a JWT access token. Here's how to generate the necessary credentials:
- Open the user profile menu by clicking your name in the top right corner and select “Privacy & Security”.
- Choose “Personal Tokens” from the left panel and click “Generate Token”.
- Provide a relevant description and click “Create”.
- Copy the Client ID and Secret Key displayed. These credentials are crucial for generating the JWT token and will not be visible again.
Acquiring a JWT Access Token
With your client credentials ready, you can now acquire a JWT access token by making a POST request:
// Set the API endpoint for the sandbox environment
$url = 'https://api.sandbox.younium.com/auth/token';

// Prepare the request headers and body
$headers = [
    'Content-Type: application/json'
];
$body = json_encode([
    'clientId' => 'Your_Client_ID',
    'secret' => 'Your_Secret_Key'
]);

// Initialize cURL session
$ch = curl_init($url);
curl_setopt($ch, CURLOPT_HTTPHEADER, $headers);
curl_setopt($ch, CURLOPT_POST, true);
curl_setopt($ch, CURLOPT_POSTFIELDS, $body);
curl_setopt($ch, CURLOPT_RETURNTRANSFER, true);

// Execute the request and decode the response
$response = curl_exec($ch);
curl_close($ch);
$data = json_decode($response, true);

// Access the JWT token
$accessToken = $data['accessToken'];
Replace Your_Client_ID and Your_Secret_Key with the credentials you generated earlier. This script will return a JWT token, valid for 24 hours, which you will use to authenticate API requests.
Handling Authentication Errors
While acquiring the JWT token, you might encounter errors. Here are some common issues and their solutions:
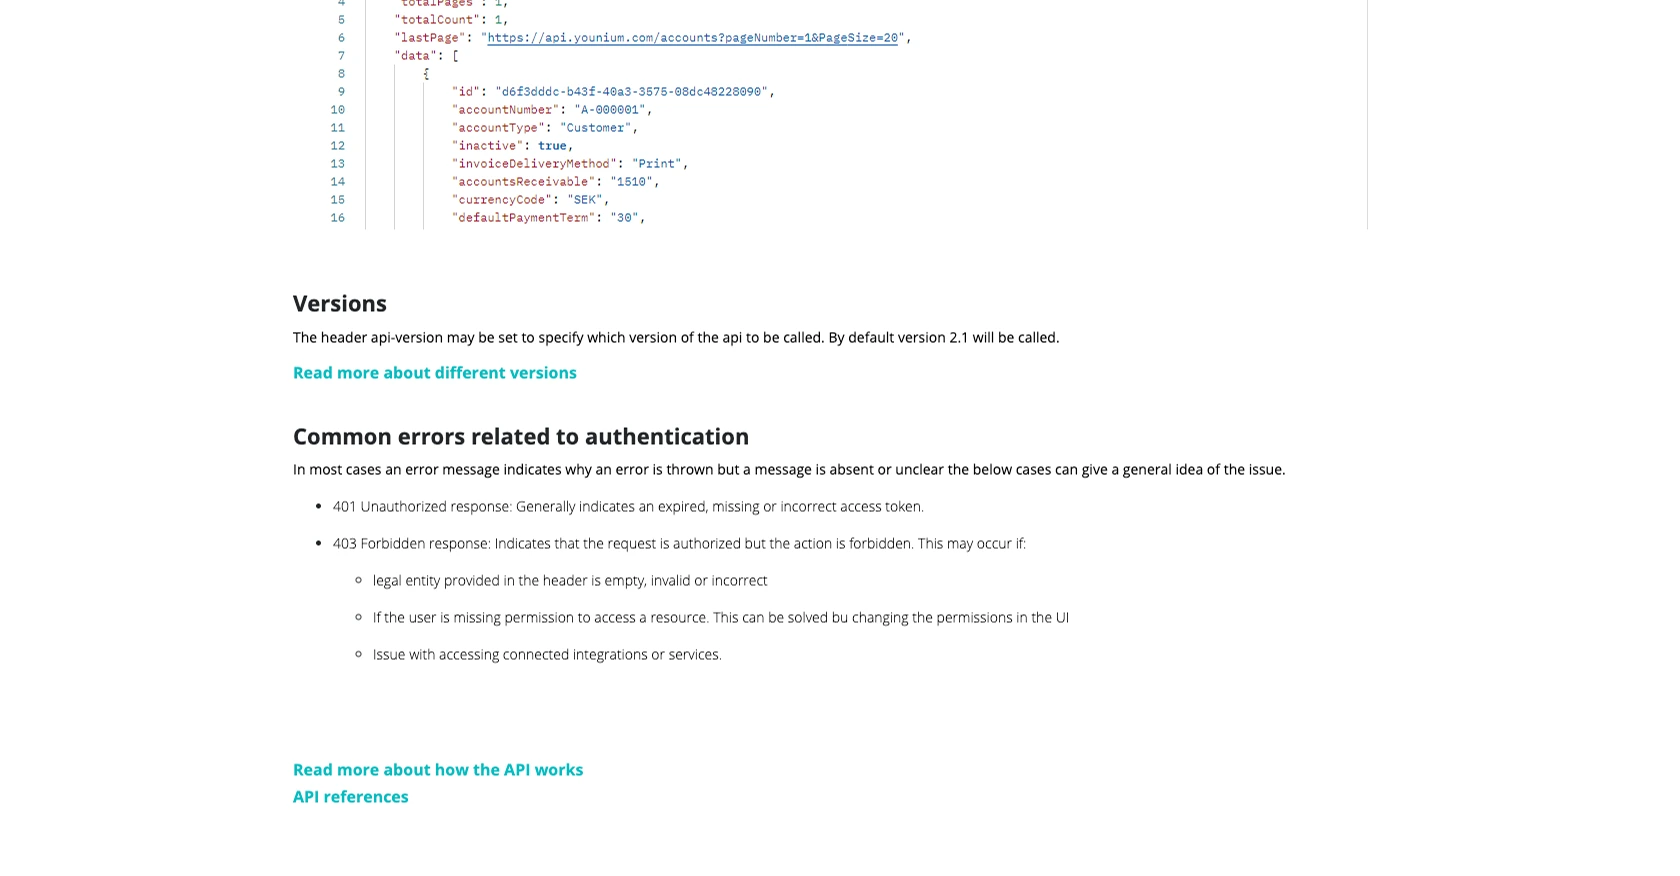
- 401 Unauthorized: Check if the access token is expired, missing, or incorrect.
- 403 Forbidden: Ensure the legal entity provided in the header is valid and that the user has the necessary permissions.
For more detailed error handling, refer to the Younium API documentation.
sbb-itb-96038d7
Making API Calls to Younium for Account Management Using PHP
With your JWT access token in hand, you can now proceed to make API calls to Younium to create or update accounts. This section will guide you through the process using PHP, ensuring you can seamlessly integrate Younium's account management capabilities into your application.
Setting Up Your PHP Environment for Younium API Integration
Before making API calls, ensure your PHP environment is set up correctly. You'll need:
- PHP 7.4 or higher
- cURL extension enabled
Creating or Updating Accounts with Younium API
To create or update accounts, you'll need to make a POST request to the Younium API endpoint. Here's a step-by-step guide:
// Set the API endpoint for creating or updating accounts
$url = 'https://api.sandbox.younium.com/accounts';

// Prepare the request headers
$headers = [
    'Content-Type: application/json',
    'Authorization: Bearer ' . $accessToken,
    'api-version: 2.1', // Optional but recommended
    'legal-entity: Your_Legal_Entity_ID'
];

// Define the account data
$accountData = [
    'name' => 'New Account Name',
    'email' => 'account@example.com',
    // Add other necessary fields as per your requirements
];

// Initialize cURL session
$ch = curl_init($url);
curl_setopt($ch, CURLOPT_HTTPHEADER, $headers);
curl_setopt($ch, CURLOPT_POST, true);
curl_setopt($ch, CURLOPT_POSTFIELDS, json_encode($accountData));
curl_setopt($ch, CURLOPT_RETURNTRANSFER, true);

// Execute the request and decode the response
$response = curl_exec($ch);
curl_close($ch);
$data = json_decode($response, true);

// Check if the request was successful
if (isset($data['id'])) {
    echo "Account created/updated successfully. Account ID: " . $data['id'];
} else {
    echo "Failed to create/update account. Error: " . $data['error'];
}
Replace Your_Legal_Entity_ID with the appropriate legal entity ID. This script sends a POST request to the Younium API to create or update an account, using the JWT token for authentication.
Verifying Successful API Requests in Younium Sandbox
After executing the API call, verify the success of the operation by checking the Younium sandbox environment. If the account was created or updated successfully, it should appear in your sandbox account records.
Handling Errors and Troubleshooting Younium API Calls
While making API calls, you may encounter errors. Here are some common issues and how to address them:
- 400 Bad Request: Check the request body for missing or incorrect fields.
- 401 Unauthorized: Ensure your JWT token is valid and not expired.
- 403 Forbidden: Verify the legal entity ID and user permissions.
For more detailed error handling, refer to the Younium API documentation.
Conclusion and Best Practices for Younium API Integration
Integrating with the Younium API can significantly enhance your subscription management processes by automating account creation and updates. By following the steps outlined in this guide, you can efficiently manage customer accounts and ensure data accuracy across your systems.
Best Practices for Secure and Efficient Younium API Usage
- Secure Storage of Credentials: Always store your API credentials, such as the Client ID and Secret Key, securely. Consider using environment variables or secure vaults to prevent unauthorized access.
- Handling Rate Limits: Be mindful of any rate limits imposed by the Younium API. Implement retry logic with exponential backoff to handle rate limit errors gracefully.
- Data Standardization: Ensure that the data you send to and receive from the Younium API is standardized and consistent with your internal data formats. This will help maintain data integrity across your systems.
Streamlining Integrations with Endgrate
While integrating with Younium is a powerful way to enhance your subscription management, managing multiple integrations can be complex and time-consuming. Endgrate offers a unified API solution that simplifies the integration process across various platforms, including Younium.
By leveraging Endgrate, you can save time and resources, allowing you to focus on your core product development. With its intuitive integration experience, you can build once for each use case and easily extend it to other platforms.
Explore how Endgrate can transform your integration strategy by visiting Endgrate's website and discover the benefits of a streamlined integration process.
Read More

Ready to get started?
