Using the Younium API to Create or Update Payments in Javascript
Introduction to Younium API Integration
Younium is a comprehensive subscription management platform designed to help businesses streamline their billing and revenue operations. It offers a robust set of tools for managing subscriptions, invoicing, and financial reporting, making it an essential solution for B2B SaaS companies looking to optimize their financial processes.
Integrating with the Younium API allows developers to automate and enhance payment management tasks. For example, you can use the Younium API to create or update payments directly from your application, ensuring seamless financial transactions and accurate record-keeping.
This article will guide you through the process of using JavaScript to interact with the Younium API, focusing on creating or updating payments. By following this tutorial, developers can efficiently manage payment operations within their applications, leveraging Younium's powerful API capabilities.
Setting Up Your Younium Test/Sandbox Account for API Integration
Before you can start integrating with the Younium API, you'll need to set up a test or sandbox account. This environment allows you to safely experiment with API calls without affecting live data. Follow these steps to get started:
Create a Younium Sandbox Account
If you don't already have a Younium account, visit the Younium Developer Portal to sign up for a sandbox account. This account will provide you with the necessary environment to test your API integrations.
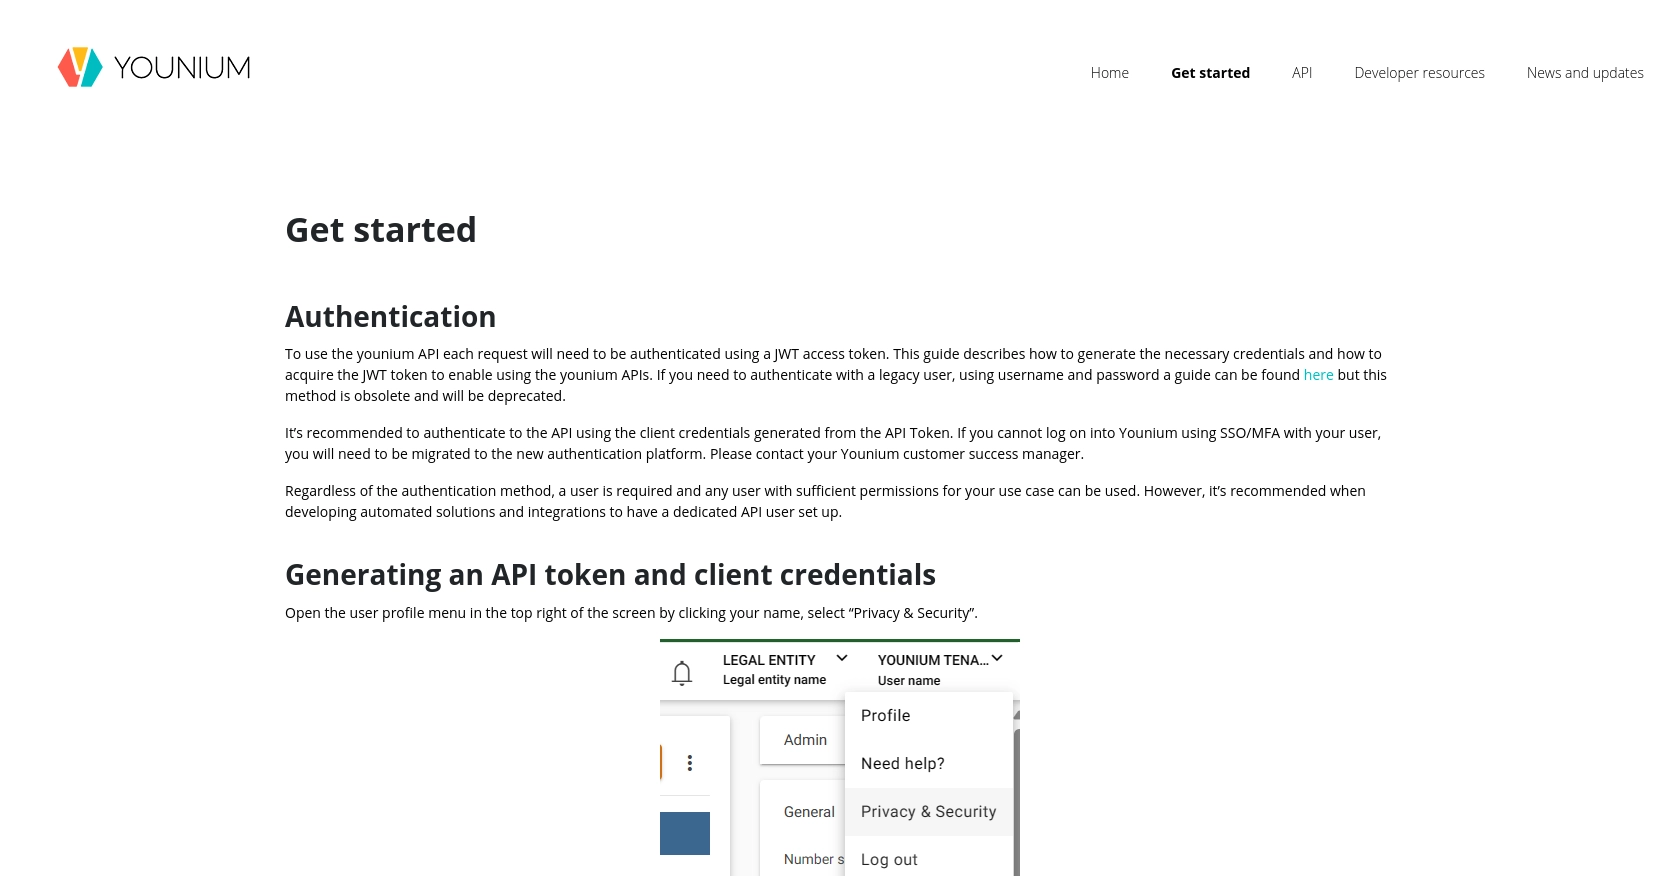
Generate API Client Credentials
- Log in to your Younium account and navigate to your user profile by clicking your name in the top right corner.
- Select “Privacy & Security” from the dropdown menu.
- In the left panel, click on “Personal Tokens” and then “Generate Token.”
- Provide a relevant description for your token and click “Create.”
- Copy the generated Client ID and Secret Key. These credentials are crucial for generating your JWT access token and will not be visible again.
Obtain a JWT Access Token
To authenticate your API requests, you'll need a JWT access token. Follow these steps to generate it:
// Example POST request to obtain JWT token
const axios = require('axios');

const getToken = async () => {
    try {
        const response = await axios.post('https://api.sandbox.younium.com/auth/token', {
            clientId: 'Your_Client_ID',
            secret: 'Your_Secret_Key'
        }, {
            headers: {
                'Content-Type': 'application/json'
            }
        });

        console.log('Access Token:', response.data.accessToken);
    } catch (error) {
        console.error('Error obtaining token:', error.response.data);
    }
};

getToken();
Replace Your_Client_ID and Your_Secret_Key with the credentials you copied earlier. This script will return an access token, which is valid for 24 hours.
Configure API Request Headers
Once you have your JWT access token, include it in the headers of your API requests to Younium:
// Example of setting headers for Younium API requests
const headers = {
    'Authorization': 'Bearer Your_JWT_Token',
    'Content-Type': 'application/json',
    'api-version': '2.1', // Optional but recommended
    'legal-entity': 'Your_Legal_Entity_ID' // Required if multiple entities exist
};
Ensure you replace Your_JWT_Token and Your_Legal_Entity_ID with the appropriate values for your setup.
With your sandbox account and authentication set up, you're ready to start making API calls to Younium. This preparation ensures a smooth integration process as you proceed with creating or updating payments using JavaScript.
sbb-itb-96038d7
Making API Calls to Younium for Payment Management Using JavaScript
With your Younium sandbox account and authentication set up, you are now ready to make API calls to create or update payments. This section will guide you through the process of interacting with the Younium API using JavaScript, ensuring you can efficiently manage payment operations within your application.
Setting Up Your JavaScript Environment for Younium API Integration
Before making API calls, ensure you have Node.js installed on your machine. You will also need the axios library to handle HTTP requests. Install it using the following command:
npm install axiosCreating Payments with Younium API in JavaScript
To create a payment, you will need to send a POST request to the Younium API endpoint. Below is an example of how to structure your request:
const axios = require('axios');

const createPayment = async () => {
    const url = 'https://api.sandbox.younium.com/payments';
    const headers = {
        'Authorization': 'Bearer Your_JWT_Token',
        'Content-Type': 'application/json',
        'api-version': '2.1',
        'legal-entity': 'Your_Legal_Entity_ID'
    };

    const paymentData = {
        amount: 1000,
        currency: 'USD',
        paymentMethod: 'CreditCard',
        accountId: 'A-000001',
        description: 'Payment for subscription'
    };

    try {
        const response = await axios.post(url, paymentData, { headers });
        console.log('Payment Created:', response.data);
    } catch (error) {
        console.error('Error creating payment:', error.response.data);
    }
};

createPayment();
Replace Your_JWT_Token and Your_Legal_Entity_ID with your actual JWT token and legal entity ID. This script will create a payment and log the response to the console.
Updating Payments with Younium API in JavaScript
To update an existing payment, you will need to send a PUT request to the Younium API. Here's how you can do it:
const updatePayment = async (paymentId) => {
    const url = `https://api.sandbox.younium.com/payments/${paymentId}`;
    const headers = {
        'Authorization': 'Bearer Your_JWT_Token',
        'Content-Type': 'application/json',
        'api-version': '2.1',
        'legal-entity': 'Your_Legal_Entity_ID'
    };

    const updatedData = {
        amount: 1200,
        description: 'Updated payment for subscription'
    };

    try {
        const response = await axios.put(url, updatedData, { headers });
        console.log('Payment Updated:', response.data);
    } catch (error) {
        console.error('Error updating payment:', error.response.data);
    }
};

updatePayment('Payment_ID');
Ensure you replace Payment_ID with the ID of the payment you wish to update. This script will update the specified payment and log the response.
Handling Errors and Verifying API Requests in Younium
When making API calls, it's crucial to handle potential errors. The Younium API may return error codes such as 400 for bad requests or 401 for unauthorized access. Always check the response status and handle errors appropriately:
- 400 Bad Request: Indicates invalid input data. Verify the request body and parameters.
- 401 Unauthorized: Ensure your JWT token is valid and included in the request headers.
- 403 Forbidden: Check if the legal entity is correctly specified and if you have the necessary permissions.
Verify the success of your requests by checking the response data and confirming changes in your Younium sandbox account.
Conclusion and Best Practices for Younium API Integration
Integrating with the Younium API using JavaScript provides a powerful way to automate and manage payment processes within your application. By following the steps outlined in this guide, developers can efficiently create and update payments, ensuring seamless financial operations.
Best Practices for Secure and Efficient Younium API Usage
- Secure Storage of Credentials: Always store your Client ID, Secret Key, and JWT tokens securely. Consider using environment variables or secure vaults to prevent unauthorized access.
- Handle Rate Limiting: Be mindful of the API's rate limits to avoid throttling. Implement exponential backoff strategies for retrying requests.
- Data Standardization: Ensure that data fields are standardized across your application to maintain consistency and accuracy in financial records.
- Regular Token Refresh: Since JWT tokens are valid for 24 hours, implement a mechanism to refresh tokens automatically to maintain uninterrupted API access.
Streamlining Integrations with Endgrate
While integrating with the Younium API can significantly enhance your application's capabilities, managing multiple integrations can be complex and time-consuming. Endgrate offers a unified API solution that simplifies integration processes across various platforms, including Younium.
By leveraging Endgrate, developers can save time and resources, focusing on core product development while ensuring a seamless integration experience for their customers. Explore how Endgrate can transform your integration strategy by visiting Endgrate.
Read More

Ready to get started?
