Using the Zoho Books API to Create or Update Invoices in Javascript
Introduction to Zoho Books API
Zoho Books is a comprehensive online accounting software designed to streamline financial management for businesses of all sizes. It offers a wide range of features including invoicing, expense tracking, and inventory management, making it a popular choice for businesses looking to automate their accounting processes.
Integrating with the Zoho Books API allows developers to automate and enhance financial operations, such as creating or updating invoices programmatically. For example, a developer could use the Zoho Books API to automatically generate invoices from a sales order system, ensuring seamless financial transactions and record-keeping.
Setting Up Your Zoho Books Test Account for API Integration
Before you can start creating or updating invoices using the Zoho Books API, you need to set up a test or sandbox account. This will allow you to safely experiment with API calls without affecting your live data.
Creating a Zoho Books Developer Account
To begin, you'll need to create a Zoho Books developer account. Follow these steps:
- Visit the Zoho Developer Console.
- Sign in with your Zoho account or create a new one if you don't have an existing account.
- Once logged in, click on "Add Client ID" to register your application.
- Fill in the required details, such as the client name, redirect URI, and other necessary information.
- Upon successful registration, you'll receive a Client ID and Client Secret. Keep these credentials secure as they are essential for API authentication.
Generating OAuth Tokens for Zoho Books API
The Zoho Books API uses OAuth 2.0 for authentication. Follow these steps to generate the necessary tokens:
- Redirect users to the following authorization URL to obtain a grant token:
https://accounts.zoho.com/oauth/v2/auth?scope=ZohoBooks.invoices.CREATE,ZohoBooks.invoices.UPDATE&client_id=YOUR_CLIENT_ID&response_type=code&redirect_uri=YOUR_REDIRECT_URI&access_type=offline - After the user grants permission, Zoho will redirect to your specified URI with a code parameter. Use this code to request an access token:
https://accounts.zoho.com/oauth/v2/token?code=YOUR_CODE&client_id=YOUR_CLIENT_ID&client_secret=YOUR_CLIENT_SECRET&redirect_uri=YOUR_REDIRECT_URI&grant_type=authorization_code - The response will include an access token and a refresh token. The access token is valid for a limited time, while the refresh token can be used to obtain new access tokens.
Configuring Your Zoho Books Organization
Each API request requires an organization ID to identify which Zoho Books organization you're working with. To find your organization ID:
- Log in to your Zoho Books account.
- Navigate to the "Organizations" section in the admin console.
- Copy the organization ID from the list of your organizations.
With your developer account set up and OAuth tokens generated, you're ready to start integrating with the Zoho Books API to create or update invoices programmatically.
sbb-itb-96038d7
Making API Calls to Zoho Books for Creating or Updating Invoices Using JavaScript
To interact with the Zoho Books API for creating or updating invoices, you'll need to use JavaScript to make HTTP requests. This section will guide you through the process of setting up your environment, writing the code, and handling responses effectively.
Setting Up Your JavaScript Environment for Zoho Books API Integration
Before making API calls, ensure you have the following prerequisites:
- Node.js installed on your machine.
- A text editor or IDE like Visual Studio Code.
- Access to your Zoho Books API credentials (Client ID, Client Secret, and OAuth tokens).
Installing Required Dependencies for Zoho Books API Calls
To make HTTP requests in JavaScript, you can use the node-fetch library. Install it using npm:
npm install node-fetchCreating an Invoice with Zoho Books API Using JavaScript
Here's an example of how to create an invoice using the Zoho Books API:
const fetch = require('node-fetch');

const createInvoice = async () => {
    const url = 'https://www.zohoapis.com/books/v3/invoices?organization_id=YOUR_ORG_ID';
    const headers = {
        'Authorization': 'Zoho-oauthtoken YOUR_ACCESS_TOKEN',
        'Content-Type': 'application/json'
    };
    const body = JSON.stringify({
        customer_id: 'CUSTOMER_ID',
        line_items: [
            {
                item_id: 'ITEM_ID',
                quantity: 1,
                rate: 100
            }
        ]
    });

    try {
        const response = await fetch(url, {
            method: 'POST',
            headers: headers,
            body: body
        });
        const data = await response.json();
        console.log('Invoice Created:', data);
    } catch (error) {
        console.error('Error creating invoice:', error);
    }
};

createInvoice();
Replace YOUR_ORG_ID, YOUR_ACCESS_TOKEN, CUSTOMER_ID, and ITEM_ID with your actual values. This code sends a POST request to create an invoice with specified line items.
Updating an Invoice with Zoho Books API Using JavaScript
To update an existing invoice, modify the request as follows:
const updateInvoice = async (invoiceId) => {
    const url = `https://www.zohoapis.com/books/v3/invoices/${invoiceId}?organization_id=YOUR_ORG_ID`;
    const headers = {
        'Authorization': 'Zoho-oauthtoken YOUR_ACCESS_TOKEN',
        'Content-Type': 'application/json'
    };
    const body = JSON.stringify({
        line_items: [
            {
                item_id: 'ITEM_ID',
                quantity: 2,
                rate: 150
            }
        ]
    });

    try {
        const response = await fetch(url, {
            method: 'PUT',
            headers: headers,
            body: body
        });
        const data = await response.json();
        console.log('Invoice Updated:', data);
    } catch (error) {
        console.error('Error updating invoice:', error);
    }
};

updateInvoice('INVOICE_ID');
Replace INVOICE_ID with the ID of the invoice you wish to update. This code sends a PUT request to update the invoice details.
Handling API Responses and Errors
After making API calls, it's crucial to handle responses and potential errors:
- Check the response status code to determine if the request was successful (e.g., 200 for success).
- Log any error messages returned by the API for troubleshooting.
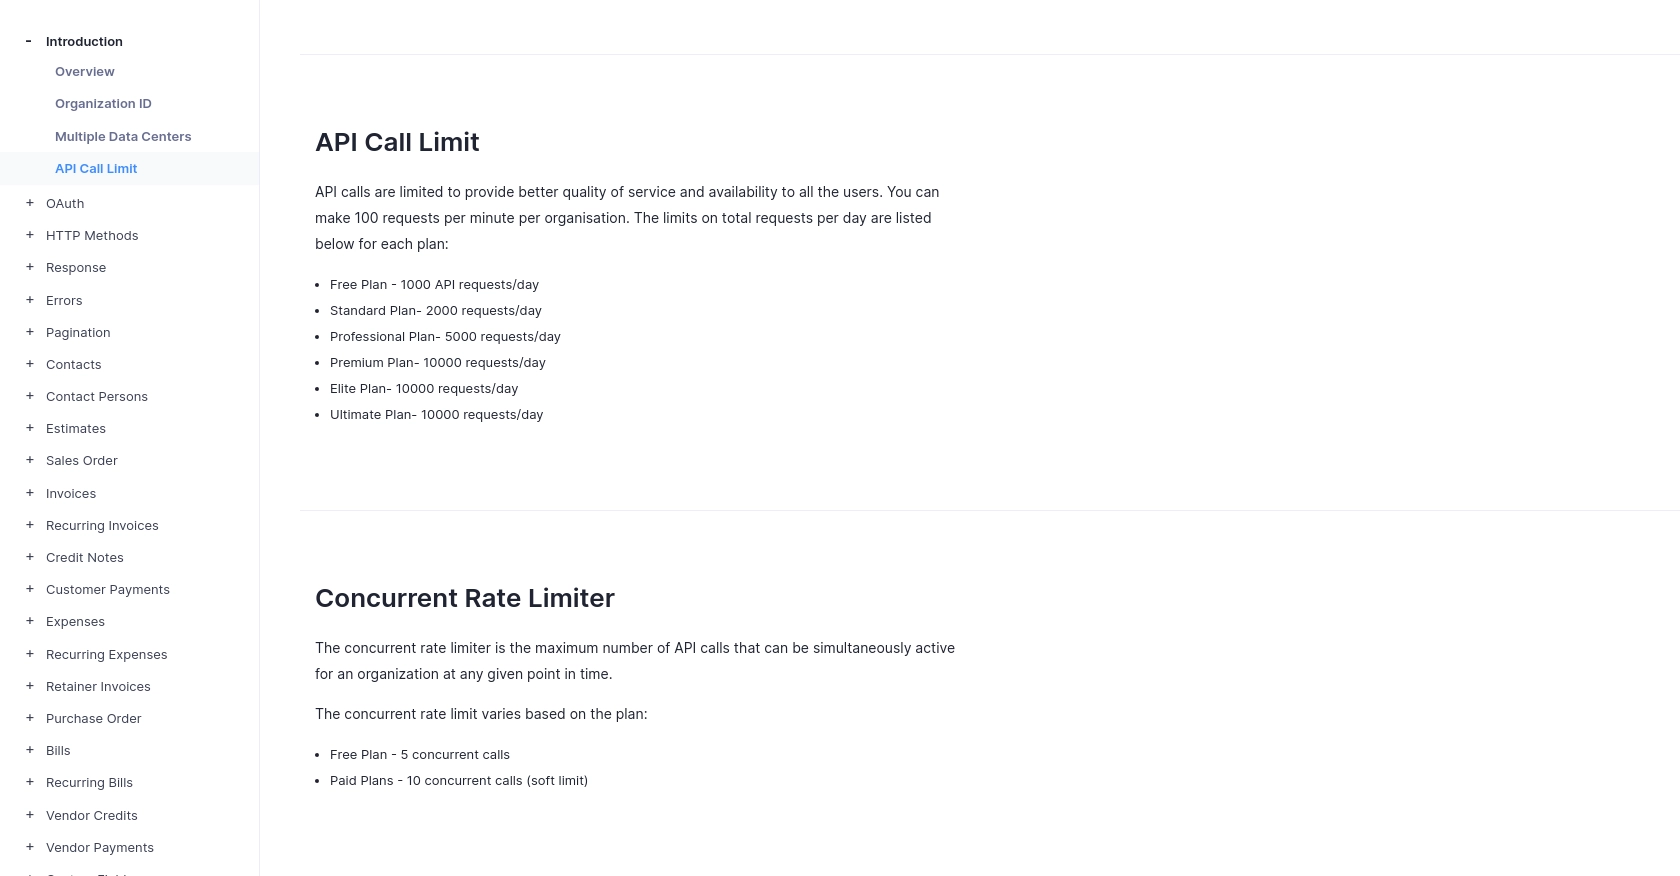
- Implement retry logic or alternative actions if rate limits are exceeded (Zoho Books allows 100 requests per minute).
For more details on error codes, refer to the Zoho Books API documentation.
Best Practices for Zoho Books API Integration
Integrating with the Zoho Books API can significantly enhance your financial management processes. Here are some best practices to ensure a smooth integration:
- Securely Store Credentials: Always store your Client ID, Client Secret, and OAuth tokens securely. Avoid hardcoding them in your source code.
- Handle Rate Limiting: Zoho Books allows up to 100 requests per minute. Implement logic to handle rate limit errors gracefully, such as retrying requests after a delay.
- Standardize Data Fields: Ensure that data fields are consistent across your application to avoid discrepancies in financial records.
- Monitor API Usage: Regularly monitor your API usage to stay within the limits of your Zoho Books plan and avoid unexpected interruptions.
Enhancing Your Integration Experience with Endgrate
While integrating with Zoho Books API can be powerful, it may require significant development effort. Endgrate offers a solution to streamline this process:
- Outsource Integrations: Save time and resources by outsourcing your integration needs to Endgrate, allowing you to focus on your core product.
- Unified API Endpoint: Use Endgrate's single API endpoint to connect with multiple platforms, simplifying your integration architecture.
- Custom Plugin Support: Build custom plugins to extend Endgrate's capabilities, ensuring support for all your integration requirements.
Visit Endgrate to learn more about how you can optimize your integration strategy.
Read More
- https://endgrate.com/provider/zohobooks
- https://www.zoho.com/books/api/v3/introduction/#api-call-limit
- https://www.zoho.com/books/api/v3/oauth/#overview
- https://www.zoho.com/books/api/v3/errors/#overview
- https://www.zoho.com/books/api/v3/pagination/#overview
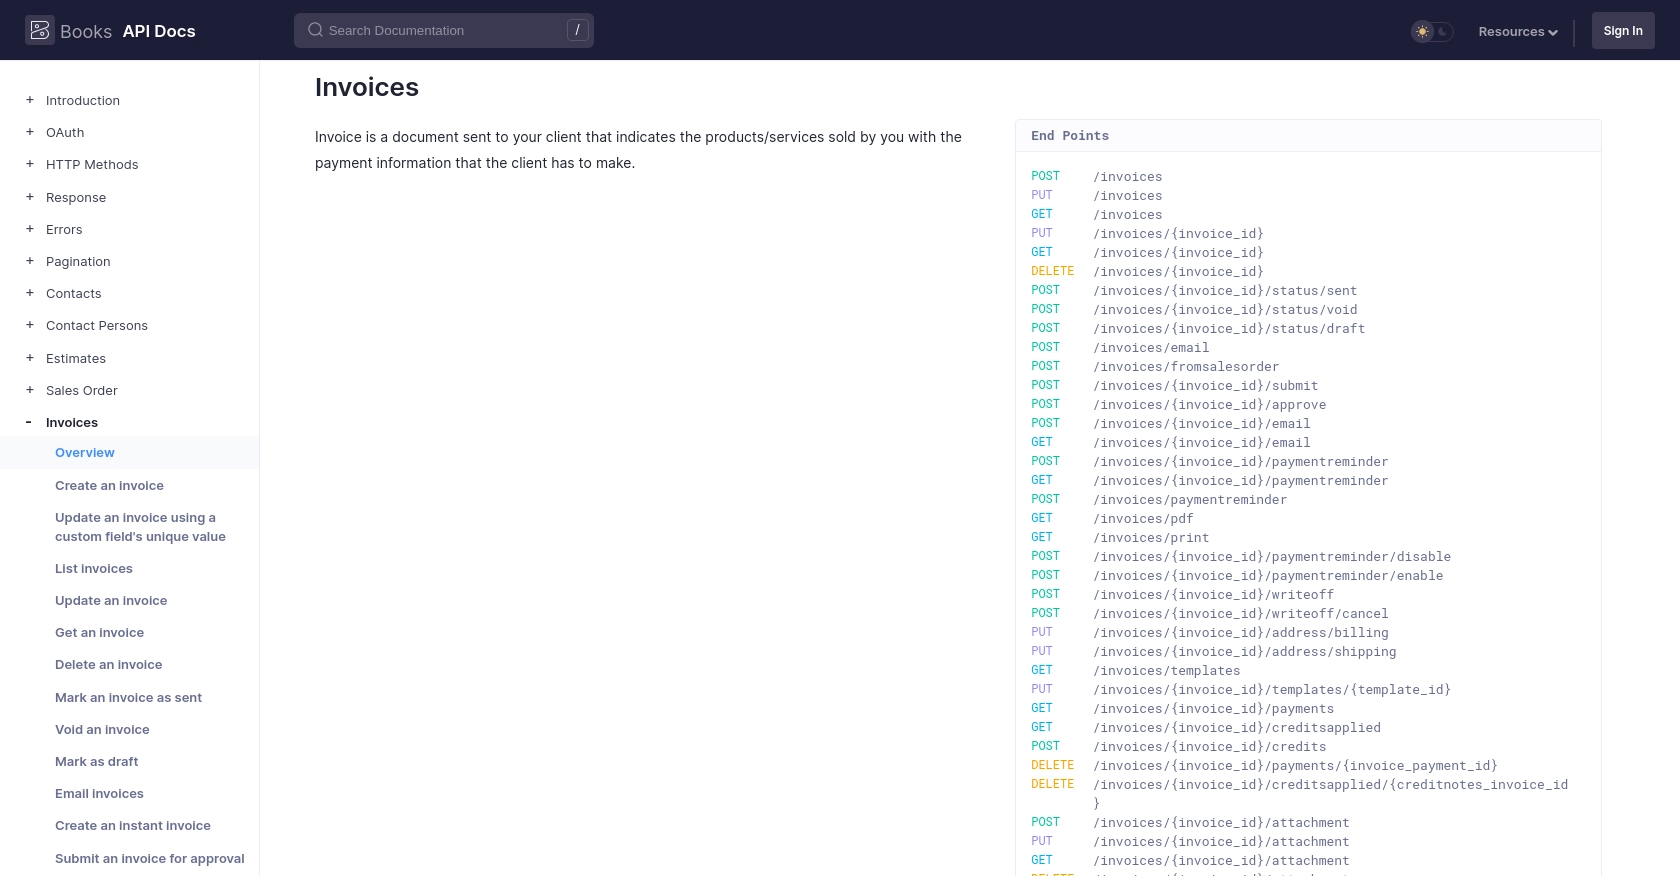
- https://www.zoho.com/books/api/v3/invoices/#overview

Ready to get started?
